There’s a good chance that if you’re reading this, you’re fairly proficient with technology. This can be both a blessing and a curse. Sure, you might avoid hefty repair fees by so-called “professionals,” but your DIY-ethos comes at its own price. Friends and family have become well aware of your tech know-how and seek your advice at every turn. Unfortunately, this usually means that you have to trudge over to Nana’s house to help her figure out why her PC won’t work after she clicked on that link from the “nice Nigerian prince.”
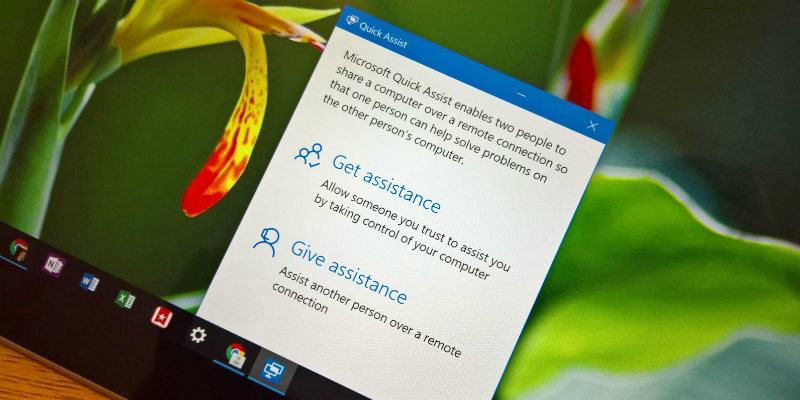
Luckily, Microsoft has included a feature in Windows 10 called “Quick Assist.” This tool allows one person to remotely control another person’s Windows 10 PC over the Internet. So you can help out Nana without ever having to leave the comfort of your couch. For Quick Assist to work, both parties must be running Windows 10. If you’re using Windows 7 or 8, don’t fret. You’ll still be able to use the older Remote Desktop tool, which is also included in Windows 10.
Why Would You Need to Remotely Access a PC?
Joking aside, the Quick Assist app can be incredibly useful. It allows a person to remotely control another person’s computer to assist them in solving problems. In addition to troubleshooting, that person can also change settings, check for malware, install software, or anything else.
The Quick Assist app (and the older Remote Desktop app) requires both parties to consent to the connection. This just means that no one can remotely connect to a computer and hijack control whenever they want.
How to Use Quick Assist
Note: in order to use Quick Assist, both parties must be running Windows 10. If you are running Windows 7 or 8, refer to the instructions below.
In order for Quick Assist to work, both parties must open the app. The method for opening the app is the same for both parties; however, different steps need to be taken once the app is running. To open the Quick Assist app, navigate to “Start -> Windows Accessories -> Quick Assist.” Alternatively, type “Quick Assist” in the search box on the taskbar and select “Quick Assist” from the results. A new window should open up asking if you want to “Provide Assistance” or “Request Assistance.”
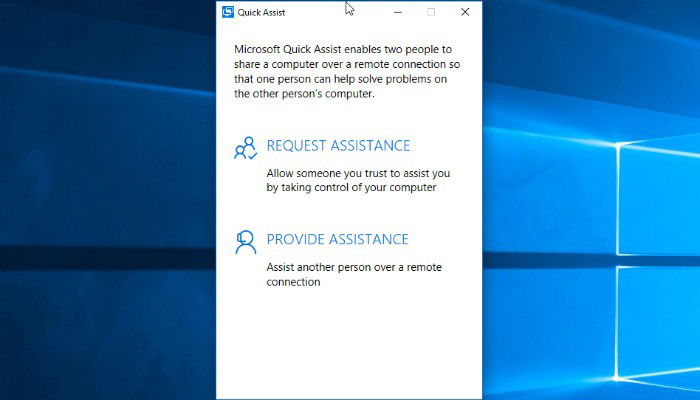
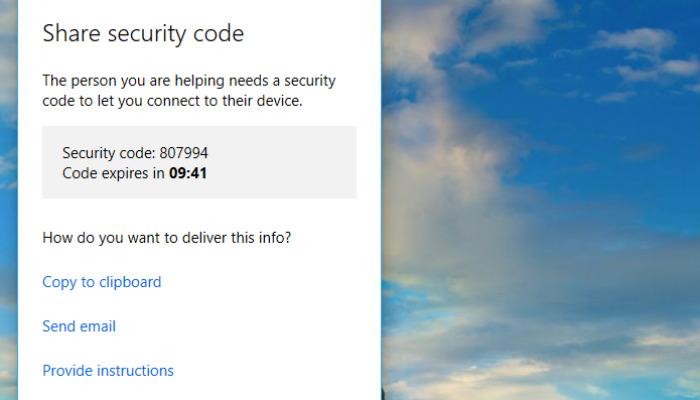
The person giving assistance chooses “Provide Assistance.” At this point, that person will have to sign in to their Microsoft account. Once that person signs in, they will receive a security code which expires in ten minutes.
The person who is allowing a trusted party to take control of their PC remotely chooses “Request Assistance.” They will then be prompted to enter the security code the person giving assistance generated earlier. The person seeking help will then see a confirmation prompt which will require them to consent to allowing remote access. If this is not completed within ten minutes, the person giving assistance will then have to generate a new code by repeating the steps above.
This will establish a connection via the Internet. This could take a few minutes, so be patient. Once the connection is made, the person giving assistance will see the other person’s desktop within a window on their computer. At this point the person giving assistance will have full control over the other person’s computer.
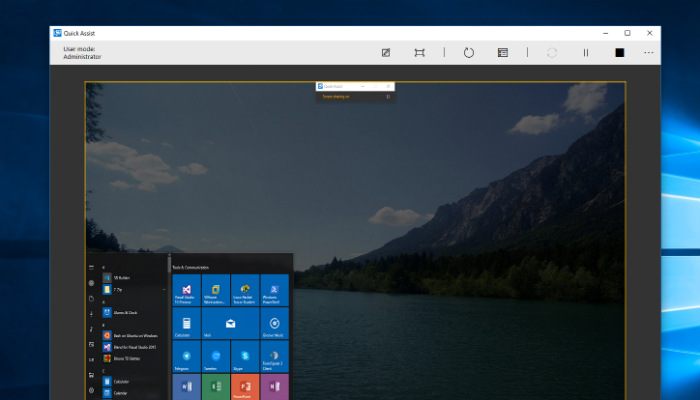
The person receiving assistance can see everything that the person giving assistance is doing. This allows them to follow along so that they (hopefully) can fix a similar problem in the future. To end the Quick Assist session, either party can simply close out the program.
How to Use Remote Desktop
As we mentioned before, Quick Assist is an app exclusively for Windows 10. If you are running Windows 7 or 8, you won’t be able to use it. Luckily, there is another option known as Remote Assistance which works with Windows 7, 8 and 10. Remote Assistance is essentially a precursor to Quick Assist. It accomplishes the same thing; however, configuration is a little more involved.
Also read: How to Secure Remote Desktop with Remote Credential Guard in Windows 10
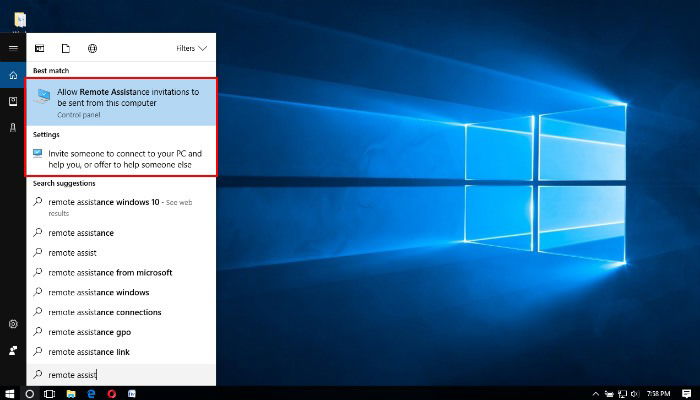
To open Windows Remote Assistance in older versions of Windows, click the Start button and search for “Remote Assistance.” From the results list, select “Windows Remote Assistance.” In Windows 10 search “Remote Assistance.” You should see an option that reads “Invite someone to connect to your PC and help you, or offer to help someone.” Go ahead and click on that. Next, a window will appear that asks “Do you want to ask for or offer help?”
We’ll start by outlining how to invite someone to help. Click on “Invite someone you trust to help you.” This will give you three different options to “create an invitation.” The first is “Save this invitation as a file.” Doing so will generate a file which you can send via a messaging system that allows attachments (e.g. Gmail). The second option is “Use email to send invitation.” If you have an email client installed directly on your computer, you can use this option. Lastly, you can “Use Easy Connect.” Easy Connect works very similarly to Quick Assist. It generates a password which then must be provided to the other person in order to establish a connection.
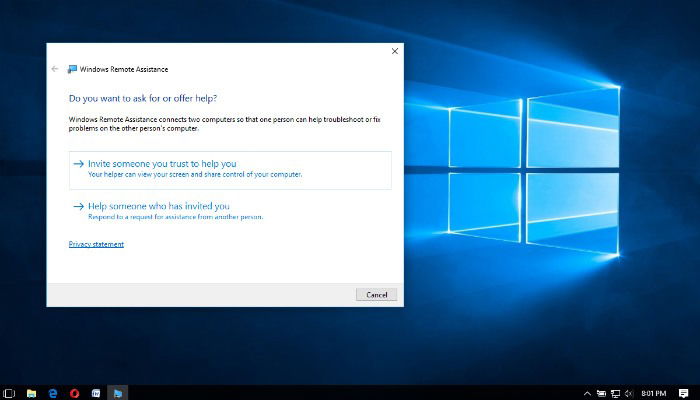
To give assistance, open the Remote Assistance program and click on “Help someone who has invited you.” Next, choose the connection method. This will be dependent on the method chosen by the person who requested assistance. Follow the on-screen prompts for the relevant connection method. Once the connection is made, the person giving assistance will see the other person’s screen and be able to control the other person’s PC remotely.
Have you used the Windows Quick Assist or Remote Assistance app? Or do you use third-party software to remotely connect to another PC? Let us know in the comments!

Ryan Lynch –
Staff Writer
Ryan is an English & Film Studies teacher. He splits his time between Australia and the United States. He passes the time on long haul flights by playing retro video games from his youth.
Subscribe to our newsletter!
Our latest tutorials delivered straight to your inbox
Sign up for all newsletters.
By signing up, you agree to our Privacy Policy and European users agree to the data transfer policy. We will not share your data and you can unsubscribe at any time. Subscribe