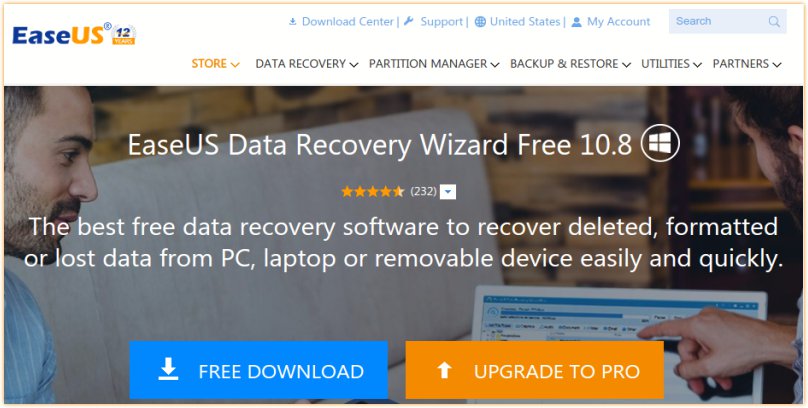
This is a sponsored article and was made possible by EaseUS. The actual contents and opinions are the sole views of the author who maintains editorial independence, even when a post is sponsored.
Have you ever deleted an important file by accident or maybe before you should have (thinking you didn’t need it anymore)? More than likely, you have. Luckily, EaseUS Data Recovery Wizard is one that can come to the rescue when you get carried away deleting files.
EaseUS Data Recovery is available for Windows and Mac. Here we’ll be looking at the Windows version (on a Windows 10 computer) to see just how quick and easy it is to recover lost files.
Installing Data Recovery Wizard
The program is very easy to download (.exe file) and only takes a minute to install. I didn’t have any issues, and the few options that are available (e.g. create desktop icon) are self-explanatory.
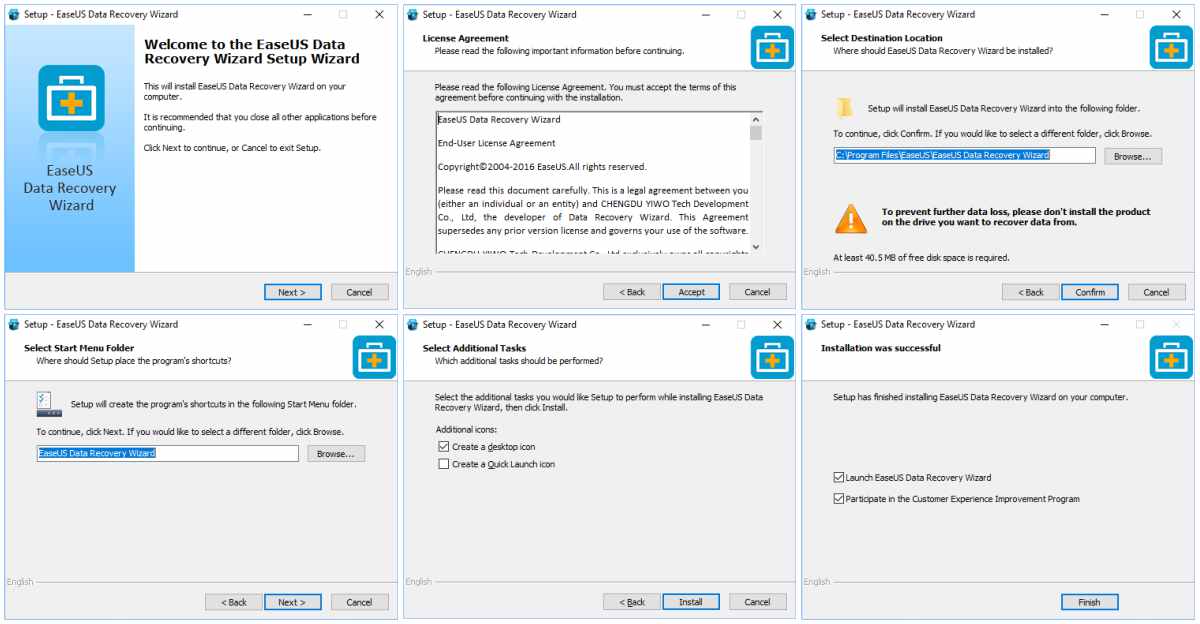
After installation, the Data Recovery Software will open as long as you keep the “Launch EaseUS Data Recovery Wizard” option checked.
Using Data Recovery Wizard
The program has a clean and minimal UI that is very easy to navigate. As a matter of fact, the first thing I noticed was the lack of a menu bar. Instead, there are just a few icons in the top-right corner (feedback, import scan status, menu, minimize, maximize, close).
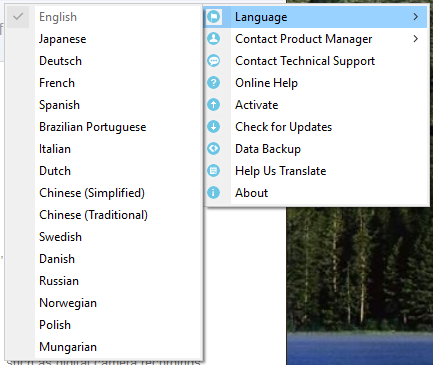
From the menu icon you can access everything from language to online help to updates. There are no settings to bother with, which is really convenient.
What and Where to Search
You’ll always start at “Home.” From the Home window you can choose the types of files to scan for: graphics, documents, email, audio, video, other.

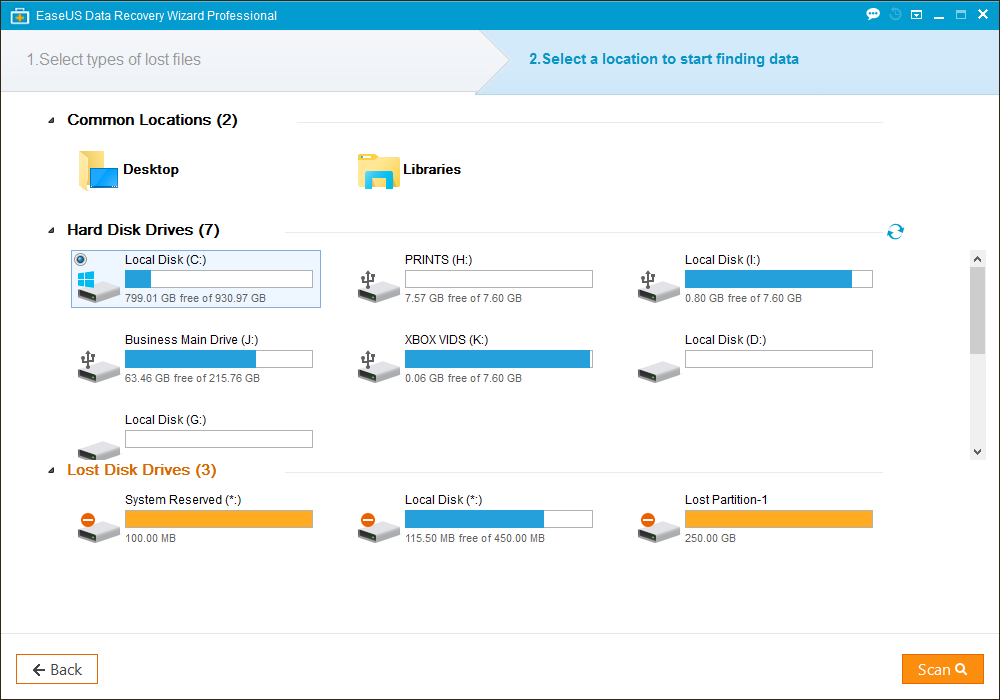
On the next screen you can choose the location of your hard drive (or any attached drives) to search through. Keep in mind that you can only search through one location (folder or drive) at a time.
Quick Scan vs. Deep Scan
Once you click on “Scan” in the bottom-right corner, the software does a true Quick Scan. By “true,” I mean that it doesn’t take much time at all; a scan of my Desktop took around four minutes.
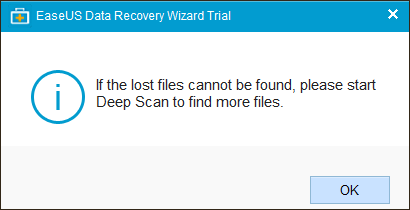
The Quick Scan finds a decent amount of files, but it’s nothing compared to the Deep Scan. It finds 100 times more but also takes more time (average two to three hours). You can do a Deep Scan by clicking on the orange button at the bottom-left corner.
If you find that the scan is going to take much longer than you’d like, you can pause or stop it. While paused, you can also preview recovered files. Don’t worry if you decide to stop it early; you can still recover any found files.
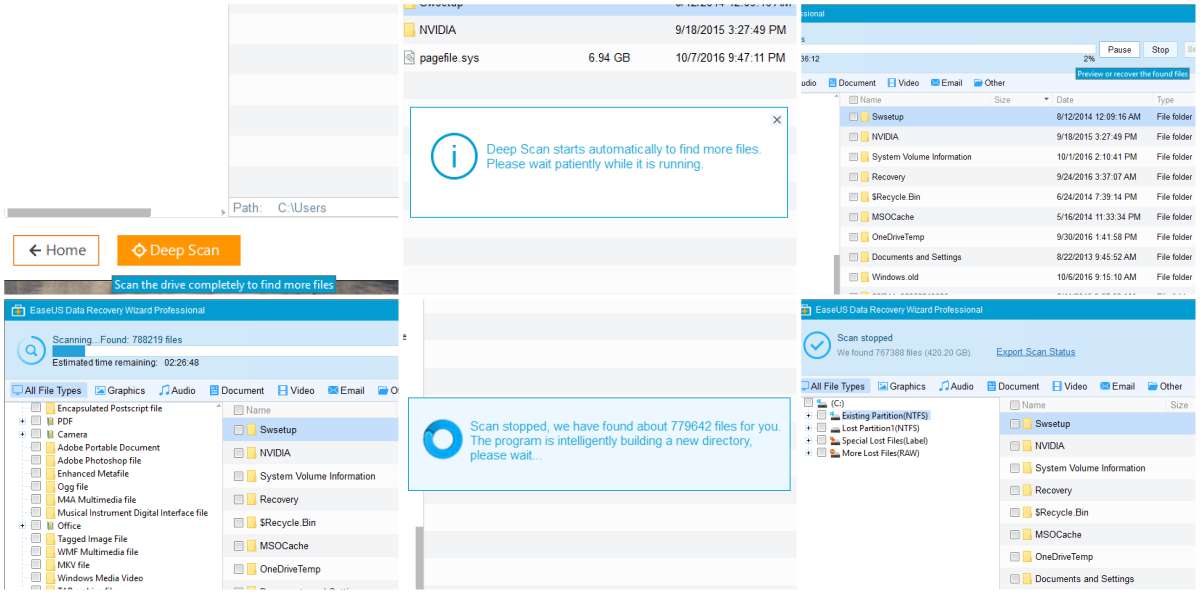
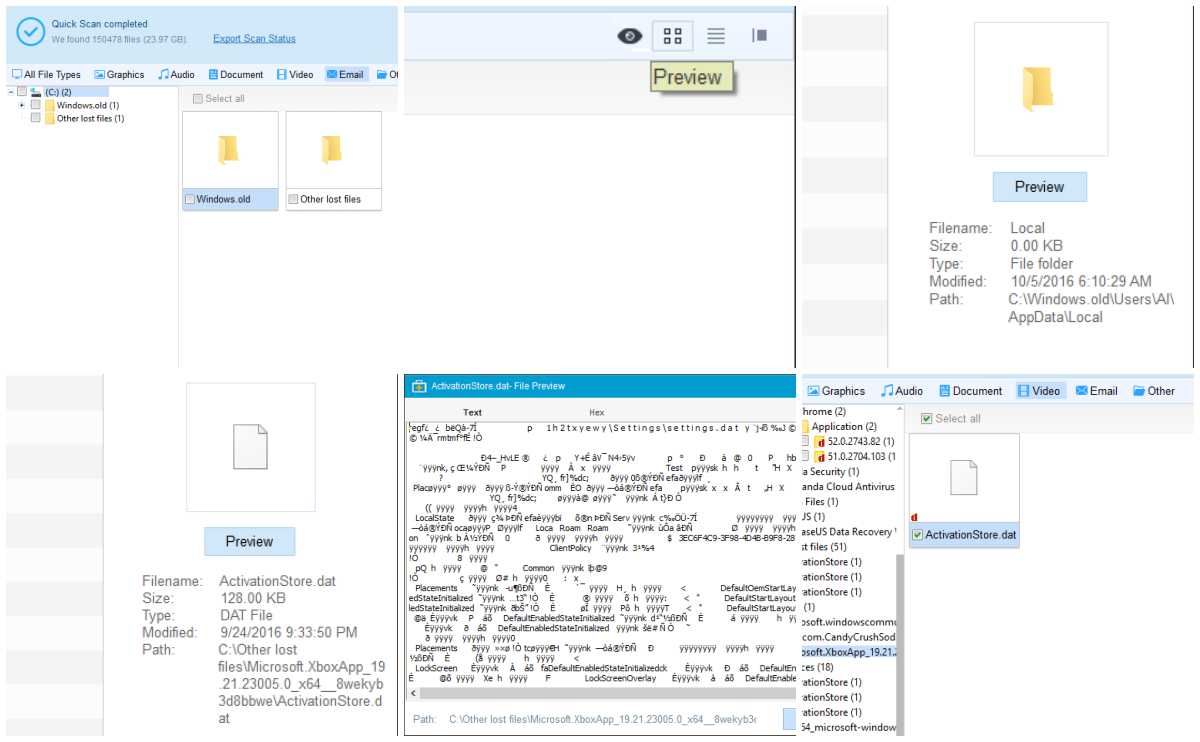
Even when stopping the Deep Scan after just 7% had been scanned, almost 1 million files had already been found, which says a lot about its thoroughness. When viewing your recoverable files, you can sort them by type: all, graphics, audio, document, video, email, other. You can also view them as a list or as icons. There’s even a preview option so that you can see exactly what the file is before restoring it.
If you want to save your scan results for later use, you can click on “Export Scan Status” to export your results as a Recovery State File (.rsf).
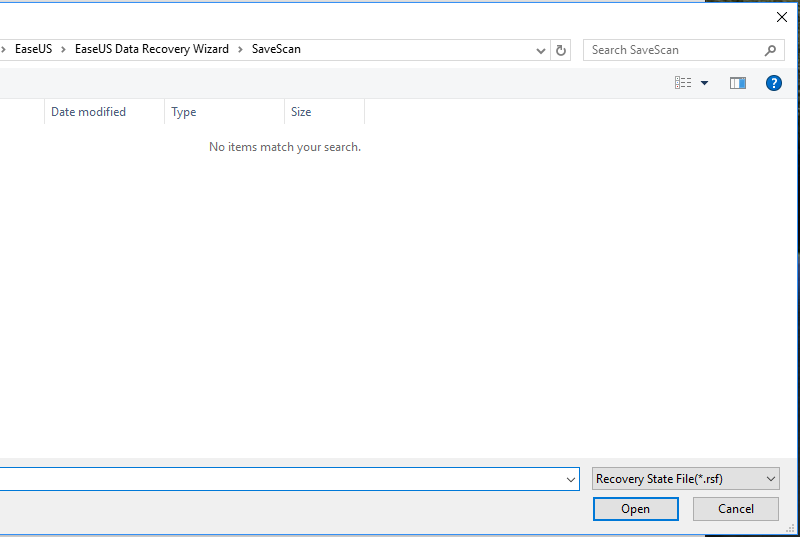
This can later be imported via the “Import Scan Status” icon at the top of the window (between Feedback and Menu).
Using Valuable CPU
I did notice that both the Quick Scan and Deep Scan are pretty CPU-intensive, especially the Deep Scan since it takes so much longer. Honestly, it’s to be expected with a hard-working program like this.
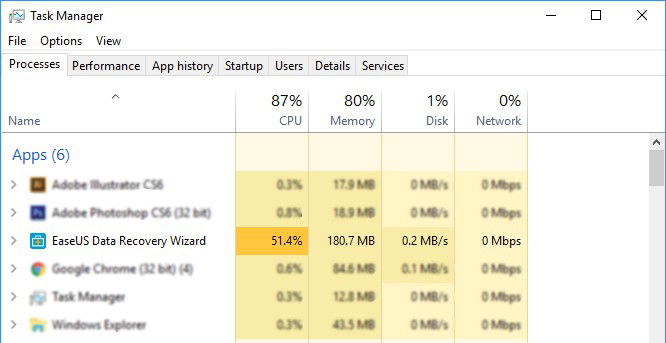
If you plan on doing a deep scan, it’s probably best to have it running while you’re asleep or away from your computer doing something else.
Recovering What Was Lost
When you’re ready to recover a file (or more), you can right-click on each one and choose “Recover,” or you can select all of the ones that you want to cover and click on “Recover” in the bottom-right corner.
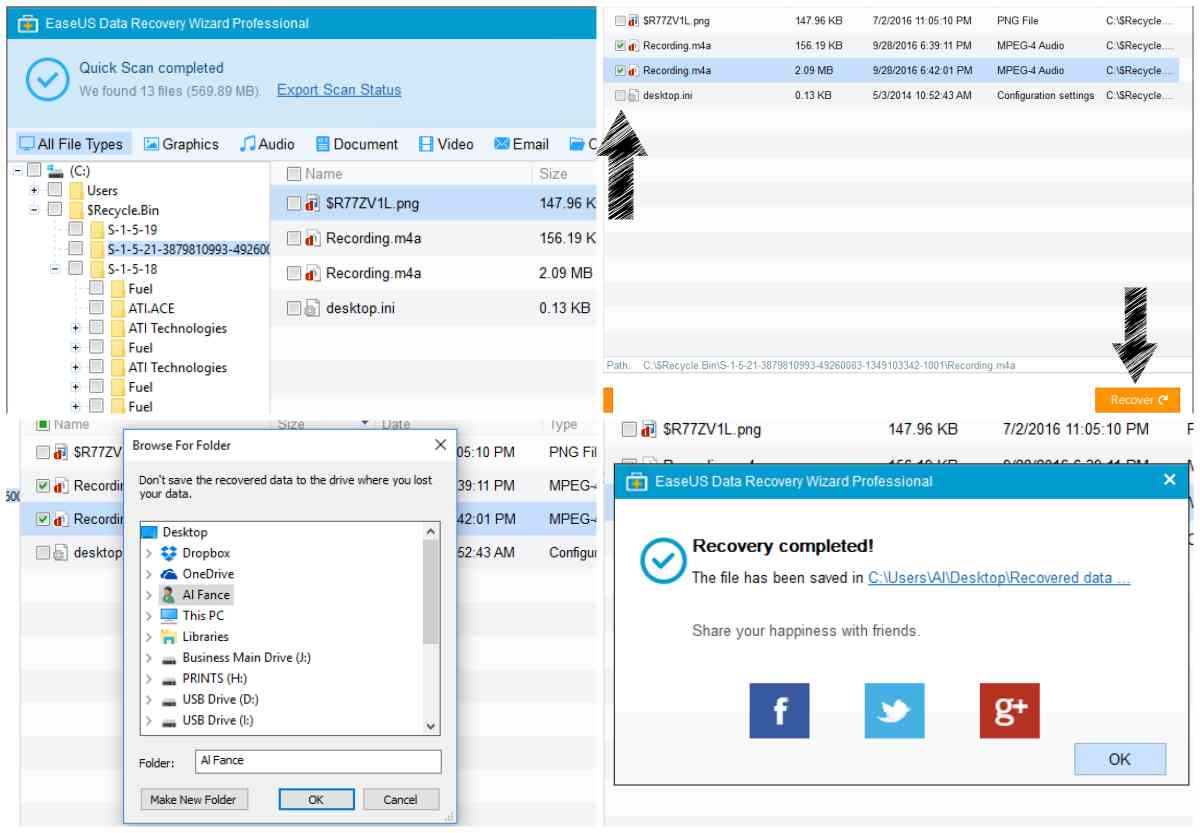
You’ll be asked to choose a location to save the files and will also be warned not to save the recovered files to the drive where you lost them. I feel that this is just a precaution in case the drive is damaged; in that case, it’s a good idea to save it somewhere else. However, if the drive it’s recovered from is fine, I personally see no harm in saving it there.

For me, recovering two files took around 10 seconds. Upon completion, you can even “share your happiness with friends” on Facebook, Twitter, and Google+.
No More Lost Data!
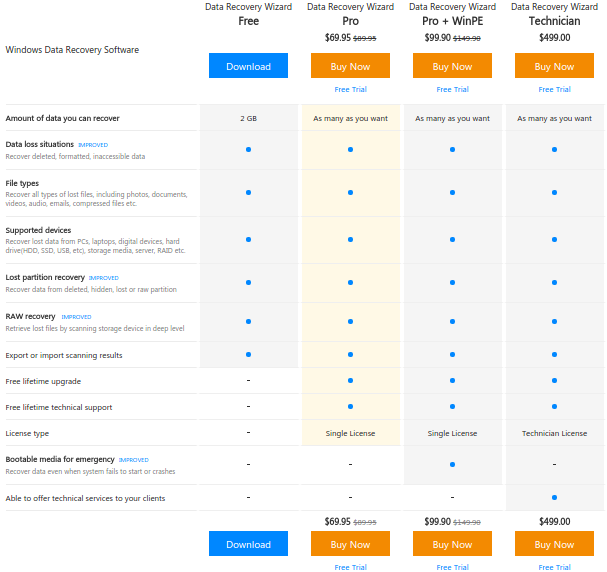
While there is a free trial of the Data Recovery Software, you can’t actually recover files with the trial; you can only do a scan and see what may be recoverable on your system. I do think it’s nice that you can see if the program will help before spending your money on it.
In a nutshell, EaseUS Data Recovery Wizard makes it alright to be careless – at least when deleting files from your computer! Plus, it provides peace of mind knowing that you can get back your coveted kitten videos collection that was mistakenly deleted by a friend just trying to help you with your addiction. Well, maybe that’s not your life, but it could be!
Charnita has been a Freelance Writer & Professional Blogger since 2008. As an early adopter she loves trying out new apps and services. As a Windows, Mac, Linux and iOS user, she has a great love for bleeding edge technology. You can connect with her on Facebook, Twitter, Google+, and LinkedIn.
Subscribe to our newsletter!
Our latest tutorials delivered straight to your inbox
Sign up for all newsletters.
By signing up, you agree to our Privacy Policy and European users agree to the data transfer policy. We will not share your data and you can unsubscribe at any time. Subscribe
