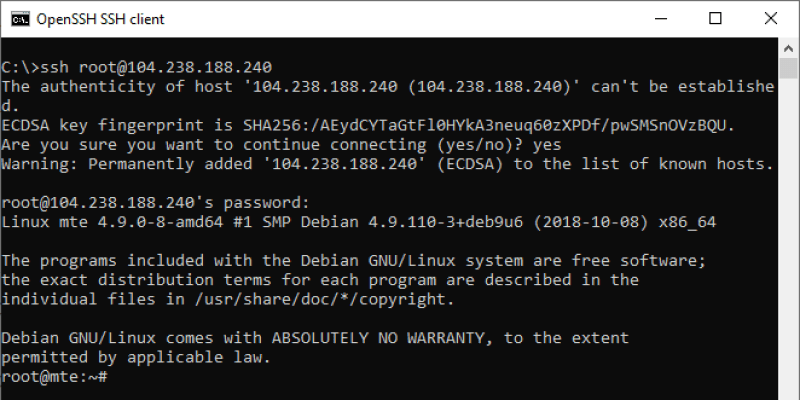
When you need to manage a *nix machine from the distance, you will almost always use SSH. Any BSD or Linux-based operating system running on a server will come with the OpenSSH daemon preinstalled. To “talk” to this daemon and interact with the remote machine, you also need an SSH client. PuTTY has long been the most popular SSH client used on Windows, but since the last major update, Windows 10 now comes with an SSH client preinstalled. It’s easier and faster to use this client rather than installing and configuring PuTTY.
How to Install Windows’ OpenSSH Client
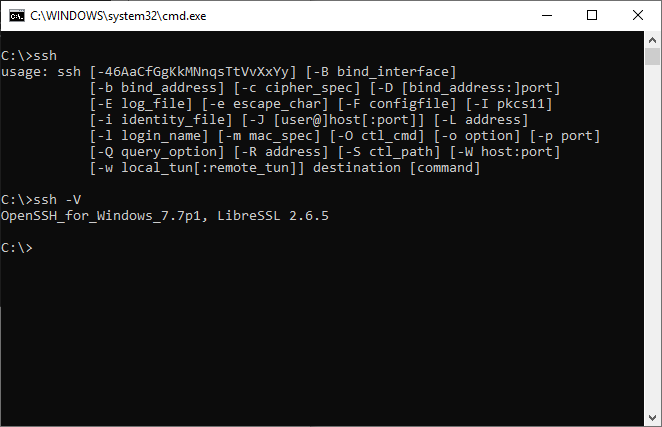
First, check if it’s already installed. Press the Windows logo key on your keyboard or click on the Start Menu. Type cmd and open Command Prompt.
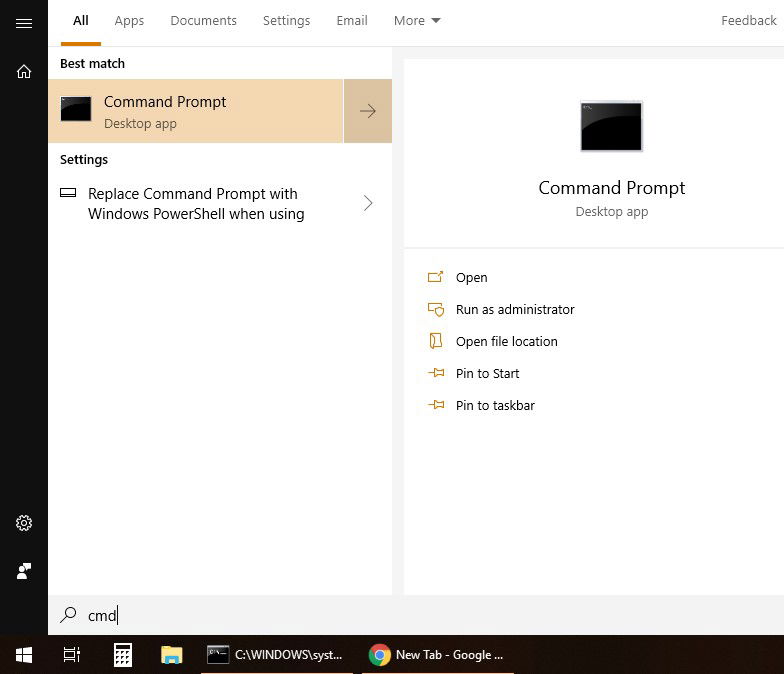
Now, type ssh and press Enter. A short summary of command line switches should be displayed. This means the client is installed, and you can skip the rest of this section.
If you get a message that says the command is not recognized, click on the Start Menu and type features. Open “Apps & features” and click on “Manage optional features.”
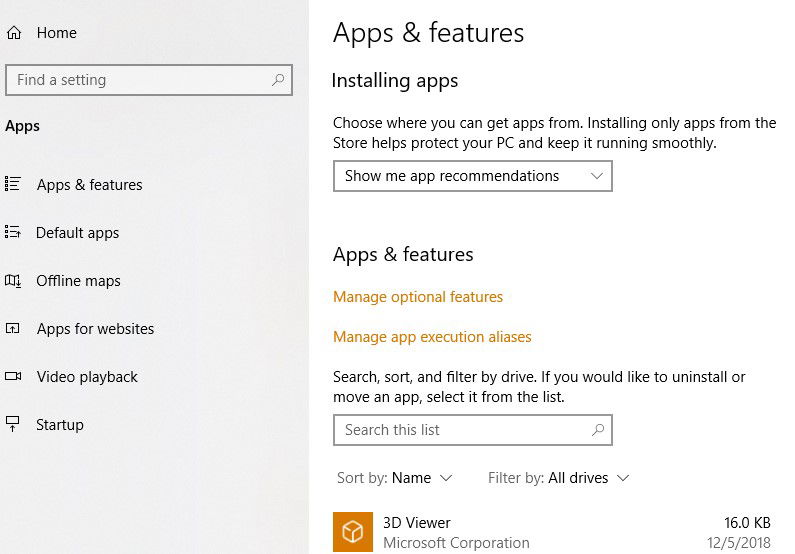
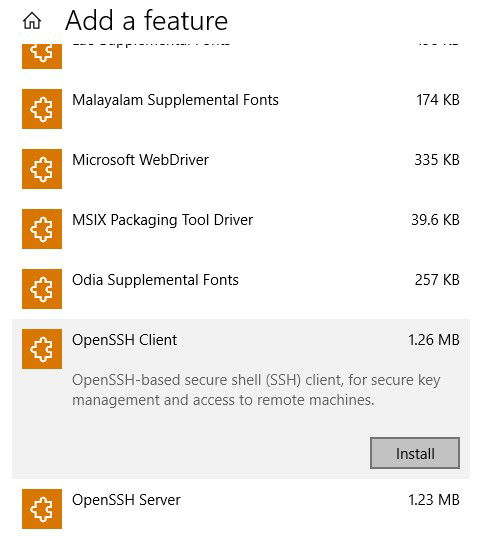
Next, click on “Add a feature” and scroll down until you find “OpenSSH Client.” Install it and you should be set to go.
How to Use Windows’ Built-in OpenSSH Client
If you are familiar with the ssh command in Linux, you already know how to use it on Windows. It has the same syntax and command line switches. You can read the complete SSH manual on OpenBSD’s website.
The basic syntax to connect to a server is ssh username@IP-address-or-hostname.
Examples:
ssh root@203.0.113.1
ssh john@example.com
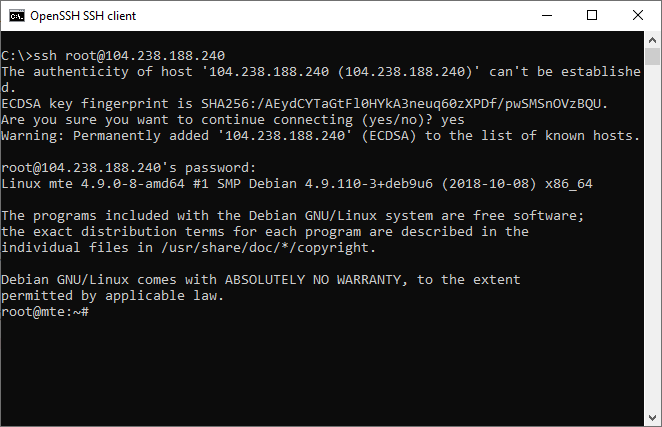
When you log in with a password, it’s easy. Just type yes to accept the fingerprint, and then type your password (characters won’t be displayed on screen).
However, it is recommended that instead of passwords you use SSH keys. Zombie computers from botnets constantly scan and try to bruteforce passwords on OpenSSH servers. Keys cannot be bruteforced. They are much more secure than using the commonly recommended scheme of passwords plus fail2ban. Fail2ban blocks multiple attempts from the same IP, but another IP will try different passwords until one of them gets lucky.
How to Log in with SSH Keys
There are many methods to create key pairs for SSH authentication. And you also have ssh-keygen available on Windows, which you can use in the command prompt. After you create the pair, add the public key to your server and disable password logins. Afterwards, save the private key on your Windows computer.
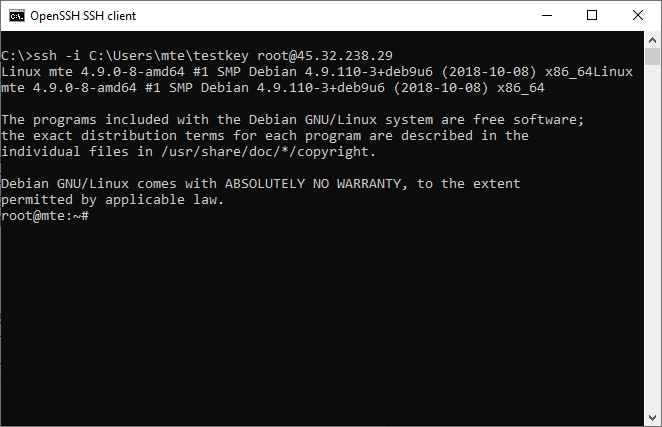
When you log in you can provide the path to this (private) key after the -i parameter in a command such as:
ssh -i C:Usersmtetestkey root@203.0.113.1
Otherwise you can move a private key to its default location. After the first connection, the SSH client creates a directory, .ssh, in your current user directory. You can open the directory by typing this in the command prompt:
explorer %userprofile%.ssh
Now, copy your private key here and name it id_rsa.
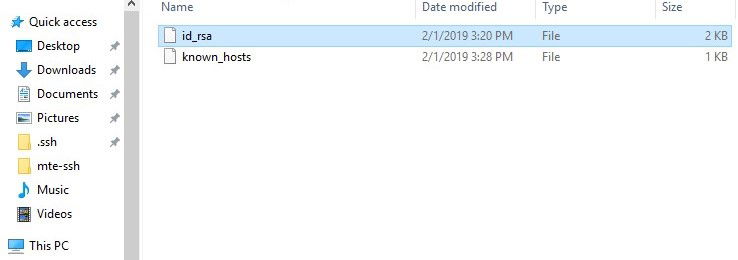
From now on, you can log in with this private key without using the -i parameter.
ssh root@203.0.113.1
Useful SSH Command Parameters
-p– Use this if your SSH server is listening on a different port (other than 22). Example:ssh -p 4444 root@203.0.113.1-C– Compress traffic between client and server. Only useful on very slow connections-v– Verbose mode, outputs a lot more about what is going on. Can help you debug connection issues.
Example command:
ssh -p 4444 -C -v root@203.0.113.1
Conclusion
Since this is basically the same OpenSSH client you find on Linux machines, some commands such as sftp are also available. This facilitates the upload and download of files to/from remote servers. For those that prefer the command line, this means they don’t need to install FTP clients such as FileZilla anymore. It’s also possible to set up SSH tunnels with the ssh command. We may cover this in a future tutorial, since it makes some “impossible” things possible, like accepting outside connections on your local computer, even if your ISP doesn’t offer you a private external IP address (more clients sit behind the same Internet IP address).
Fell in love with computers when he was four years old. 27 years later, the passion is still burning, fueling constant learning. Spends most of his time in terminal windows and SSH sessions, managing Linux desktops and servers.
Subscribe to our newsletter!
Our latest tutorials delivered straight to your inbox
Sign up for all newsletters.
By signing up, you agree to our Privacy Policy and European users agree to the data transfer policy. We will not share your data and you can unsubscribe at any time. Subscribe
