Windows 11 packs a lot of improvements over Windows 10. Unfortunately, to do a full Windows 11 install, you have to renounce your stable Windows 10.
The good news is that you can try Windows 11 on your primary machine without messing with Windows 10. You have three options: use a virtual machine, dual booting or a Windows 11 simulator. You can pick the method that works best for you, and we’ll show you how to set each up in what follows.
Content
Also read: How to Use Windows 11 without a Microsoft Account
Use a Virtual Machine
A virtual machine (VM) allows you to install Windows 11 on top of your Windows 10 OS. In short, you’ll have Windows 11 running in an app window on your Windows 10 desktop.
What you’ll need:
- Virtualization Application (Oracle VirtualBox)
- Windows 11 ISO file
On top of that, you will need to check Windows 11’s hardware requirements in order to make sure the OS can run in your VM. If you’re unsure of some of the things on the list, you might want to perform a Windows 11 compatibility test before proceeding any further.
Note: VirtualBox does not support TPM 2.0, which is a requirement for installing Windows 11. However, it’s possible to bypass this by modifying the registry after starting your Windows 11 install. If you’re not prepared to do that, you might want to take a look at the other two methods outlined in this post.
1. Install VirtualBox on Windows 10
VirtualBox is popular software to use for this purpose, because it’s easy to install and set up. Also, it doesn’t hog PC resources, which is what you want in a VM.
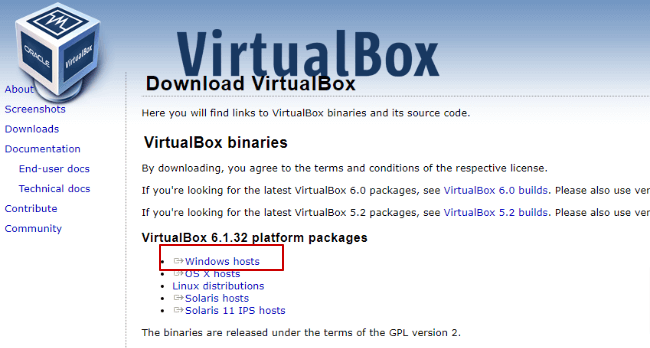
- Head over to the VirtualBox website.
- Click on the “Windows Hosts” option to download VirtualBox on your PC and install it by following the prompts.
Also read: Everything You Need to Know About Windows 11 Context Menus
2. Create a VirtualBox Virtual Machine
Before proceeding to the Windows 11 installation, you’ll need to set up a VirtualBox VM.
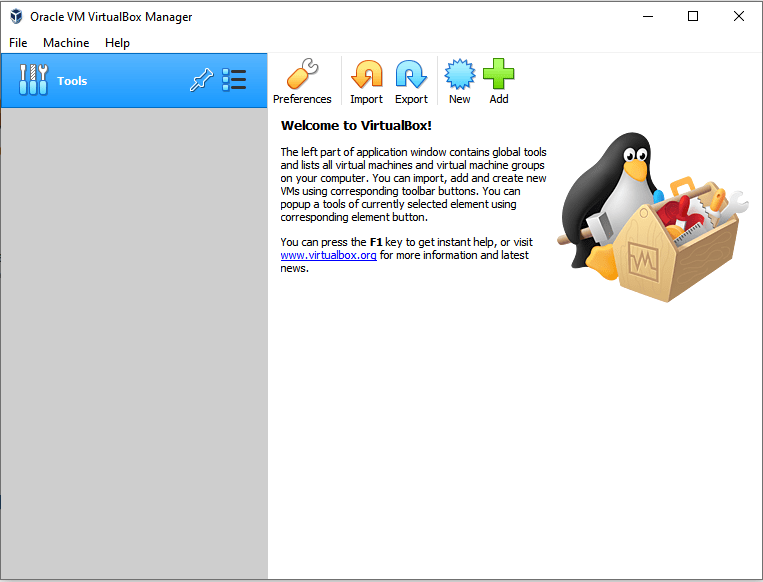
- Start by launching VirtualBox and clicking on the New button in the VirtualBox Manager menu.
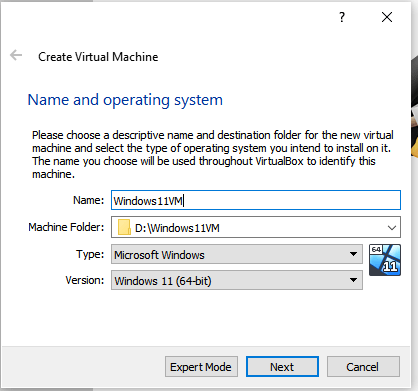
- In the new window, name your virtual machine. In our case it’s Windows11VM. Also, select an installation location with at least 64GB of disk space. Finally, select “Windows 11” from the Version menu and click Next.
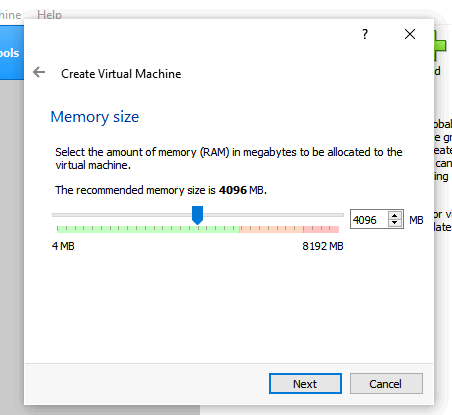
- In the next window, you’ll need to allocate a minimum of 4,096MB of memory to your VM. If you have enough RAM installed, allocate more memory to the VM. Remember to leave adequate memory for Windows 10 to run smoothly, as well.
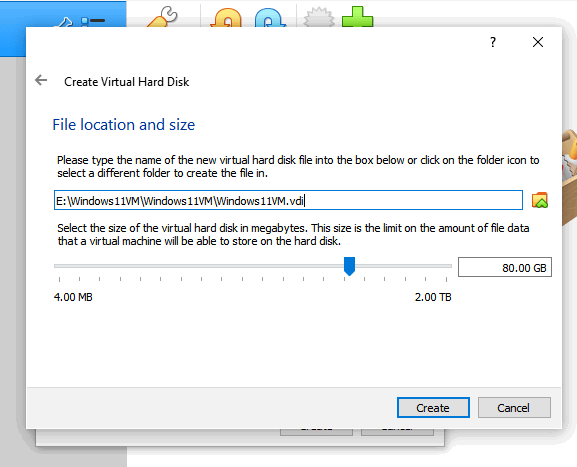
- In the next three screens, the installation wizard will guide you through setting up your virtual hard disk.
- Click Create to complete the installation.
Also read: How to Install Windows 11 on Unsupported PCs (And Why You Shouldn’t)
3. Install Windows 11 in VirtualBox
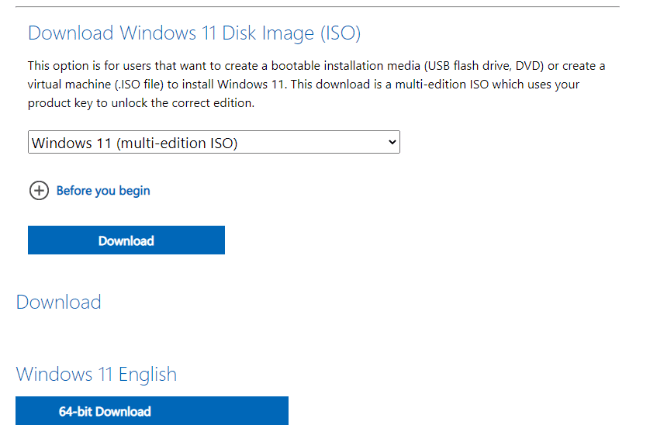
- Download the Windows 11 Disc Image (ISO) by going to the official Windows 11 download page.
- Now, open VirtualBox and select your Windows11VM on your left-hand side.
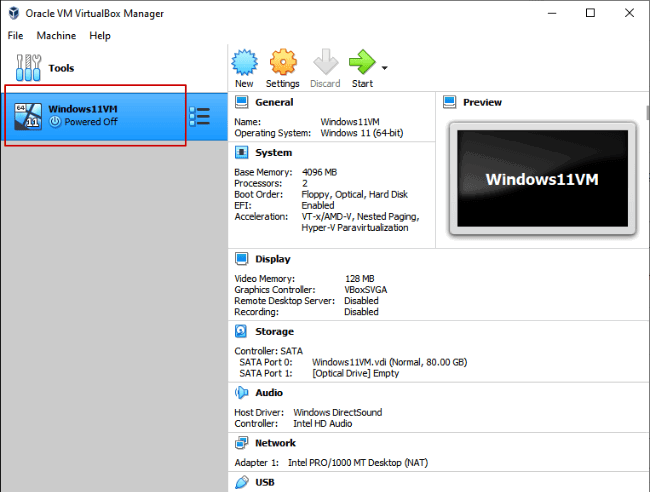
- Click Start to proceed.
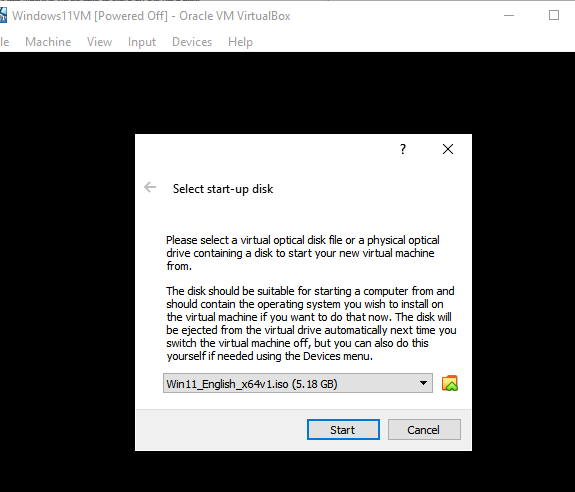
- You’ll be prompted to select a start-up disk. Click on the folder icon to select the Windows 11 ISO file you downloaded.
- Click Start.
Note: Press Shift + F10 and then follow the instructions under “Modify the Registry on a Fresh Windows 11 Install” in the bypass the TPM requirement post before moving to the next step.
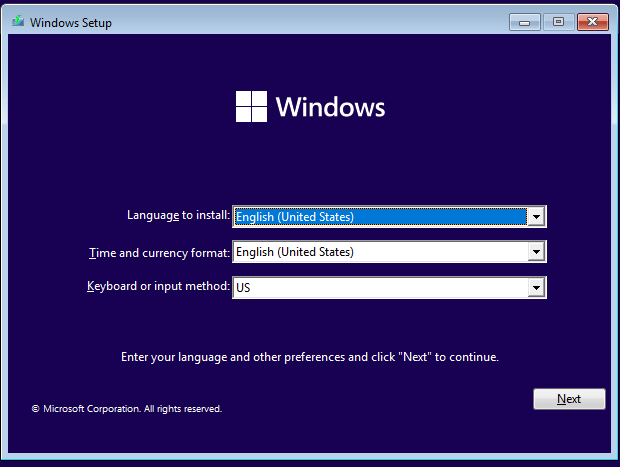
- Select the language, time, and keyboard settings you prefer and click Next.
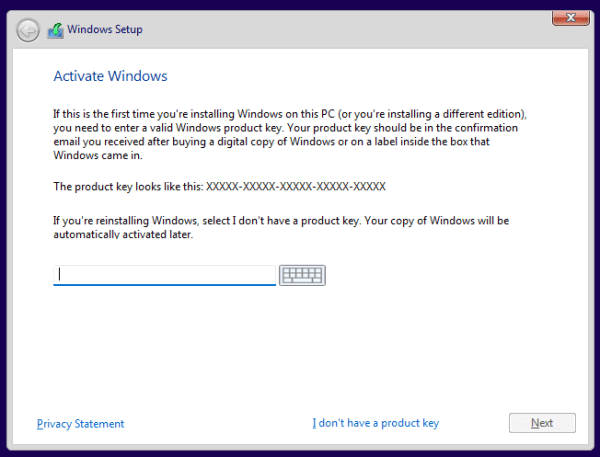
- Click “Install Now” on the next page. You’ll then be asked to enter your Windows product key. If you don’t have one, click on “I don’t have a product key.”
- Select the version of Windows you want to install. Click Next.
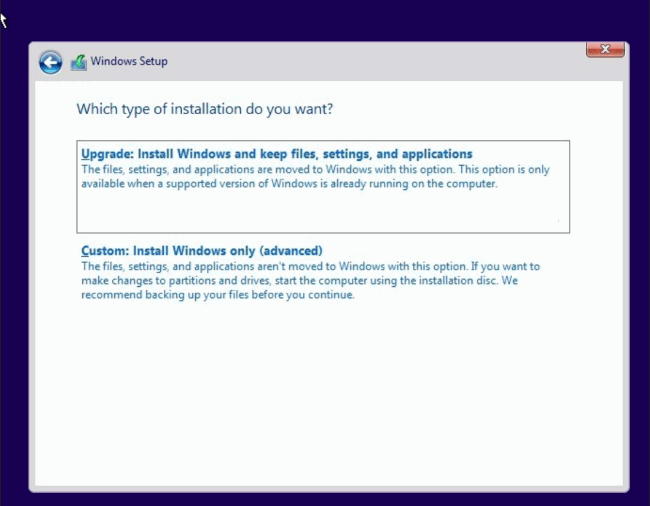
- Accept the user agreement. Once done, click on “Custom: Install Windows only (advanced)” and choose where to install Windows. The installation process will start.
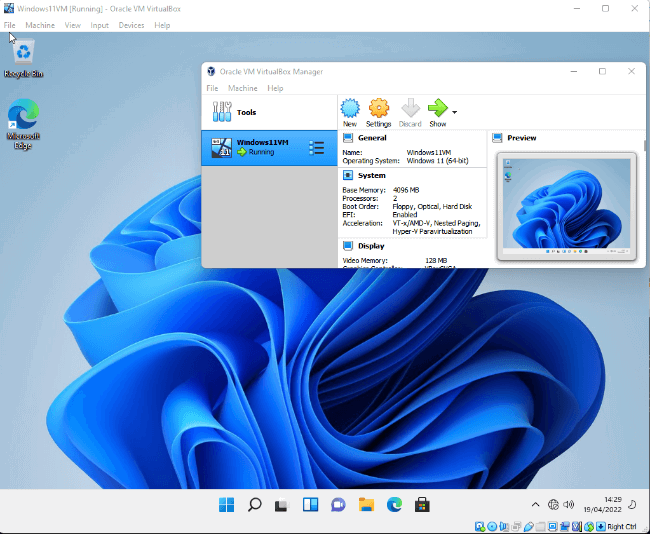
- With Windows 11 installed, you’ll be able to access it by firing up VirtualBox and starting up the Windows11VM.
Also read: Why Encryption Is Not Working on Windows 11 Home, and How to Fix It
Dual Boot Windows 11 With Windows 10
Dual booting is simply running two operating systems on one PC at the same time. While it’s not as seamless as running a virtual machine, it is less demanding on PC resources.
To dual boot Windows 11 with Windows 10, your PC should have a minimum of 8GB RAM, more than 64GB available storage, UEFI firmware, TPM version 2.0, and be Secure Boot capable. To make sure your PC has everything it needs, you can go ahead and perform a Windows 11 compatibility test beforehand.
1. Prepare a Partition for Windows 11
- Press Win + R.
- Type in
compmgmt.mscand hit Enter to open “Computer Management.” - Navigate to “Disk Management” on the left menu and click on it to view your disk configuration.
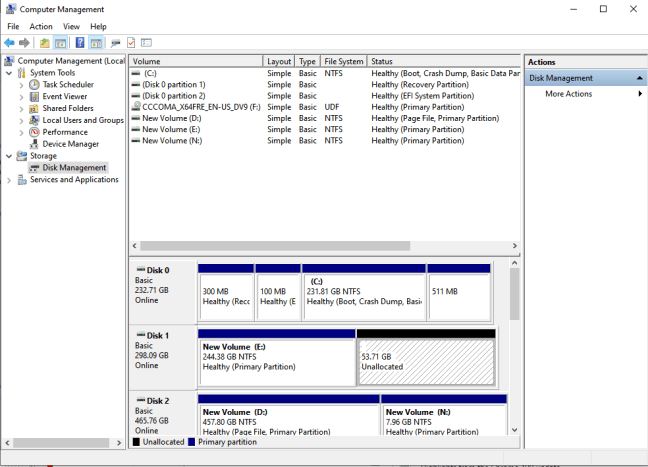
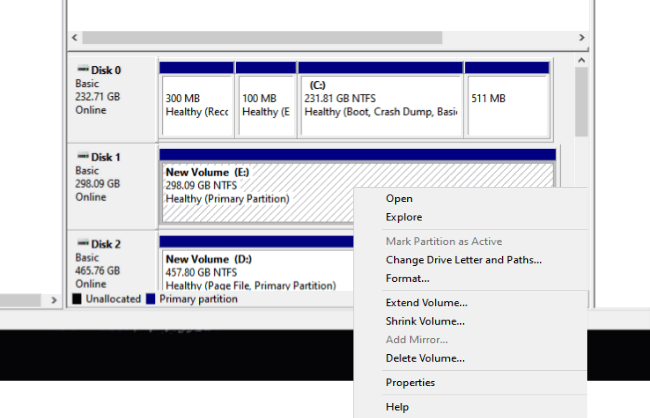
- Select a Disk that has at least 64GB of free space. It’s better if you can allocate more space. Right-click on the drive and select “Shrink Volume.”
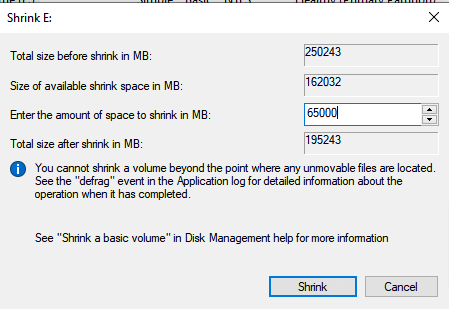
- Enter the amount of space to shrink in MB and click Shrink.
- The unallocated space should now be visible in Disk Manager. Right-click on it and select “New Simple Volume.”

- On the next screen, the new volume wizard will launch. It will help you set up, format, and assign a drive letter and a volume label to the new hard disk partition. Make sure you assign a memorable volume label (for example, Windows11BootDrive). Click Next to proceed.
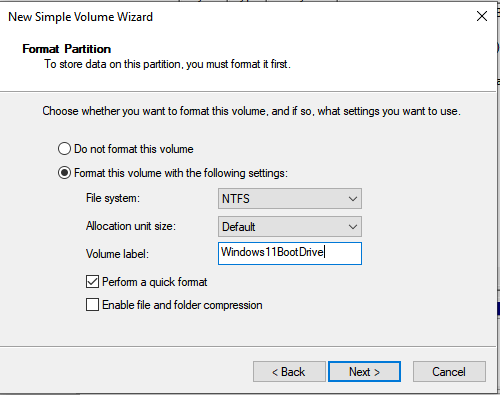
- Click Finish to close the wizard.
Also read: How to Check the CPU Temperature in Windows
2. Install Windows 11
- Download the Windows 11 Media Creation Tool.
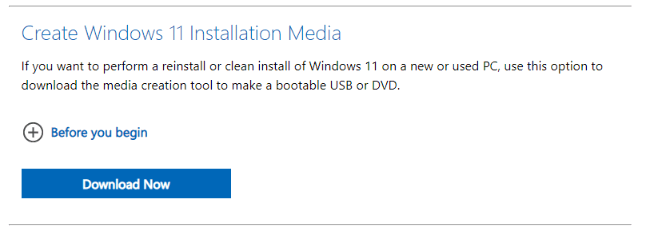
- Before running the tool, plug a USB flash drive (at least 8GB) into your PC. Follow the prompt to create a bootable USB flash drive. When the process is complete, you’ll see a “Your USB flash drive is ready” message.
- Reboot your PC into BIOS and choose the USB drive as the boot device. The Windows 11 installation wizard will launch.
- Follow the prompt until you get to the “Which type of installation do you want?” window. Click on “Custom: Install Windows only (advanced)” and click Next.

- Choose the partition you created (Windows11BootDrive) and then click Next to install Windows 11.
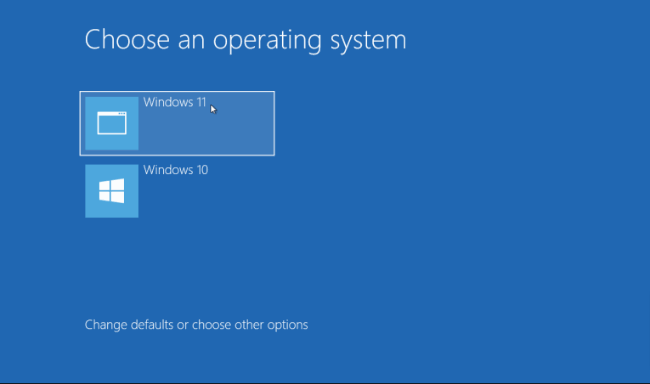
- With the installation complete, you will now be able to access Windows 10 and Windows 11 from the boot menu when you restart your PC.
Also read: How to Get Classic Volume Mixer Back in Windows 11
Try the Windows 11 Simulator
One of the easiest ways to get a feel of Windows 11 is to use this cloud-hosted simulator. Simply go to the website to get a feel of what Window 11 would be like if you installed it.
Things You Can Do
- Open the Start Menu – you can take a look at how the Start Menu looks simply by clicking on the Windows icon which is now centrally located by default. You’ll see pinned apps at the top of the menu and recommended items at the bottom.
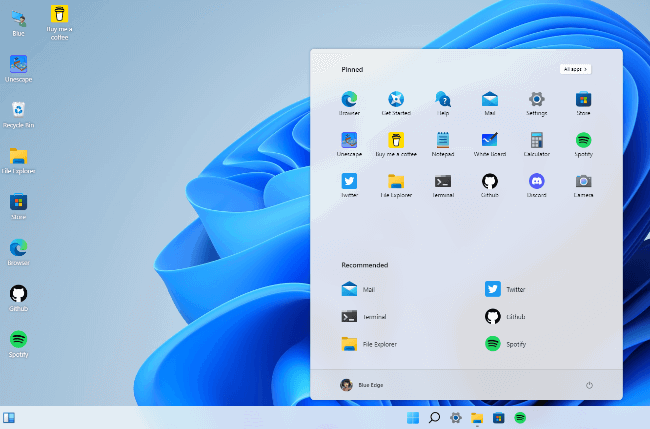
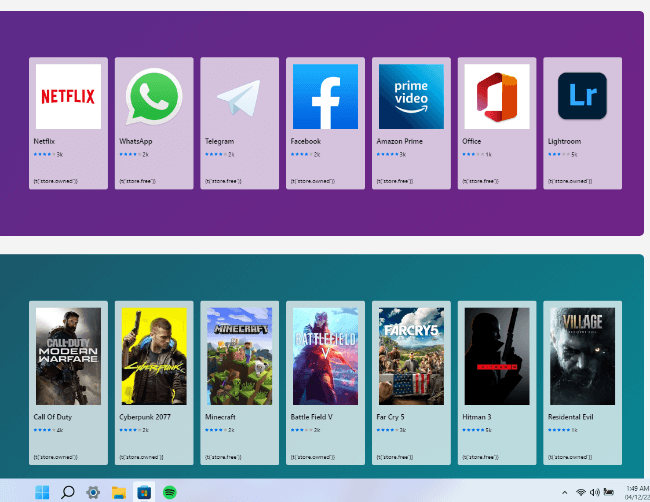
- Get a Sneak Peek of the Windows Store – click on the Windows Store icon to get a feel of the new-look store. Unfortunately, you can’t install apps in the simulator.
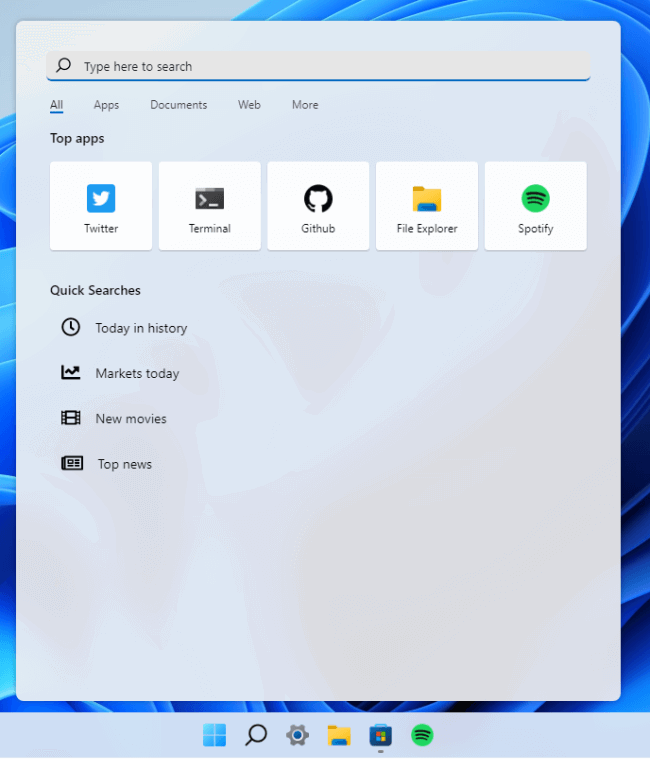
- Try the New Search – click on the search icon on the task bar for the new search menu to pop up.
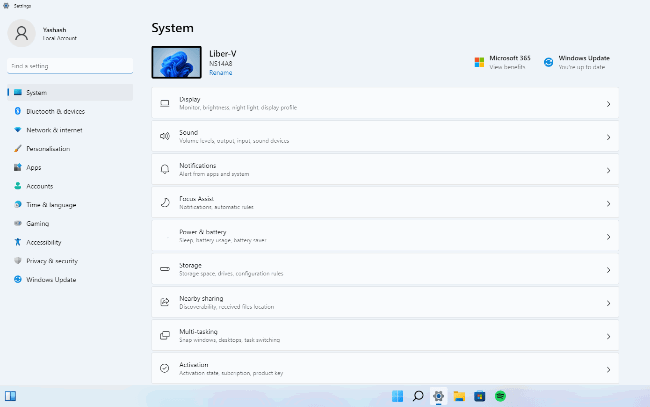
Additional Features – you can also check out File Explorer, Edge browser, and Settings.
Also read: Windows 11 Snipping Tool Not Working: 12 Possible Fixes
Wrapping Up
Now that you know how to try Windows 11 without renouncing Windows 10, perhaps you’d like to learn more about Microsoft’s latest OS. For instance, check out this list of hidden Windows 11 features or learn about all the ways you can customize your Windows 11 start menu.
Image credit: Pixabay
I’m a tech writer. I believe the world’s biggest problems can be solved by progressively solving the little ones. I hope that through my writing, I can help people solve the little problems in their life.
Subscribe to our newsletter!
Our latest tutorials delivered straight to your inbox
Sign up for all newsletters.
By signing up, you agree to our Privacy Policy and European users agree to the data transfer policy. We will not share your data and you can unsubscribe at any time. Subscribe
