
Whether you want to share something with your IT guy or are composing a how-to, taking a screenshot of your computer can be incredibly useful. Luckily, there are a number of different ways to take screenshots in Windows 10, and we’ve compiled a bunch of them for you here.
Content
- 1. Use Your Graphics Card Software (Nvidia or AMD)
- 2. Snip & Sketch
- 3. Snipping Tool
- 4. PrtScn Button
- 5. Windows Key + PrtScn
- 6. Take Screenshot of Only One Window
- 7. Take Screenshot of Only Part of Your Screen
1. Use Your Graphics Card Software (Nvidia or AMD)
Screenshots can sometimes be a complicated thing. Depending on what app or game you’re running, it’s possible that you’ll be locked out of the default Windows shortcuts to take screenshots. In those situations, it’s good to have a backup. If you are using an Nvidia or AMD graphics card, then you have one.
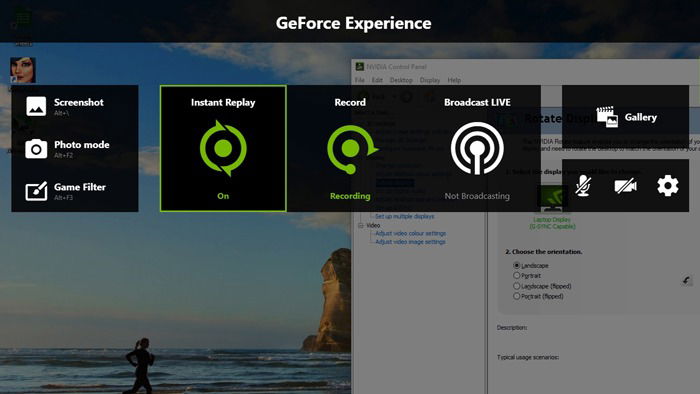
Nvidia GPU owners with GeForce Experience enabled should be able to take a screenshot by hitting Alt + F1. (You can change the hotkey through the GeForce Experience overlay, which you can open by hitting Alt + Z.)
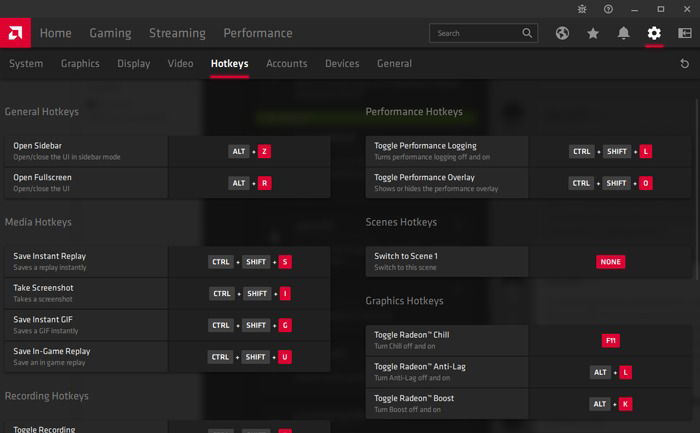
AMD GPU owners, meanwhile, can take screenshots using Ctrl + Shift + I, but again, you can change this hotkey to one of your choice through Radeon Software under “Settings -> Hotkeys.”
Also read: Windows 11 Snipping Tool Not Working: 12 Possible Fixes
2. Snip & Sketch
For years, the integrated Windows Snipping Tool has served us well, but in the interest of modernization, Microsoft has released a new screenshot tool this year called “Snip & Sketch,” which will eventually completely replace Snipping Tool. If you want to be ahead of the curve, then you should use this instead.
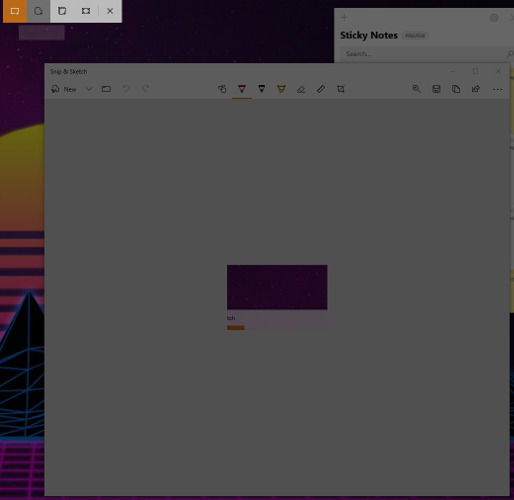
To open Snip & Sketch, press the Win key, type “snip” and select “Snip & Sketch.”
In the Snip & Sketch window, you can jump right into a snip by clicking New at the top-left corner. (Click the arrow next to it to set a screenshot on a timer.)
Once you’ve clicked New, you’ll see icons for four options at the top of your screen – Rectangular Snip, Freeform snip, Window snip and Fullscreen Snip. Click the one you want and create your bespoke screenshot!
Once you’ve created a screenshot, you can make basic edits to it, save it, or even share it with specific people or online (option at the top-right corner).
3. Snipping Tool
Even though Snip & Sketch is set to replace it, the Snipping Tool still exists in Windows 10 for now and is still a good tool to take screenshots. It’s been around since the Vista days and for good reason. It’s intuitive and easy to use. To open the app, navigate to “Start -> All Programs -> Windows Accessories -> Snipping Tool.”
With the app open, click “New” to start the screenshot capture process. This will automatically dull your screen, but don’t be alarmed. This just means that the tool is ready to “snip” your designated area of the screen.
Simply click your mouse and drag it to crop your screen, including the desired area you wish to capture. Releasing the mouse button will automatically generate a preview of your newly-created screenshot. If you wish to save it, click the floppy disk icon in the top-left part of the Snipping Tool window. If you exit the program without saving, the screenshot is discarded.

Be aware that the default snip type is a rectangular box. If you click the arrow next to the “New” button in the Snipping Tool, a drop-down box will appear, allowing you to change the snip type to freeform, window or full screen.
4. PrtScn Button
The snipping tool is not the only way to take screenshots in Windows 10. You can also take screenshots of your entire screen by simply pressing the “Print Screen” button. This button can be labeled “PrtScn,” “PrtSc” or something similar. Be aware that on some laptop keyboards you may have to press the Function “Fn” button simultaneously with your “Print Screen” button in order to activate the feature.

Pressing the “Print Screen” button doesn’t seem to do anything. However, it has indeed captured your screen. Instead of saving your screenshot as a file, the “Print Screen” button simply copies it to the clipboard. In order to save the screenshot, you’ll have to paste it from the clipboard to another program. Once you have copied your screenshot into Paint, Word or another program, you can save it to the location of your choice.
Also read: Laptop Keyboard Not Working? Try These Fixes
5. Windows Key + PrtScn
Copying a screenshot into another program is handy if you want to do edits, but what if you just want your screen as it is? Fortunately, there is a quick and easy way to do that. All you have to do is hit the Windows key and the Print Screen button simultaneously.
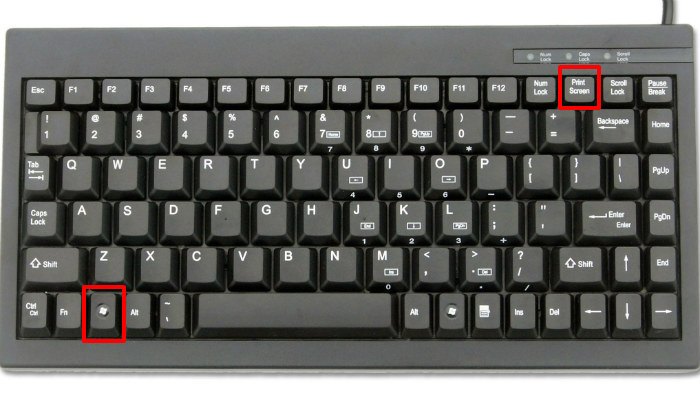
This will cause your screen to dim momentarily, which also means that it has successfully taken a screenshot of your screen. The screenshot will appear in a folder aptly titled “Screenshots” inside your “Pictures” folder.
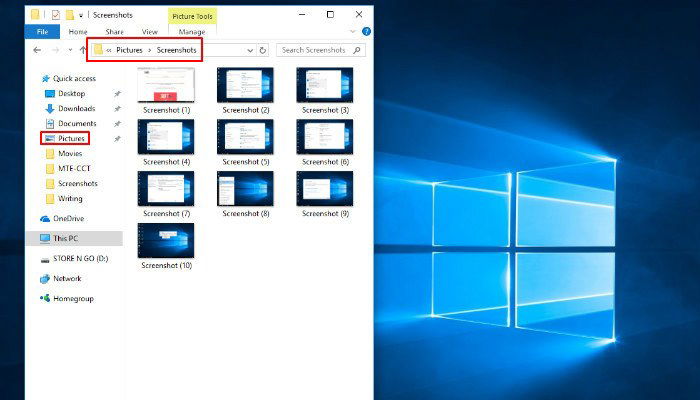
Note: some laptops may require the Fn button to activate the Print Screen button. In this case, you would have to press the Windows, Fn and Print Screen keys simultaneously.
6. Take Screenshot of Only One Window

In some cases you may not need to capture your entire screen. Luckily, if you only want to screenshot a specific window, there is a keyboard shortcut for that. Simply click on the title bar of the window that you want to capture and simultaneously press Alt + PrtScn. Doing so will capture the active window as a screenshot and copy it to the clipboard. In order to save or edit, you will have to paste the image into the program of your choice.
7. Take Screenshot of Only Part of Your Screen
If you only want to take a screenshot of a specific window as opposed to the whole screen, you’re in luck. Pressing Win + Shift + S simultaneously will cause your screen to dim and your mouse cursor to change. If this sounds familiar, it’s because it looks and functions exactly like the Snipping Tool mentioned earlier.
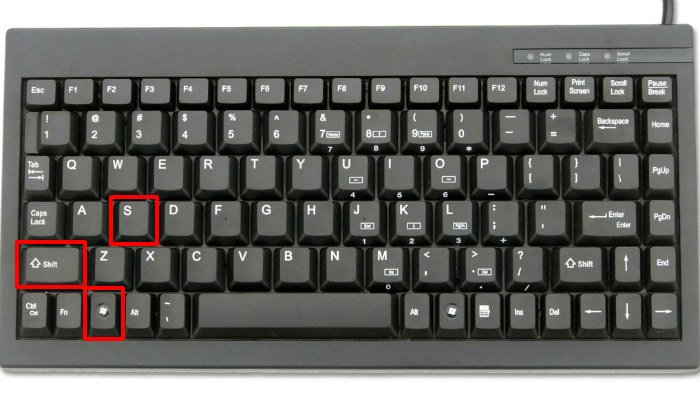
Click and drag on your screen to select the part of your screen you want to capture. Upon releasing the mouse, you’ll notice the major difference between this shortcut and the Snipping Tool. Unlike the Snipping Tool, this shortcut doesn’t automatically give you a preview of your screenshot. Instead, it simply copies the screenshot to the clipboard, meaning you will have to paste it into an editing program (Word, Paint, etc.) before you will be able to save it.
Now that you know how to take screenshots in Windows 10, the next thing is to take a scrolling screenshot of a webpage in Windows 10. You should also take a look at our guide on converting VCE files to PDFs.

Ryan Lynch –
Staff Writer
Ryan is an English & Film Studies teacher. He splits his time between Australia and the United States. He passes the time on long haul flights by playing retro video games from his youth.
Subscribe to our newsletter!
Our latest tutorials delivered straight to your inbox
Sign up for all newsletters.
By signing up, you agree to our Privacy Policy and European users agree to the data transfer policy. We will not share your data and you can unsubscribe at any time. Subscribe