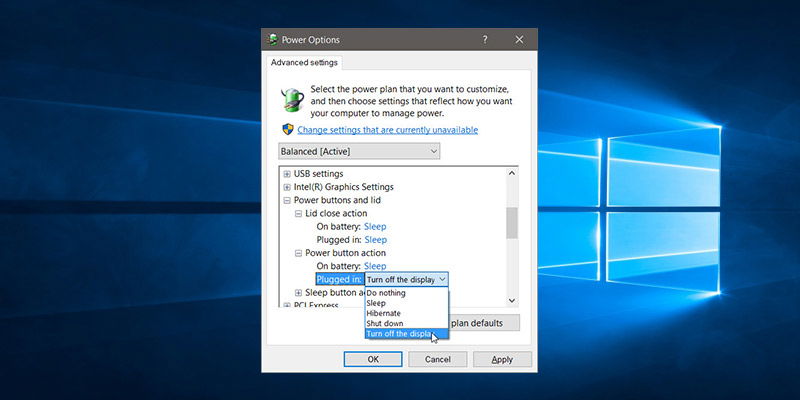
There are many settings buried deep down in Windows’ Control Panel that you might not have explored yet. One of the settings we’d like you to get familiar with is turning off the display when the power button is pressed. This can specifically be useful for laptop and notebook users. Yes, you do get a function key to turn off the display, but the power button can be more convenient in regular usage.
By default, the Power button is set to “Sleep” when pressed while “on battery” or “plugged in.” This setting can be easily configured in the Power Plan options for your laptop as we will show you how to do in this article.
Configuring the Power Button to Turn Off the Display on Windows 10
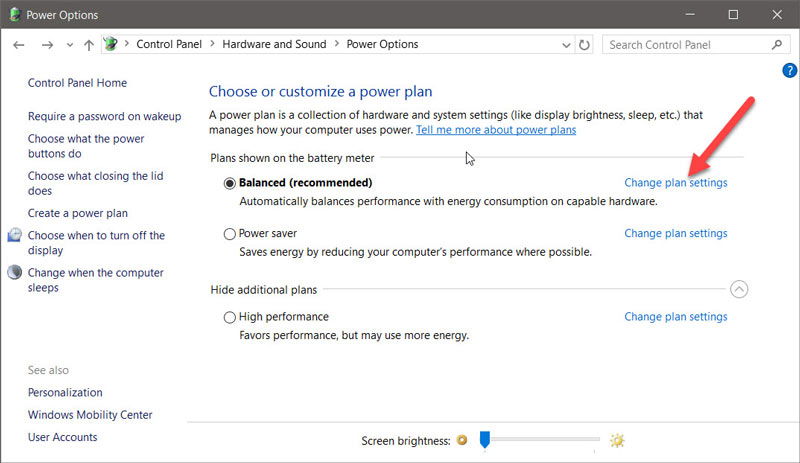
1. Go to “Control Panel -> Hardware and Sound -> Power Options.” You can alternatively perform a Windows search (Windows Key + S) for “Power Options.”
2. Click on “Change Plan Settings” of your current power plan. The configuration that we apply here will be specific to the current power plan that you are using. You’ll have to perform the same for custom power plans.
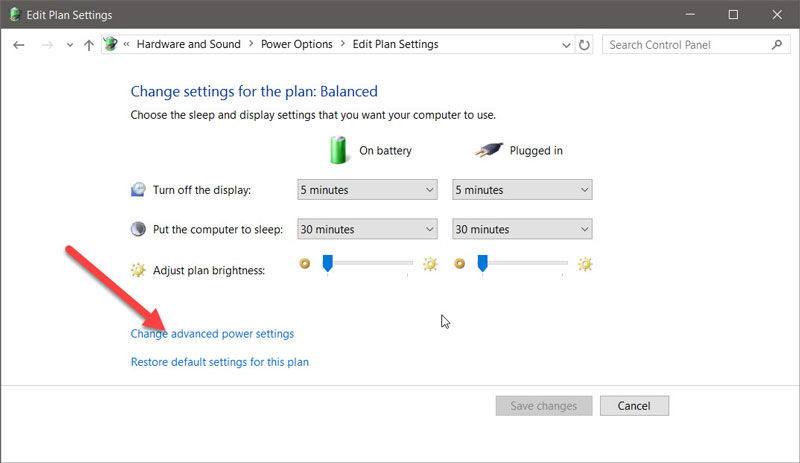
3. Under the Plan Settings you should find “Advanced Power Settings” for that plan. Click on it to open the dialogue box for advanced configuration.
4. Scroll down the options, and you should find the “Power button and Lid Action” option. Click on the “+” icon to open the Action options for it, then click on the “+” icon next to “Power button action.” This will show you the configuration settings for what should be done when the Power button is pressed.
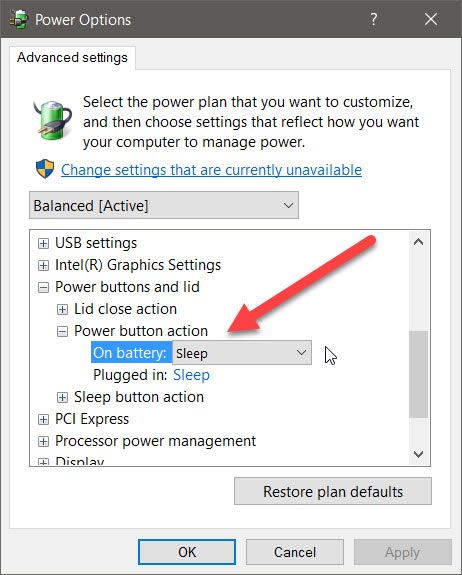
5. Drop down the menu next to “On battery” and “Plugged in” to change the action set for the Power button. You should see the action “Turn off display.” Choose the action and click on Apply and OK.
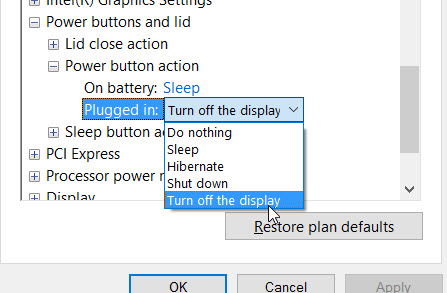
6. Now, press the Power button, and your laptop’s screen should turn off.
Note: the above configuration should be done every time you change the Power Plan.
Explore the Settings
In the advanced settings for the Power Plan, you can find many other useful settings and configurations. You can change the Lid close action’ to “do nothing” or change the Sleep action to “Hibernate” instead of Sleep. In the Display options you can turn on “Adaptive Brightness” which is based on the ambient light sensors of your laptop. So if your laptop doesn’t have this sensor, then this option will not be available. Most modern laptops do come with this sensor, however.
You can also change the “Processor power management” if you want to. By default it is set to be used to 100%, but you may change it if you wish. There are also battery options, and you can configure many of the options. Here, you can set the percentage value for low battery power state and reserved battery power state. There are many other options to explore here as well.
Conclusion
This even works on a PC with a monitor. It even supports a multi-monitor display, so you won’t have to do any extra configuration for that. This can be quite helpful in situations when you’re away for a while and don’t want someone else to look at what you are doing. However, the display can be turned on by simply moving the mouse, using the touchpad, or pressing a key.
Abhishek is a Freelance Tech blogger and an avid coder. He’s an Android Freak and loves customizing and fixing all things digital. You might also want to check out his blog where he shares his love for Tech.
Subscribe to our newsletter!
Our latest tutorials delivered straight to your inbox
Sign up for all newsletters.
By signing up, you agree to our Privacy Policy and European users agree to the data transfer policy. We will not share your data and you can unsubscribe at any time. Subscribe
