
I remember back in the day of Windows 95 to Windows 7, rebuilding your PC was a multi-day affair. With the implementation of Windows 10, most of this process has become a lot easier. Windows now includes a restore and refresh function that allows you to quickly and easily wipe and restore your PC when things aren’t functioning correctly. The one problem they didn’t fix, however, is in restoring all of your data – and specifically, browser favorites. Those never get backed up, and restoring them after a PC refresh isn’t as easy as it should be.
Microsoft Edge is a system component, and its resources include browsing favorites. That data isn’t kept in a location that’s kept safe with your data. That information is erased with all other system components on your hard drive.
That doesn’t mean they’re lost, though. If you’re missing your Favorites from Microsoft Edge, and you want them back, you can use the following procedure to restore them.
Extract Edge Favorites from Windows.old
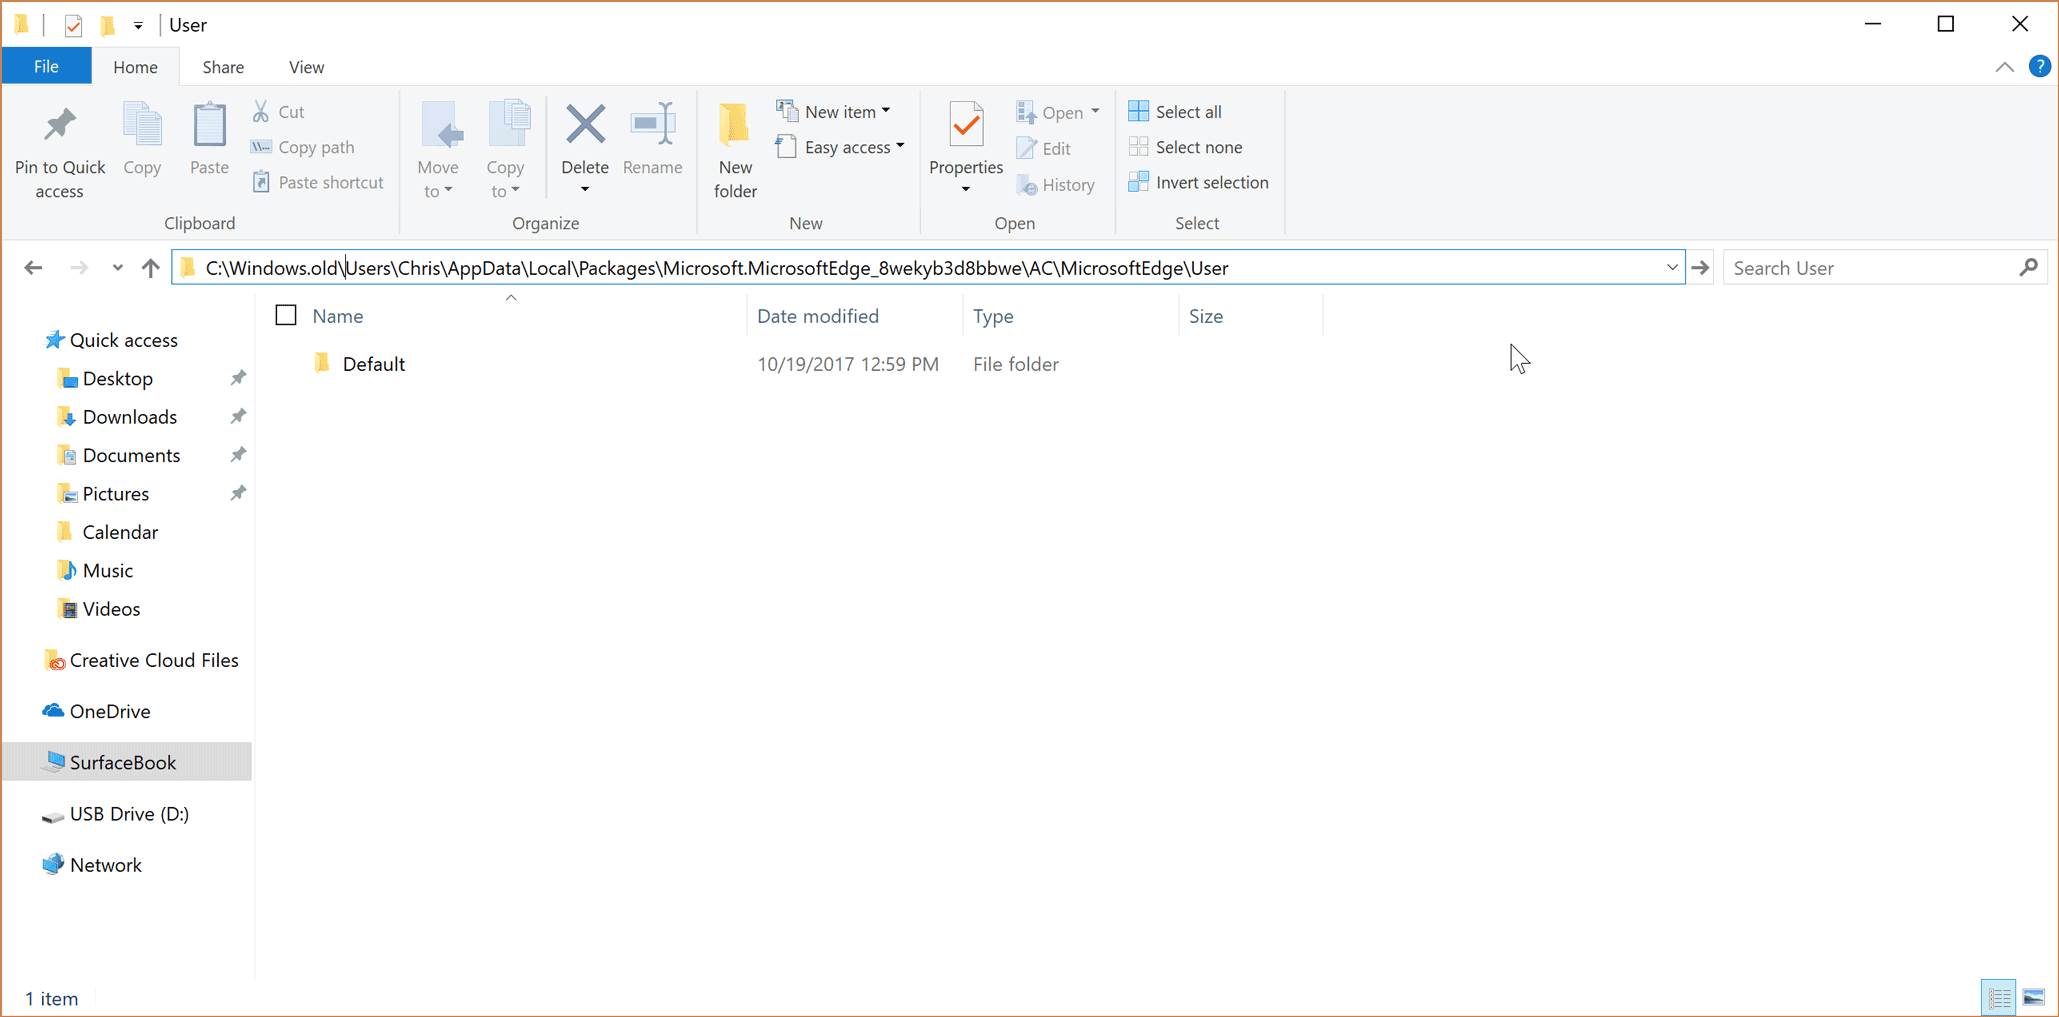
After Windows refresh is done, it puts your old system files in a directory called “Windows.old.” You’ll need to go into that directory and pull some files out.
1. Open Windows Explorer (formerly called File Manager) and navigate to the following folder: “C:Windows.old.”
2. Navigate to the “Users” folder.
3. Locate the folder corresponding with the user name you used to log into Windows. Click on the folder matching that username.
4. Choose “View -> Enable Hidden Items,” and search for the folder called “AppData.”
5. Navigate to “C:Windows.oldUsers<username>AppDataLocalPackages.”
6. Find and open the folder starting with “Microsoft.MicrosoftEdge.”
7. Open the folder named “AC.” Navigate to “MicrosoftEdgeUserDefault” underneath that.
8. The entire address to the folder will now look like this:
C:Windows.oldUsers<username>AppDataLocalPackagesMicrosoft.MicrosoftEdge_8wekyb3d8bbweACMicrosoftEdgeUserDefault
9. Copy the contents of the Default folder to a safe place. You’re going to need it in the next set of actions.
Restore and Get Back Edge Favorites
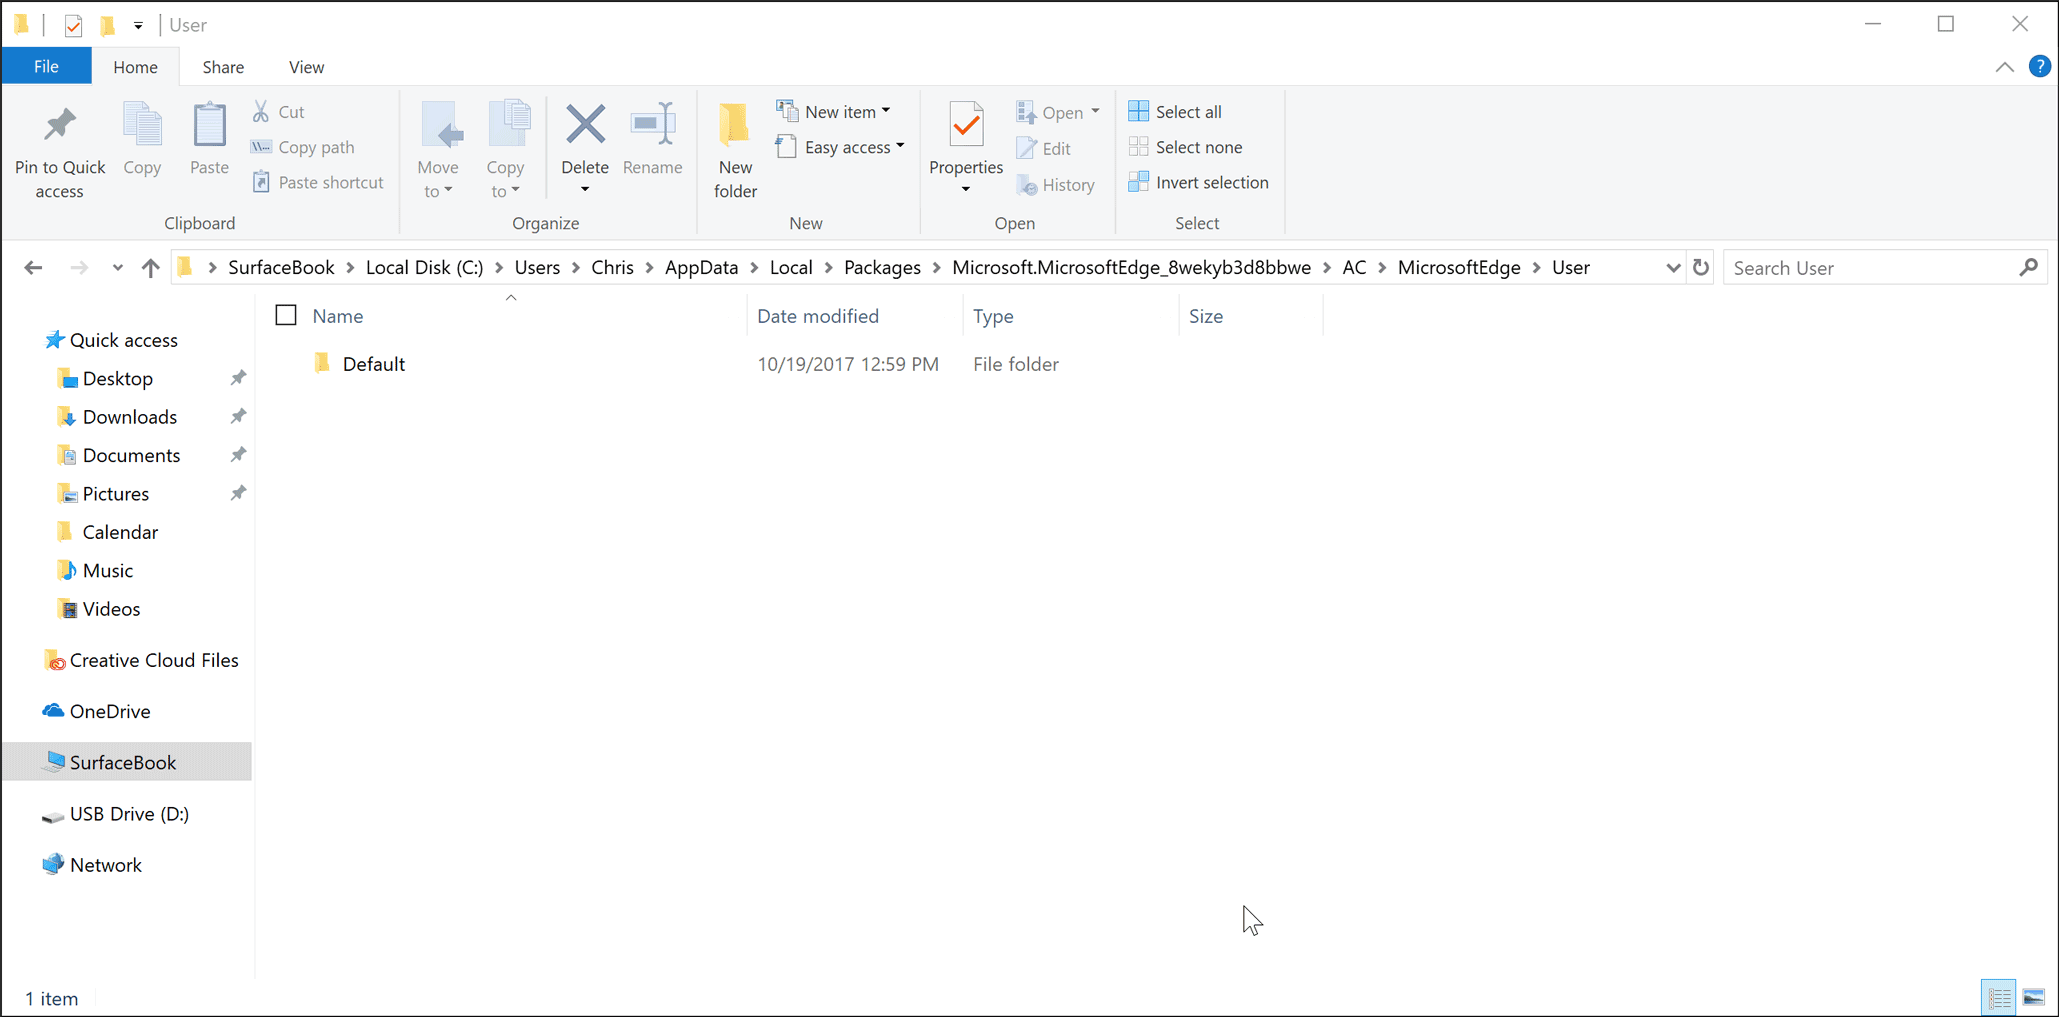
Now that you’ve extracted your Favorites, it is time to put them into the right place so that Edge can load them.
1. Close Microsoft Edge if its currently open.
2. Open Windows Explorer and navigate to the following folder. This path is similar to the previous location.
C:Users<username>AppDataLocalPackagesMicrosoft.MicrosoftEdge_8wekyb3d8bbweACMicrosoftEdgeUserDefault
3. Open another Windows Explorer window, and navigate to the folder where you copied the files you extracted out of “Windows.old.”
4. Paste the files into the path above. Ensure all the files are copied over.
5. Open Microsoft Edge. Your favorites should be back in place.
Resolve Any Issues
In some cases Edge favorites have been known to disappear after restoring them with the above procedure. If this happens, follow the steps below.
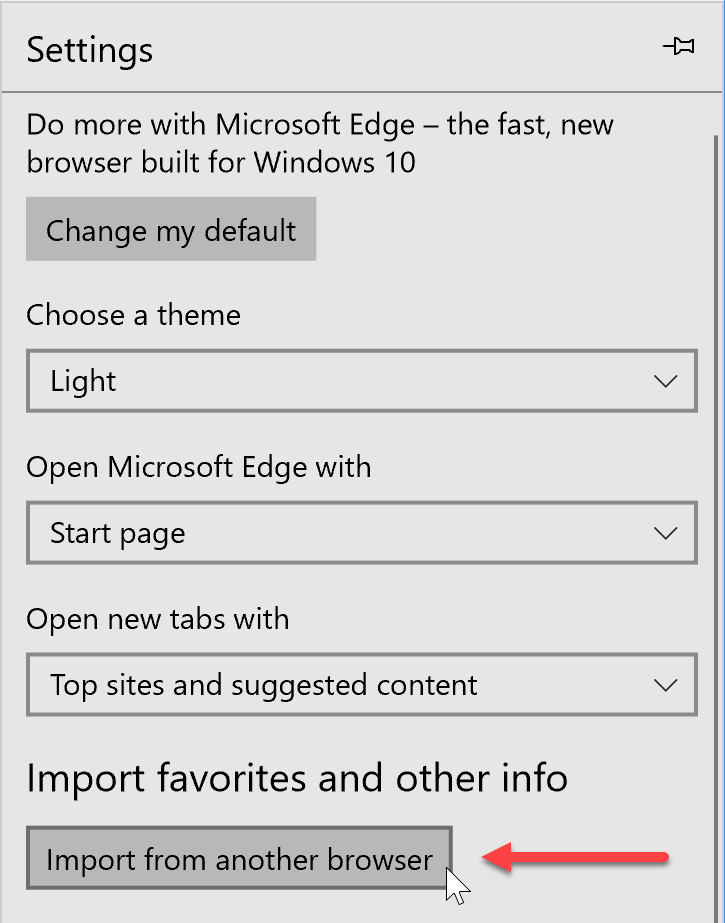
1. With Edge open, click the three dots in the upper-right corner of the application window and then click Settings.
2. Under Import Favorites and Other Info, click the “Import from another browser” button.
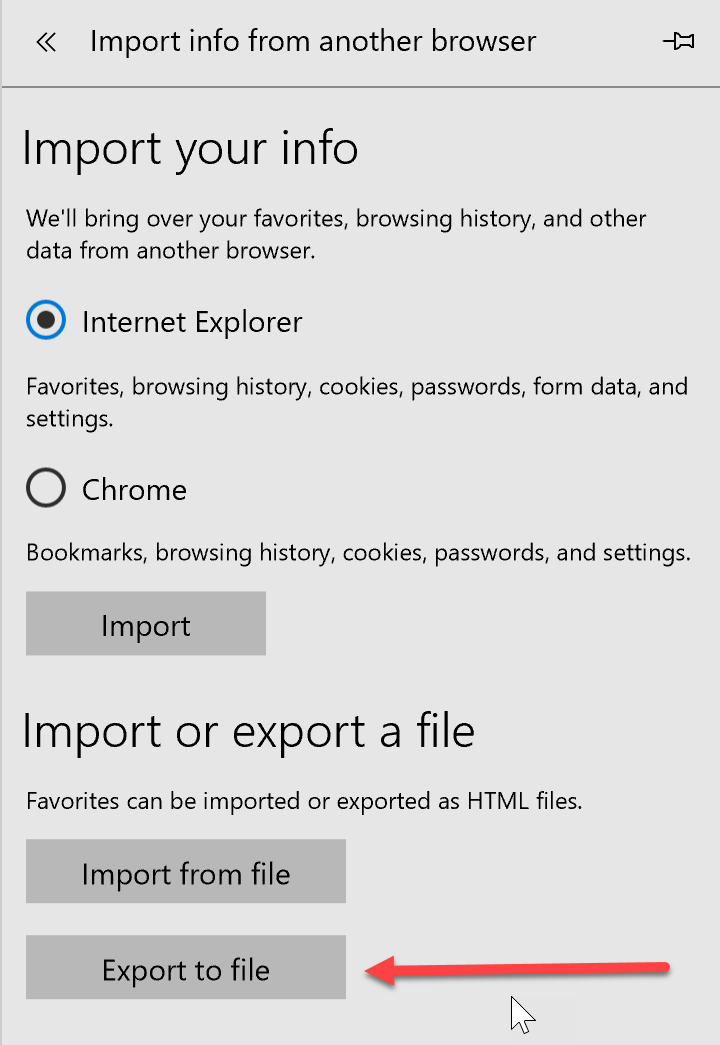
3. Click the “Export” button and save your favorites as an HTML file.
4. Close Edge and open it again.
5. Check to see if your favorites have reappeared.
6. If your favorites have not returned, repeat steps 1 and 2. Instead of exporting, click the “Import from a file” button, and follow the instructions.
Conclusion
Rebuilding a Windows 10 PC doesn’t take days like it did with earlier versions of Windows. With Windows 10, bringing back everything via a System Refresh or Restore doesn’t always bring back your Edge favorites. Thankfully, with a little prep work, you can back them up and bring them back when you need them.
Subscribe to our newsletter!
Our latest tutorials delivered straight to your inbox
Sign up for all newsletters.
By signing up, you agree to our Privacy Policy and European users agree to the data transfer policy. We will not share your data and you can unsubscribe at any time. Subscribe