Windows Task Scheduler is one of the best apps for you to quickly create simple and complex scheduled tasks to automate your daily workflow. In fact, we’ve previously covered topics discussing how you can configure CCleaner to automatically clean your PC and how you can easily schedule Windows Defender to perform a full PC scan on a weekly basis. As useful as it is, one of the drawbacks of Task Scheduler is that it won’t let you rename the task once it has been created.
I don’t quite understand why Microsoft chose to restrict users from renaming a scheduled task easily, but if you ever want to do that, here is how you can rename a scheduled task in Windows Task Scheduler.
Also read: Windows Automation: 8 Useful Tasks to Schedule With Task Scheduler
Rename a Scheduled Task in Task Scheduler
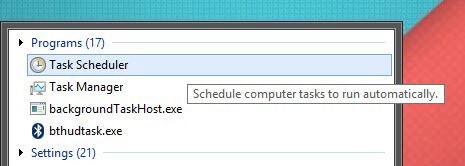
Although renaming a task in the Task Scheduler is not straightforward, it is not hard either. All you have to do is to export and import the scheduled task. To start, open the Task Scheduler app by searching for it in the Start menu or screen.
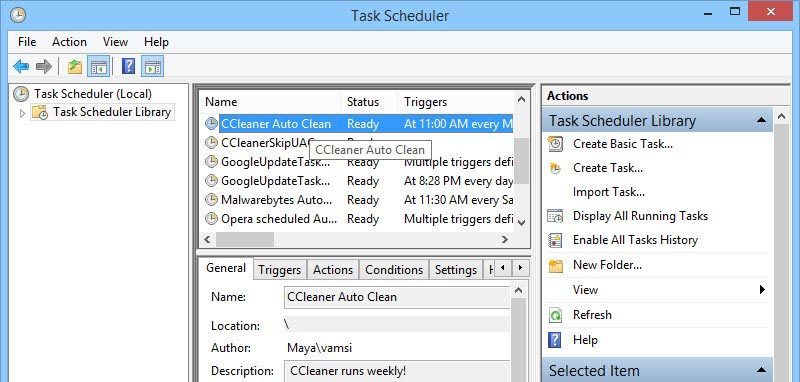
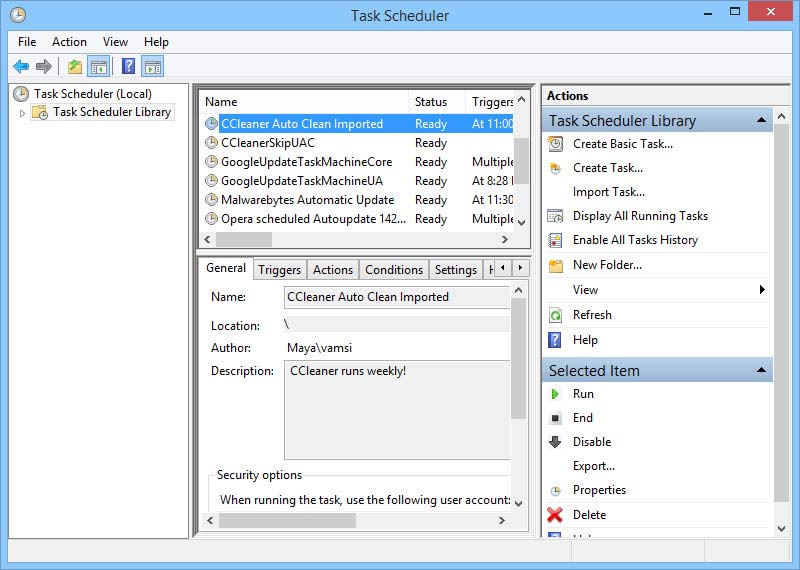
In the Task Scheduler app, find the task you want to rename. For instance, I want to rename my custom CCleaner Auto Clean task.
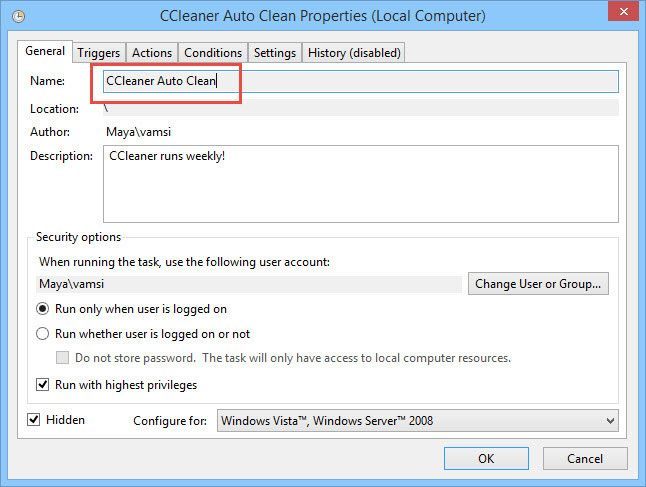
Now, if you rightnclick on the task and select the option “Properties,” you will see the Name field in the General section is greyed out. i.e. Windows won’t let you rename the scheduled task in the traditional way (right click and select rename option).
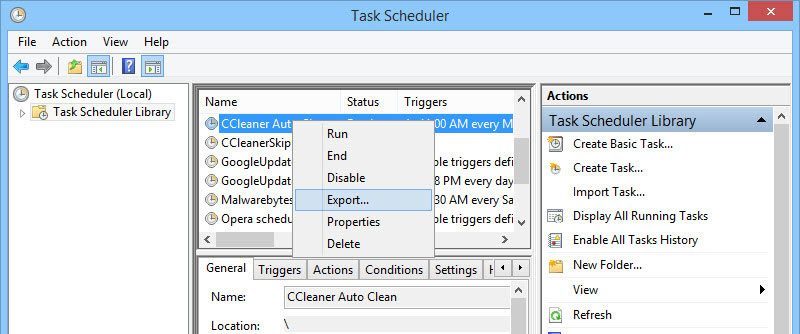
To rename the scheduled task, you first need to export the existing task. To do that, right click on the task and select the option “Export.”
The above action will open the Save As window. Simply select a convenient location and click on the “Save” button to complete the exporting process.

Now, right click again on the task and select the “Delete” option. Don’t worry; we can get our task back by importing it.
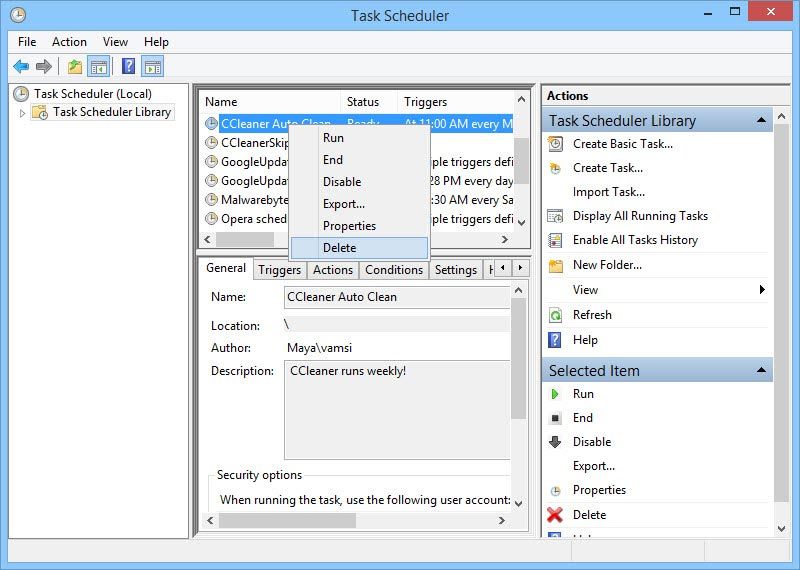
This action will display a warning window; just click on the “Yes” button to complete the deletion process.

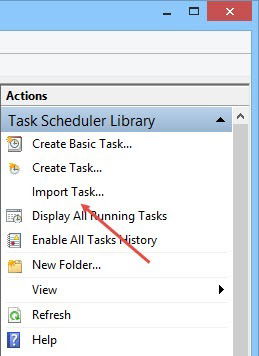
Now, under the Actions section in the right pane, select the option “Import Task.”
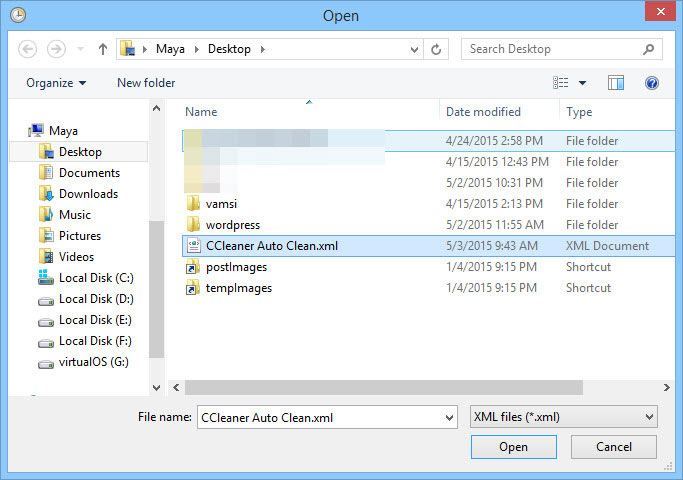
This will open the “Open” window. Here, navigate and select the task that we exported earlier and click on the “Open” button to import the task.
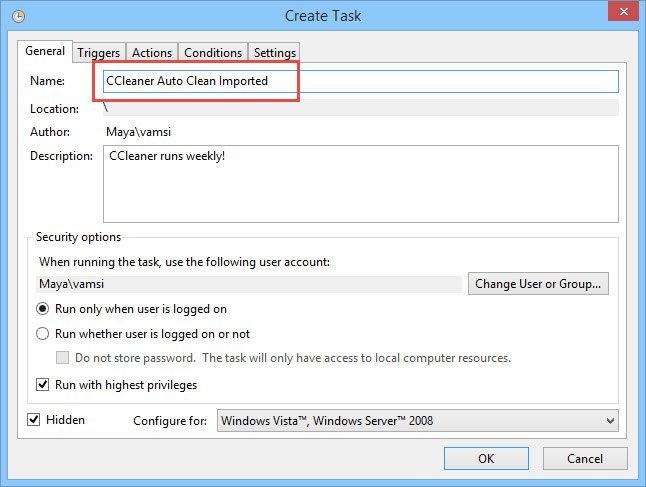
As soon as you click on the “Open” button, the imported task will be opened in the “Create Task” window. Here, enter the new name of your choice and click on the “Ok” button to save the changes. All the settings will stay intact; of course, you can always edit them according to your needs.
Also read: How to Fix Task Scheduler Not Working in Windows
That’s all there is to do, and it is that simple to rename a scheduled task in Windows Task Manager. That being said, Windows will again lock out the name field so that you can no longer rename the task. If you want to, you have to redo the whole process.
Hopefully that helps, and do comment below sharing your thoughts and experiences about Windows restricting users from renaming a scheduled task and the above-discussed method to rename the scheduled task indirectly.
Vamsi is a tech and WordPress geek who enjoys writing how-to guides and messing with his computer and software in general. When not writing for MTE, he writes for he shares tips, tricks, and lifehacks on his own blog Stugon.
Subscribe to our newsletter!
Our latest tutorials delivered straight to your inbox
Sign up for all newsletters.
By signing up, you agree to our Privacy Policy and European users agree to the data transfer policy. We will not share your data and you can unsubscribe at any time. Subscribe
