When you first turn on your system or when you lock your system, Windows displays a simple login screen which enables you to log in to your system. On the login screen Windows 10 provides you with different options like Ease of Access, Power options, Sign-in options, etc. The Power button on the login screen allows you to quickly restart, shut down, or put your system into sleep mode. As useful as it is, you may sometimes need to disable or remove the Power button from the login screen so as to prevent other users from shutting down your PC when it is locked. Here is how you can remove a shutdown or power button from the Windows 10 login screen.
To remove the power button from the Windows 10 login screen you can either use the Group Policy Editor or the Registry Editor. I will show both ways; follow the one you are comfortable with.
Using Group Policy Editor
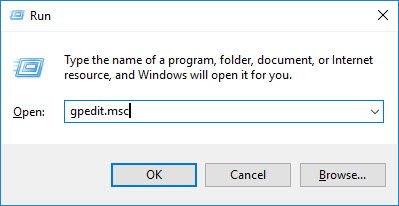
Removing the shutdown button from the login screen using the Group Policy Editor is the easiest way. To start, press Win + R, type gpedit.msc and press the Enter button.
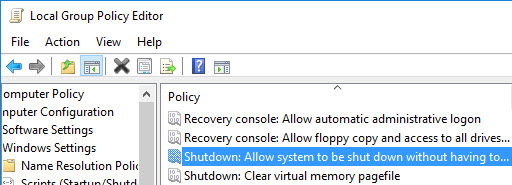
The above action will open the Windows Group Policy Editor. Here, navigate to the follow policy on the left panel: “Computer Configuration -> Windows Settings -> Security Settings -> Local Policies -> Security Options.”

Find and double-click on the policy “Shutdown: Allow system to be shut down without having to log on.”
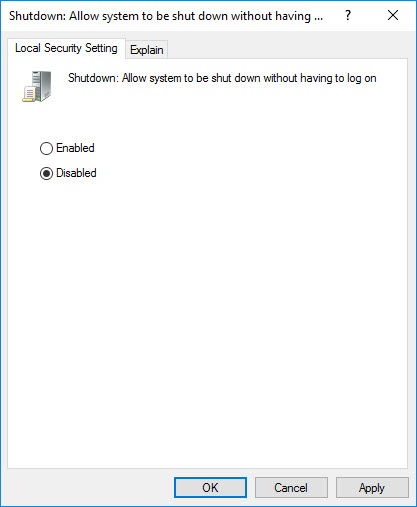
This will open the respective policy settings window. Here, select the “Disabled” radio button, and then click on the “Ok” button to save the changes.
From this point onward you won’t see the power button on the login screen.

If you ever want to revert back, simply change the policy setting from “Disabled” to “Enabled” and you are good to go.
Using Windows Registry Editor
If you don’t have access to the Group Policy Editor, then you can use the Windows Registry editor. However, make sure that you have a good backup before making any changes.
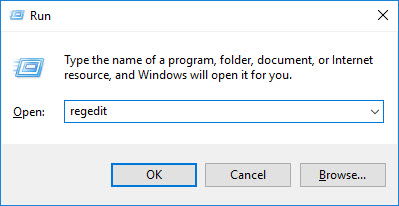
To start, press Win + R, type regedit and press the Enter button to open the Windows Registry Editor.
Once the Registry Editor has been opened, navigate to the follow key on the left panel:
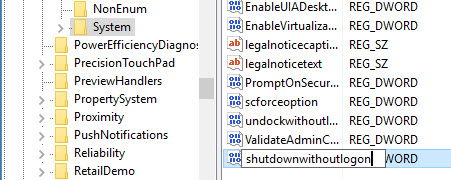
HKEY_LOCAL_MACHINESOFTWAREMicrosoftWindowsCurrentVersionPoliciesSystem

Right-click on the empty space in the right pane, and then select the “New” option and then “DWORD (32-bit) Value.”

The above action will create a new Dword Value. Rename the new value to “shutdownwithoutlogon” and press the Enter button.
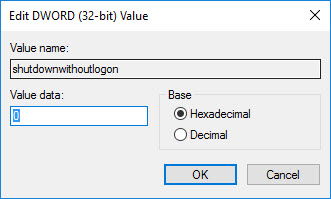
After creating the value double-click on it and make sure that the value data is set to “0.” If the value data is not set to “0” then change it accordingly.
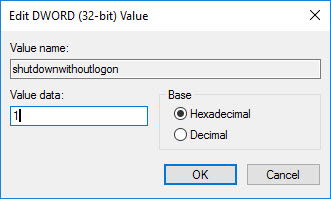
You’ve successfully removed the power or shutdown button from the login screen. If you ever want to revert back, simply change the value data from “0” to “1” and you are good to go.
Do comment below sharing your thoughts and experiences about using the above method to remove the power or shutdown button from the Windows 10 login screen.
Vamsi is a tech and WordPress geek who enjoys writing how-to guides and messing with his computer and software in general. When not writing for MTE, he writes for he shares tips, tricks, and lifehacks on his own blog Stugon.
Subscribe to our newsletter!
Our latest tutorials delivered straight to your inbox
Sign up for all newsletters.
By signing up, you agree to our Privacy Policy and European users agree to the data transfer policy. We will not share your data and you can unsubscribe at any time. Subscribe
