If you are using Windows 10, you might have noticed that when you open the File Explorer, it will, by default, show you the Quick Access view. The new Quick Access view in Windows 10 lists the frequently used folders and recent files so that you can quickly access them again if needed.
But if you don’t like or don’t want the Quick Access feature, here is how you can easily customize or remove the Quick Access view from Windows 10 File Explorer.
Customize or Remove Quick Access
Before removing the Quick Access view, you first need to change the default view of the File Explorer. To do that, click on the “View” tab and select the “Options” option.

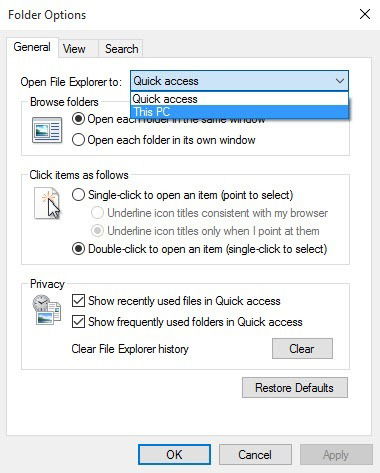
The above action will open the “Folder Options” window. Here, select the “This PC” option from the drop-down menu next to “Open File Explorer to” and click on the “Ok” button to save the changes.
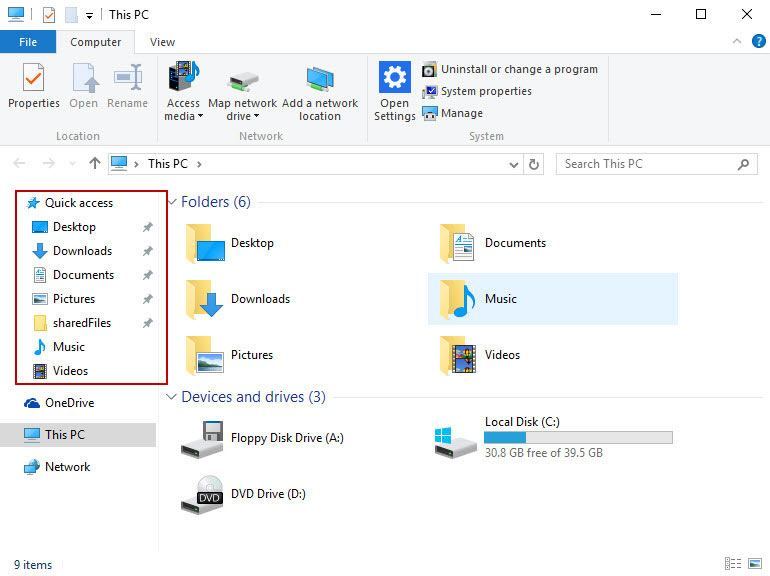
Now if you open the File Explorer it will show you all the local drives reflecting the above change.
But the Quick Access view is still there with all the frequent folders and recent files. The good thing is that you can easily customize Quick Access by configuring the Privacy options in the Folder Options window. For most of the users, this is fine as the Quick Access view is no longer visible by default.
Note: only follow the further procedure if you know what you are doing. Moreover, make sure that you have a good backup of your Windows Registry.
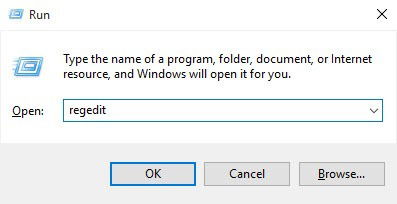
If you want to completely remove the Quick Access view, you need to modify a system registry key. To do that, press “Win + R,” type regedit and press the button.
The above action will open the Windows Registry. Here, navigate to the following key.
HKEY_CLASSES_ROOTCLSID{679f85cb-0220-4080-b29b-5540cc05aab6}ShellFolder
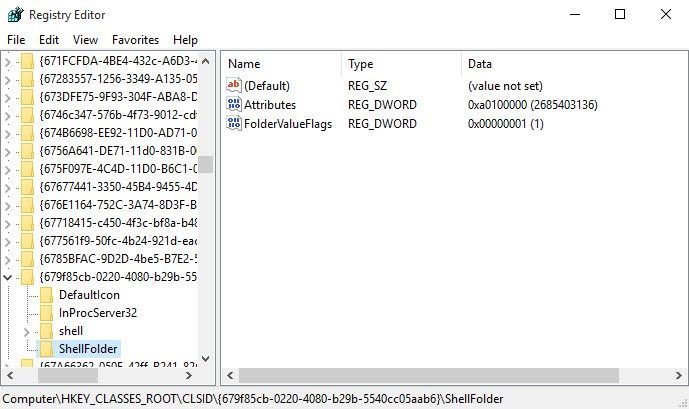
The “ShellFolder” key is a protected system key, and in order to edit the content of the key, we first need to take ownership of that key. If you try to edit the key without taking ownership first, you will receive an error something like this:

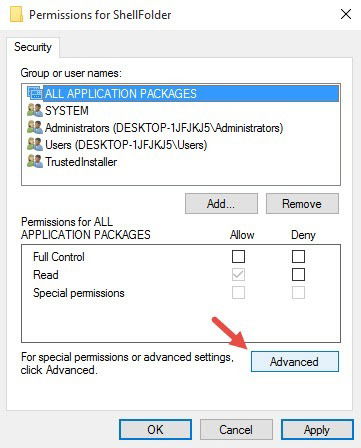
To take the ownership, right-click on the “ShellFolder” key and select the “Permissions” option. Here in the permissions window, click on the “Advanced” button.
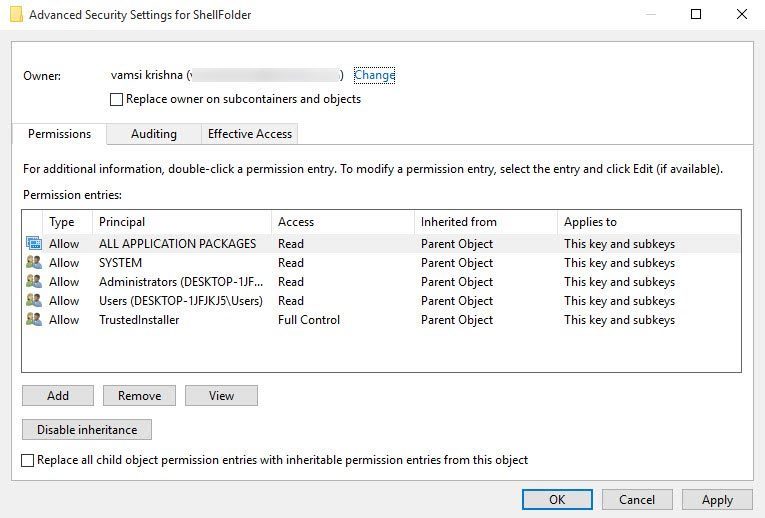
Click on the “Change” link next to the Owner option.

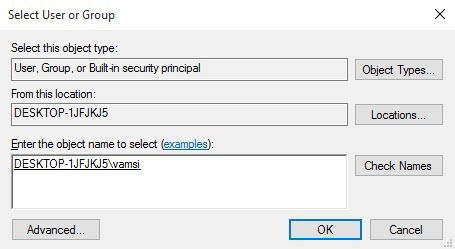
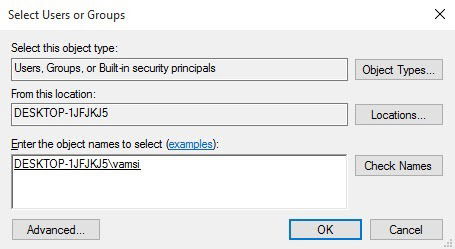
The above action will open the “Select User or Group” window. Here, enter your username, click on the “Check Names” button, and click on the “Ok” button to change the owner.
Once the owner has been changed, this what it looks like. Just click on the “Ok” button to continue.
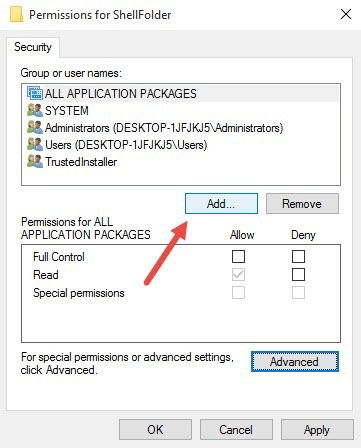
Again in the Permissions window, click on the “Add” button to add your user account to the list of users.
In the “Select User or Group” window, enter your username, click on the “Check Names” button, and click on the “Ok” button to add the user.
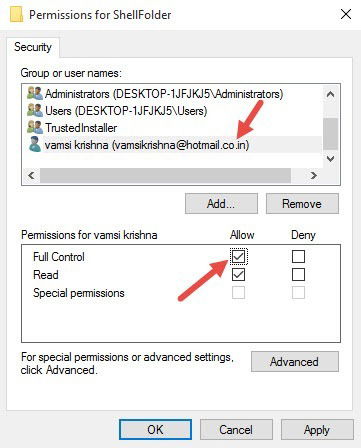
In the Permissions window, select your User account in the list, and select the “Allow” checkbox next to the Full Control option. Next, click on the “Ok” button to save the changes.
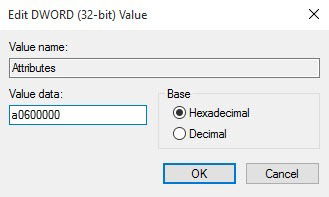
Once you are done taking the ownership of the key, double click on the “Attributes” value in the right panel. Now, change the value data from “a0100000” to “a0600000,” and click on the “Ok” button to save the changes.
Now when you open file explorer, the Quick Access view will no longer be there. If you ever want to revert the changes, simply change the value back.
Do comment below sharing your thoughts and experiences about removing the Quick Access view in Windows File Explorer.
Vamsi is a tech and WordPress geek who enjoys writing how-to guides and messing with his computer and software in general. When not writing for MTE, he writes for he shares tips, tricks, and lifehacks on his own blog Stugon.
Subscribe to our newsletter!
Our latest tutorials delivered straight to your inbox
Sign up for all newsletters.
By signing up, you agree to our Privacy Policy and European users agree to the data transfer policy. We will not share your data and you can unsubscribe at any time. Subscribe
