
Windows PC and laptop users have likely heard of DirectX, especially if their computer is used for gaming. A faulty DirectX installation can cause all sorts of problems with your computer components and applications, so it’s important you know how to reinstall DirectX if necessary.
Content
- What Is DirectX?
- How to Check Your DirectX Version
- When to Reinstall DirectX on Your PC
- Method 1: Windows Update
- Method 2: DirectX End-User Runtime Web Installer
- Method 3: System File Checker
- Frequently Asked Questions
What Is DirectX?
DirectX is a combination of APIs designed by Microsoft to handle a bunch of different tasks related primarily to gaming and multimedia. An Application Programming Interface (API) is a set of rules or procedures that allow computers or computer applications to communicate with one another.
Consoles like the PlayStation 5 and Nintendo Switch all sport identical hardware across all their units, making it easier for developers to optimize their games since they just have to tweak the configurations to match the particular console’s specs. PC gaming is more complex on account of the near-infinite number of combinations you can have when it comes to graphics cards and processors.
DirectX allows the game to communicate directly with your machine’s hardware – the graphics card and processor – allowing the title to run at its best given the specs of your machine. It’s one of the primary reasons Windows has such an overwhelming edge over other operating systems when it comes to running video games.
How to Check Your DirectX Version
It’s worth noting that not all graphics cards are compatible with the latest version of DirectX, so the optimal version for your device might not be the newest. This is especially true for older cards. To check your DirectX version, follow these steps:
- Bring up the “Run” window by pressing Win + R.

- Type in “dxdiag” and hit Enter.

- After a few seconds, the DirectX Diagnostic Tool should pop up, and the DirectX version should be visible toward the bottom of the “System Information.”

When to Reinstall DirectX on Your PC
DirectX is heavily involved in managing 3D graphics, sound, video, and even gamepad functionality when it comes to certain software and games. That being said, if your installation of DirectX malfunctions, it may cause distorted sounds, corrupted graphics, or other serious issues when trying to run programs or games that require it, making it appear as though you have faulty hardware.
The worst-case scenario would be the application encountering a fatal error and not running at all. In cases like these, your best bet at fixing the issue would be to reinstall DirectX, which should add any missing components and repair the ones that are broken.
Method 1: Windows Update
Modern Windows iterations already include DirectX installed as part of the operating system, and it’s regularly updated along with your other system components. The first place you should look when attempting to fix your faulty DirectX installation would be your system updates. It could just be a pending update that’s causing all the issues.
- Click the “Start” button and go to “Settings.”

- Select “Update & Security.”

- Select “Check for updates,” and Windows will start searching for any available updates. If there are any available that, for some reason, were not installed automatically, your OS will find them and make sure you have the latest Windows updates. When it’s done, you’ll likely be asked to restart your PC.

Method 2: DirectX End-User Runtime Web Installer
While more modern Windows variants come with a preinstalled version of DirectX, you can still download an installation file manually and run that instead. This is particularly useful if your Windows updates are halted for some reason or your installation of DirectX causes errors.
- Download the “DirectX End-User Runtime Web Installer” from the Microsoft website. Once you’ve downloaded the installer, launch it to begin the reinstallation process.

- Select the “I accept the agreement” radio button and hit the “Next” button to proceed.

- The next page will give you the option to install the Bing Bar, a toolbar that works with Microsoft Internet Explorer. The “Install the Bing Bar” checkbox is checked by default, so you’ll want to uncheck it if you’re not interested. Once you’re done, click “Next” to continue.
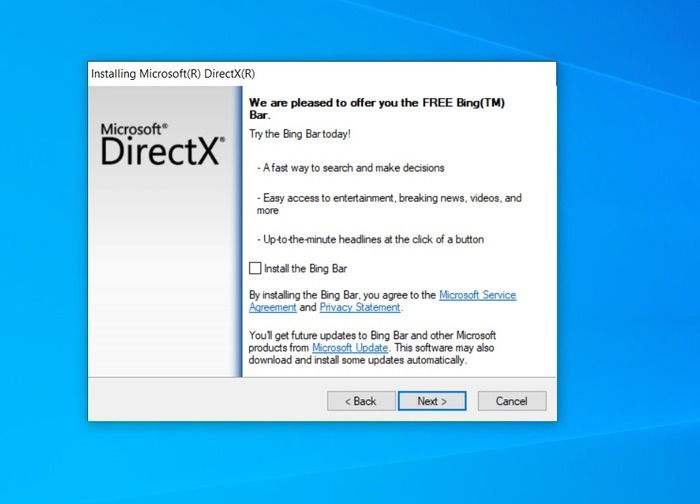
- The installation wizard will check your version of DirectX and determine all the components you need to install. When it’s done, click the “Next” button to start the installation.

- Once the installation is complete, click the “Finish” button and restart your computer. DirectX should update to the latest version.
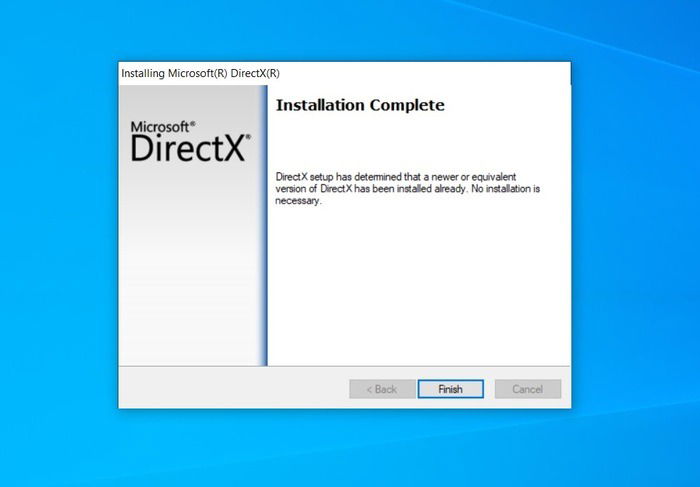
Note: If your PC or laptop already has the latest version of Direct X installed, you’ll be met with a screen explaining that. If this happens, just click “Finish’ to exit the wizard.
Method 3: System File Checker
The last method utilizes the Windows System File Checker (SFC) tool which scans your computer for any corrupted or damaged files and attempts to fix them using a cached copy located in the Windows folder. This includes your DirectX installation.
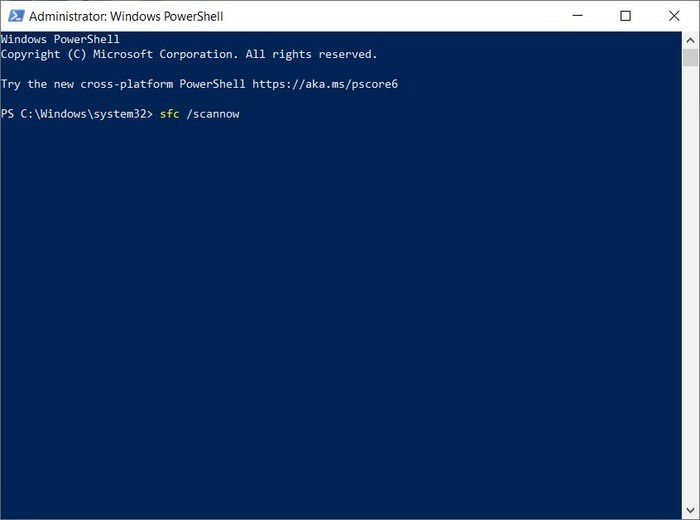
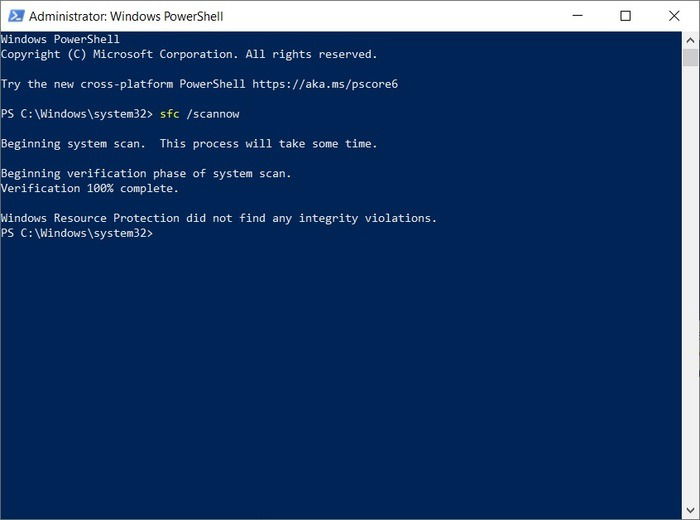
- Launch the Windows PowerShell app using Administrator privileges.

- Type in
sfc /scannowand hit the Enter key.
- The tool begins scanning your machine. The length of time it takes to complete depends largely on the specs of your machine and the size of your hard disk.
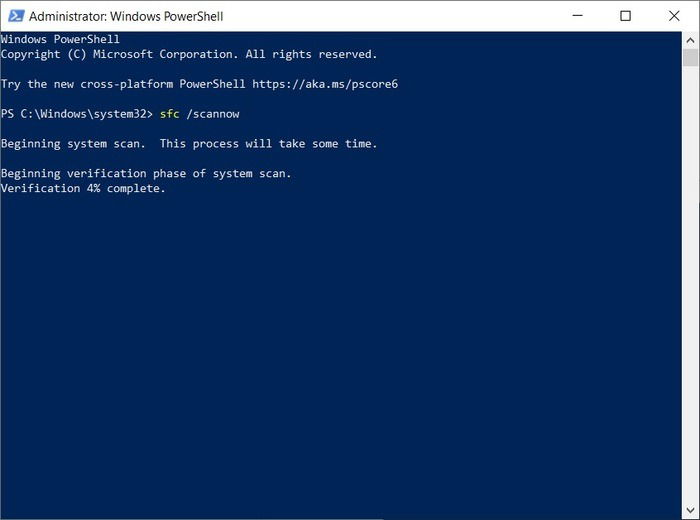
- When the scan is complete, the tool will automatically repair any damaged or corrupted files it finds, leaving you to restart your PC. If no damaged or corrupted files are found, you’ll receive a message explaining that.
Given that there’s no safe and simple way to completely uninstall DirectX on machines with newer Windows versions, the above methods are the best way to reinstall DirectX on your PC or laptop to fix any issues caused by a bad installation. But if your games still won’t run after a successful DirectX reinstall, you’ll want to make sure that you’re not dealing with a faulty graphics card.
Also read: Graphics Card Not Working? Here Are the Causes and Fixes
Frequently Asked Questions
1. What is the DirectX diagnostic tool?
This is a built-in Windows tool that shows you all the DirectX-related drivers and components that are currently available on your machine. It is a good tool to check important computer specs, including your Windows version, processor, memory, graphics card, audio device, and DirectX version.
2. How does DirectX enhance video game performance?
Since video game consoles have identical specs for all their units, it’s easier to optimize the graphical and audio settings across all of the machines. PCs and laptops, on the other hand, support a variety of different graphics card models and other parts, so it would be a pain to have to optimize a game individually for each component. That’s what makes DirectX so important.
For the Windows version of PC games, developers design their games according to how the DirectX API functions. Tapping into the DirectX API allows a game to access a PC or laptop’s graphics card and audio card directly, creating a smoother, tailor-fit experience depending on your machine’s specifications.
To further your gaming experience, find out which is the best live-game streaming platform: Facebook Gaming vs. Twitch vs. YouTube Gaming. Also, check your knowledge with this glossary of gaming terms.
Princess is a freelance writer based in Croatia. She used to work as an English teacher in Hokkaido, Japan before she finally changed careers and focused on content writing & copywriting, while running their own digital marketing company in Europe. For 5 years, she has written many articles and web pages on various niches like technology, finance, digital marketing, etc. Princess loves playing FPS games, watching anime, and singing.
Subscribe to our newsletter!
Our latest tutorials delivered straight to your inbox
Sign up for all newsletters.
By signing up, you agree to our Privacy Policy and European users agree to the data transfer policy. We will not share your data and you can unsubscribe at any time. Subscribe
