Even if you are a casual user, I am sure you have tons of folders in your computer that can make it difficult to find the files you want sometimes. The Windows Explorer application in Windows doesn’t make it any easier for you to locate your files. Wouldn’t it be great if you could mount your frequently accessed folder as a virtual drive (such as E:, F: etc.) in Windows so they could appear in the “Computer” list and you could easily access your folder with a single click?
Visual Subst is a small tool that allows you to link your favorite folders to virtual drives. It is only 78kb in size and doesn’t require any installation.
Mounting a folder as a virtual drive with Visual Subst
1. Download the zipped file from the Visual Subst website. It is only 78kb in size.
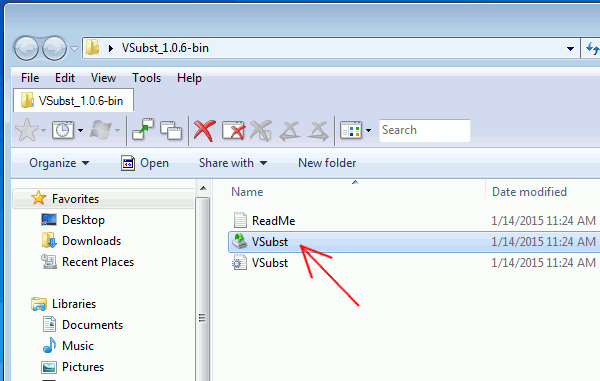
2. Extract the archive and double-click the “VSubst” application to run it.
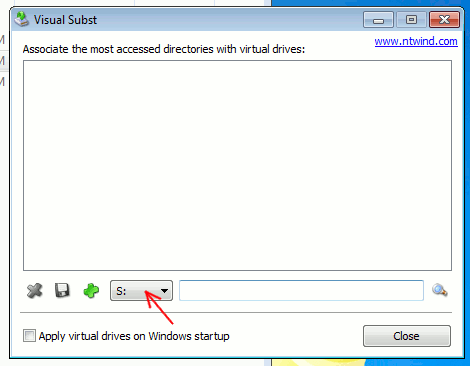
3. In the window that opens, first click the dropdown field to select the Drive letter you want to assign to the folder. In this case, I selected “S:”.
4. Next, click the “magnifying glass” icon to locate the folder you want to mount as a drive. In this case, I selected my Dropbox folder.
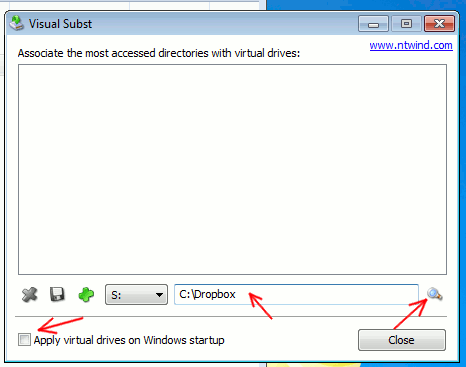
Optionally, you can check the box beside “Apply virtual drives on Windows startup” if you want this folder to be accessible right from the start.
Lastly, click the green “+” icon. This will create the virtual drive. Now open your Windows Explorer and you should see the newly created drive in the Computer list.
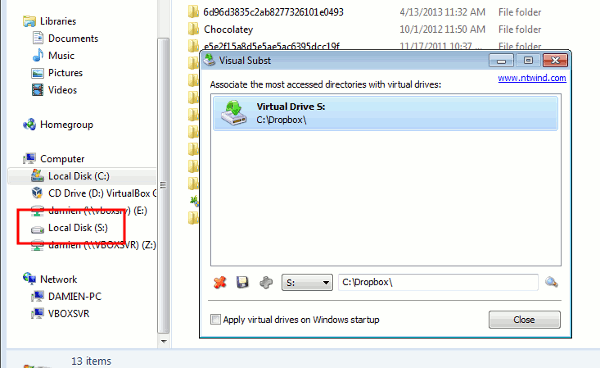
To delete it, simply select the entry and click the “x” icon.
Manually creating the virtual drive
If you don’t want to rely on third-party software, here is another way you can do it.
1. Open Windows Explorer and navigate to the Startup folder by pasting this line to the location bar:
C:UsersusernameAppDataRoamingMicrosoftWindowsStart MenuProgramsStartup
Note: replace the “username” with your login username.
2. Right-click and select “New -> Shortcut.”
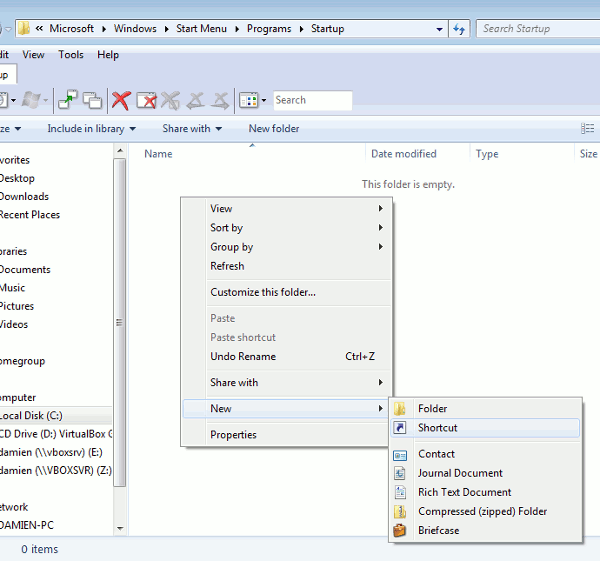
3. For the location of the item, enter the following command:
subst X: "path/to/your/folder"
Replace “X:” with the drive letter you want to use and “path/to/your/folder” to the folder that you want to mount. For example: subst S: "C:Dropbox"
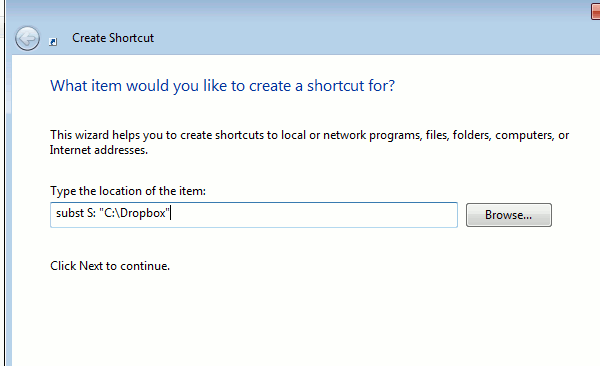
4. Click Next. Give a name to this shortcut.
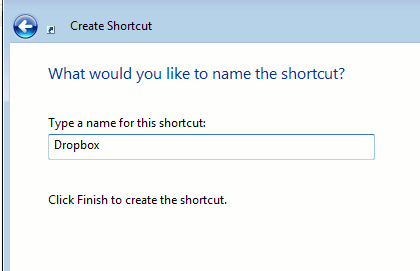
Click Finish. You should now see a new shortcut in the Startup folder. Double click on it and it will be mounted as a virtual drive. Since it is in the Startup folder, it will be mounted automatically on the next (and every) startup.
To delete the virtual drive, simply delete the shortcut file.
Conclusion
Mounting a folder as a virtual drive allows you to quickly access your folder with a single click. This is particularly useful for cloud storage services like Dropbox, Google Drive and OneDrive that reside in their own folders. Try it out and let us know if this is useful to you.
Damien Oh started writing tech articles since 2007 and has over 10 years of experience in the tech industry. He is proficient in Windows, Linux, Mac, Android and iOS, and worked as a part time WordPress Developer. He is currently the owner and Editor-in-Chief of Make Tech Easier.
Subscribe to our newsletter!
Our latest tutorials delivered straight to your inbox
Sign up for all newsletters.
By signing up, you agree to our Privacy Policy and European users agree to the data transfer policy. We will not share your data and you can unsubscribe at any time. Subscribe
