
For the first time, you can install Android apps on Windows. Android apps, games, and notifications are natively supported on Windows 11. However, the official Amazon Appstore is only available to Windows Insiders.But thanks to a few package alterations on the original Windows Subsystem for Android (WSA), you can easily operate Google Play services on Windows 11. Follow the instructions in this guide to install Google Play Store on your Windows 11 device.
Content
- What Is Windows Subsystem for Android?
- Install Google Play in Windows 11 Using MagiskOnWSA
- Things to Do Before Installing Google Play Store Using MagiskOnWSA
- Installing WSA and Google Play Using MagiskOnWSA
- Final Check: Things to Do After Installing Google Play Store on Windows 11
- Malware Alert for Powershell Windows Toolbox
- Frequently Asked Questions
Also read: How to Fix “Something Went Wrong Try Again” Issue in Google Play
What Is Windows Subsystem for Android?
Windows Subsystem for Android (WSA) is a Windows 11 component that runs Android apps on a Windows device in a Hyper-V virtual environment.
The program is designed as a virtualized Android operating system based on the Android Open-Source Project (AOSP). Once installed, Windows Subsystem for Android can be accessed from the “Apps & Features” section of Windows 11 and may be uninstalled from there.

Through the Microsoft Store, Windows Subsystem for Android integrates with Amazon Appstore, which is an official partner that brings the Android experience to Windows devices. Currently, both Windows Subsystem for Android and Amazon Appstore are only available to U.S.-based Windows Insiders in the Beta Channel. To become an insider, follow the last section of this installation guide.

Microsoft is currently running the Windows Subsystem for Android Beta to improve the user experience of Android apps in Windows 11. While they do that, you can sidestep the whole insider procedure to run a full-fledged Google Play services experience on your Windows device.
Also read: 9 Awesome Projects that Allow You to Run Android on PC
How to Install Google Play in Windows 11
Currently you can use an open source application called MagiskOnWSA to install WSA and Google Play Store. That is, provided you meet the basic prerequisites of such an installation as we’ve covered below. The method won’t work on a Windows 10 PC. You should have migrated to Windows 11 to install Google Play on your device.
Install Google Play in Windows 11 Using MagiskOnWSA
In this method, we are using a root access tool like Magisk. A developer has modified the official Microsoft WSA package to offer an integrated installer that combines Magisk with open Google Apps, which are integrated into most Android devices. It is a safe download link through a GitHub repository and integrates well in the Windows 11 environment.
- Sign in to your online GitHub account and visit the repository link to install the custom WSA.
- Click “Fork” to save the repository to your GitHub profile.

- You should clearly see the “forked from” menu change in your GitHub repository. Click “Actions” to proceed.
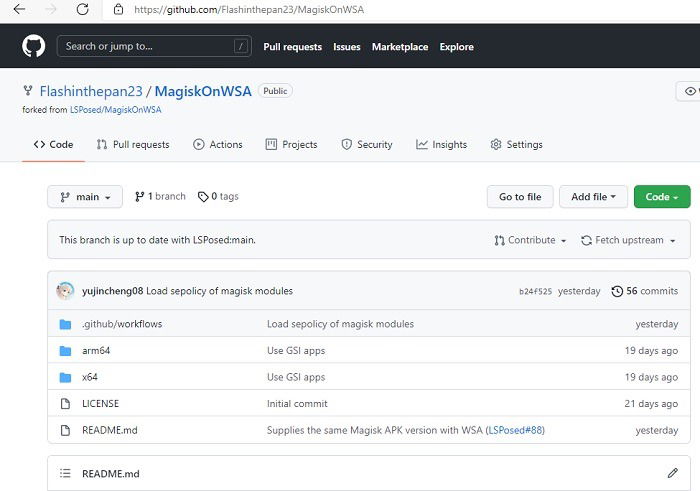
- If your GitHub repository doesn’t support workflows, then you need to enable that option by clicking “I understand my workflows, go ahead and enable them.”

- To prepare the download files, click “Run workflow.”

- You should now see a status message that reads: “Workflow run was successfully requested.” You have to choose your Android apps package, such as “pico,” the absolute minimum, or “full,” which contains stock AOSP apps.
- The workflow starts and displays an “in progress” status. Wait a few minutes for the process to complete.

- Once the download files have been prepared, you should see a status that reads: “xx jobs complete.” Click “Show all jobs” to review the tasks.
- You should see the WSA software with Magisk and Android apps software. Click the suitable download link, depending on your computer version (ARM4 or x4).

- The download initiates, and the repository zip file will be downloaded to your PC location.

Also read: Fix Google Play Services Battery Drain on Android
Things to Do Before Installing Google Play Store Using MagiskOnWSA
1. Check system requirements
Ensure your device meets the following system prerequisites that are essential to install Google Play on Windows 11.
- A minimum 8 GB of RAM
- The system should already have migrated to Windows 11. If you’re still on Windows 10, use this guide to move to Windows 11.
2. Enable Developer Mode
- Go to Windows 11 Search box or Start menu search and find “Developer settings.”
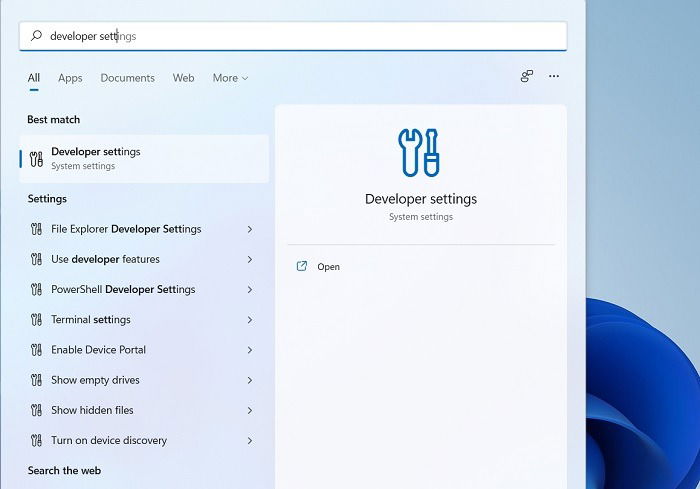
- Turn “Developer mode” on to be able to install apps from any source, including loose files.

3. Set Up a VM to Run Android Apps
Since WSA is a Hyper-V based environment, you need to configure the required virtualization settings on your Windows 11 device.
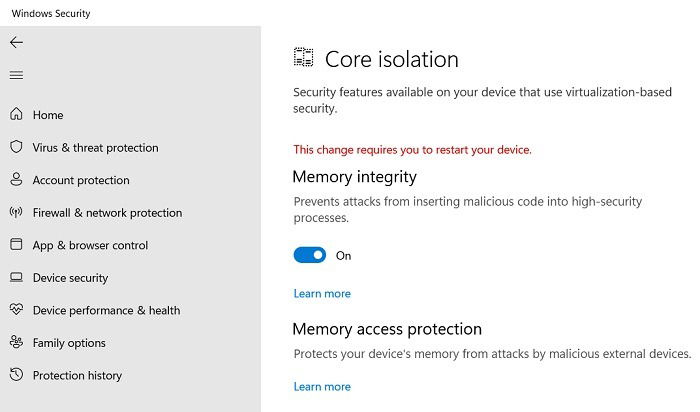
- Type “Windows security” and go to “Device security” in the search box.
- Under “Core Isolation,” enable “Memory integrity” to configure the changes.
- Restart the device to apply the changes. You should see a status that reads: “Updates are underway. Please keep your computer on.”
- After the device has restarted, go to the search menu and type “Turn Windows features on or off.”
- Enable the options for “Virtual machine platform” and “Windows Hypervisor platform.”

- It will take a few minutes for the virtualization changes to be applied on your device.

- Your PC will restart to affect these requested changes.
- You will see an update status that reads: “Customizing features for you. You’re 100% there. Please keep your computer on.”

4. Change Region Settings to US
Currently, WSA and its included Google Play settings are only supported for the United States. Even if you’re not living there, you should still go to “Region Settings” from the search menu and change the Country/Region to U.S. and the recommended language to U.S. English.

Installing WSA and Google Play Using MagiskOnWSA
To install Windows Subsystem for Android (WSA) and the included Google Play on your Windows 11 device, follow the steps below.
- Copy the downloaded zip file of WSA and paste it to an accessible location on your PC, such as the desktop.
- Using 7-ZIP, WinRAR or other archival software, extract all the files to a folder at the same location.

- Navigate inside the unzipped folder and look for an “Install” file, which is a PowerShell script. It can be right-clicked and opened in PowerShell.

- The PowerShell window will open to execute the script. There may be a few permissions required. Enter “a” to confirm all operations.

- Wait just a few seconds for the deployment operation to complete successfully.

- The Powershell script exits automatically, allowing you to easily search for Windows Subsystem for Android on your Windows 11 device. It’s been installed along with Google Play, which is an internal component of the package.

Also read: How to Get Classic Volume Mixer Back in Windows 11
Final Check: Things to Do After Installing Google Play Store on Windows 11
After a successful installation, you need to take a few more steps to initialize WSA.
- Go to WSA Settings from a Start menu search and make sure “Developer mode” has been enabled.
- Configure the “Optional diagnostic data” for WSA. You may keep it either on or off.
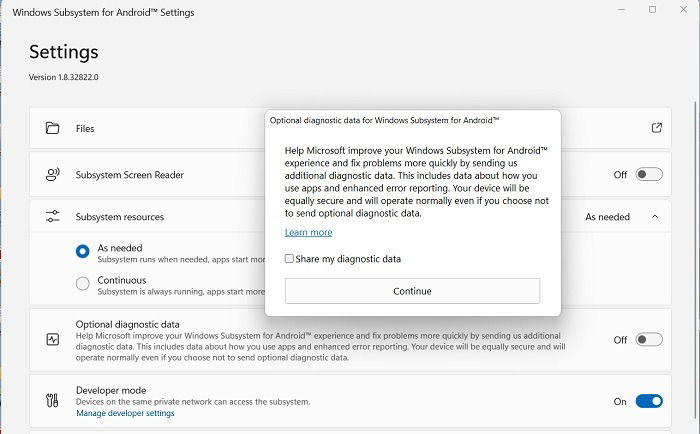
- Wait a few seconds for the WSA apps to initialize. This operation will require at least 8 GB RAM to be successful.

- Go back to the Search menu and open Google Play Store.

- You will be asked to sign in to your Google Play Services account. Be sure to wait for the updates to finish.
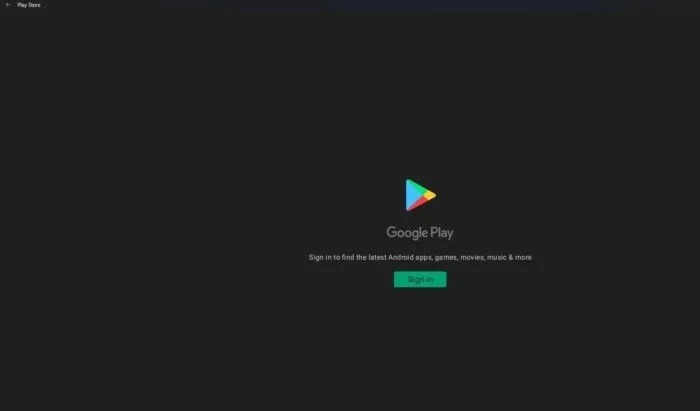
- Check whether Google Play Store has been installed properly on your device and whether the apps are downloading easily.

Also read: Top 7 Fixes for Google Play Store My Apps Not Showing
Malware Alert for Powershell Windows Toolbox
We had previously covered a solution called “Powershell Windows Toolbox” which was available as an open-source GitHub code. It has now suddenly been taken offline due to malware concerns, which were nonexistent when we last published this article.
If you installed Play Store using Powershell Windows Toolbox, here’s how to easily resolve related malware issues if any:
- Using Microsoft Defender Offline Scan: Open Windows Security from the Search menu and navigate to “Virus and threat Protection -> Current threats -> Scan options.” Choose Microsoft Defender Offline scan which scans and repairs existing threats on your device, without booting to your operating system. Restart the device when done.

- Using System Restore: With System Restore, you can return your Windows system to the way it was before installing Google Play Store. Open System Restore from the Search menu and click the “System Restore” button on your PC. Follow the on-screen instructions to reset the system to a previously stored Restore Point date. Use our System Restore guide if you need help completing the process.

Also read: The Ultimate Guide to Check Windows 11 Compatibility with Your PC
Frequently Asked Questions
1. Why will Google Play not let me sign in on a Windows 11 device?
Sometimes due to some unknown settings on your PC, the downloaded MagiskOnWSA file may not be compatible with your Google account on Play Store settings. If you’re facing Play Store sign-in problems after installation, perform the following remedial steps:
- Check whether your Wi-Fi or Internet connection is turned on and working properly.
- Download and install this software. There is an .exe file which needs to be extracted and installed.
- Go back to the Windows Subsystem for Android Settings and turn the “Developer Mode” on as usual.
- Open the ADB file in Windows Terminal. Run the command:
.adb.exe connect 127.0.0.1:58526. - Go back to the Play Store and click “Sign in” to log back in using your Google account.
2. How do I turn off Windows Subsystem for Android?
Windows Subsystem for Android (WSA) can consume substantial CPU and other resources, especially if too many Android apps are open at the same time. To turn it off, go to WSA Settings from the search menu and turn WSA off. This means all apps will immediately close, and the WSA will restart the next time you open an installed app.

3. Are there any performance issues when you run Windows Subsystem for Android?
As the official Windows Subsystem for Android (WSA) is still a work in progress, with Microsoft testing it on Windows Insiders, you can expect some performance delays, lags and visual problems.
Some of the performance issues include:
- Letter and Pillar boxing: when the aspect ratio of an app window does not align well with your PC resolution, you may have problems such as the window being wider than its height or narrower than its length.
- Mouse input problems: as the apps are designed for a mobile interface, some mouse inputs may not work, such as right-click, hover effects, drag and drop.

Sayak Boral –
Staff Writer
Sayak Boral is a technology writer with over eleven years of experience working in different industries including semiconductors, IoT, enterprise IT, telecommunications OSS/BSS, and network security. He has been writing for MakeTechEasier on a wide range of technical topics including Windows, Android, Internet, Hardware Guides, Browsers, Software Tools, and Product Reviews.
Subscribe to our newsletter!
Our latest tutorials delivered straight to your inbox
Sign up for all newsletters.
By signing up, you agree to our Privacy Policy and European users agree to the data transfer policy. We will not share your data and you can unsubscribe at any time. Subscribe