
If you have a number of user accounts on your Windows 10 computer that you don’t want to see on the login screen, you can now hide the particular user accounts on the Windows 10 login screen with a simple registry hack.
Before you do so, you must know the name of the account that you want to hide. This is not the full name that you have entered on your computer. This is another name that your computer uses to uniquely identify you on your computer.
Note: If you happen to use the Pro version of Windows 10, please skip the following section and go to the second section where you can use the “Local Users and Groups” panel to find out your account name.
Using Accounts Manager to Find Out Account Name
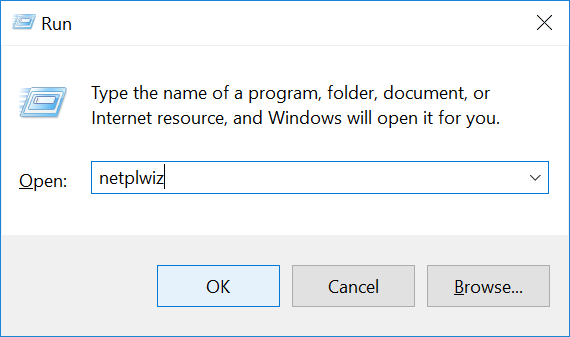
1. Launch the Run utility on your computer by pressing the “Windows + R” key combination. When it opens, type in netplwiz, and click on “OK” to open accounts manager.
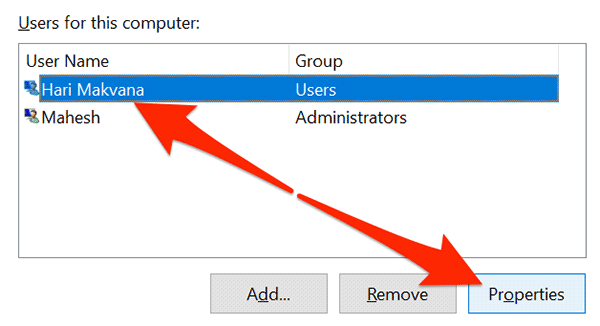
2. On the following screen, you will see all of the user accounts on your computer. Click on the one that you want to hide, and then click on “Properties” to open the Properties panel for that user account.
3. On the following screen you should be able to see the account name in the “User name” field.
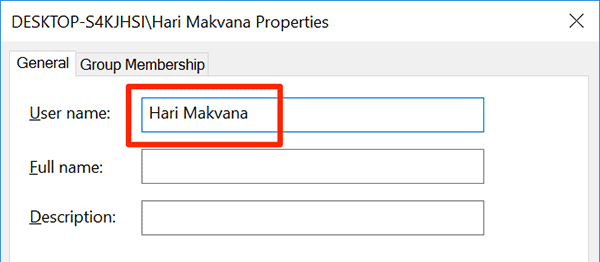
Note the account name as you are going to need it in the following steps.
Here are the steps for the Pro users
Using Local Users and Groups to Find Out Account Name
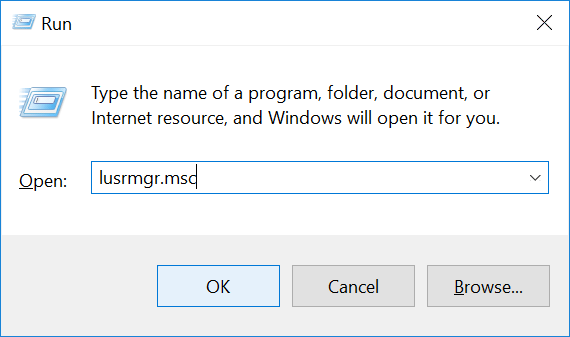
1. Launch Local Users and Groups on your computer by opening the Run utility and typing in lusrmgr.msc and pressing Enter.
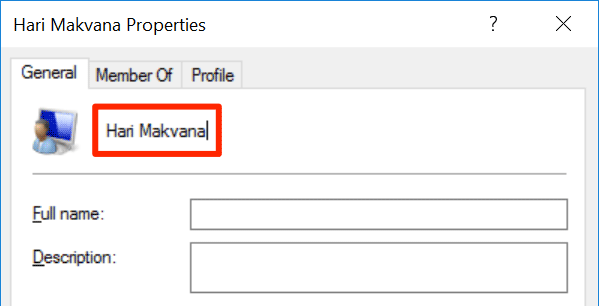
2. Click on “Users” on the following screen and you should be able to see the users list. Double-click on the user name you want to hide.
You should be able to see the account name if the user is highlighted in the following screenshot.
Hide Specific User Accounts from the Sign-in Screen in Windows 10
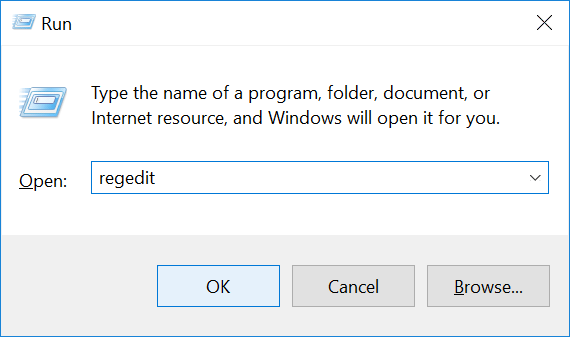
1. Open the Run utility by using the “Windows + R” key combination, and then type in regedit and click on “OK” to open the Registry Editor for your computer.
2. When the Registry Editor opens, head to the following path by clicking on the directories in the left-panel:
HKEY_LOCAL_MACHINESOFTWAREMicrosoftWindows NTCurrentVersionWinlogon
3. Once you are at that path, right-click on the directory named “Winlogon” and select “New” followed by “Key” to create a new key inside that directory.
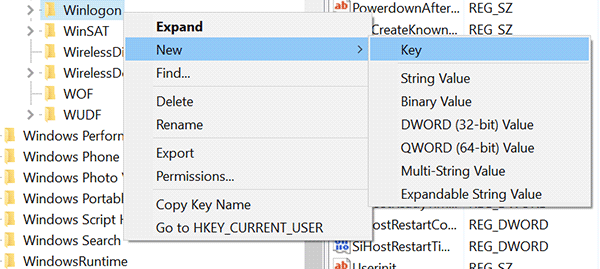
4. Enter “SpecialAccounts” as the name of the key and press Enter.
Right-click on the newly created key “SpecialAccounts,” and select “New” followed by “Key” to create a new key.
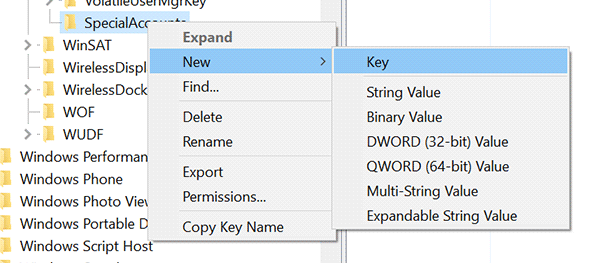
5. Enter “UserList” as the name of the key and press Enter. Right-click on the “UserList” key and select “New” followed by “DWORD (32-bit) Value” to create a new DWORD in this directory.
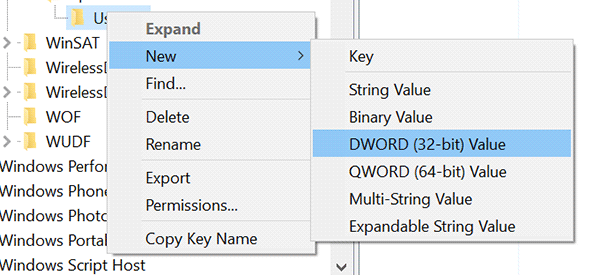
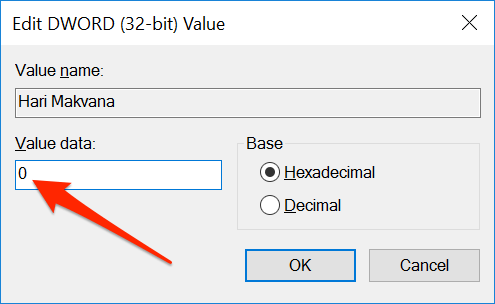
6. As for the name of the DWORD, enter the account name that you obtained using the previous section. It is the name that you have noted from the above section.
Enter “0” (zero) in the “Value data” field, and click on “OK” to save the changes.
7. Restart your computer, and you should no longer see that account on the sign-in screen.
While the account is hidden, it still exists in your computer. You can still log in with its username and password.
Conclusion
If there’s a user account that you wish to hide from the sign-in screen on your Windows 10 computer, you have a way to do so using the built-in Registry Editor on your computer.
Mahesh Makvana is a freelance tech writer who’s written thousands of posts about various tech topics on various sites. He specializes in writing about Windows, Mac, iOS, and Android tech posts. He’s been into the field for last eight years and hasn’t spent a single day without tinkering around his devices.
Subscribe to our newsletter!
Our latest tutorials delivered straight to your inbox
Sign up for all newsletters.
By signing up, you agree to our Privacy Policy and European users agree to the data transfer policy. We will not share your data and you can unsubscribe at any time. Subscribe
