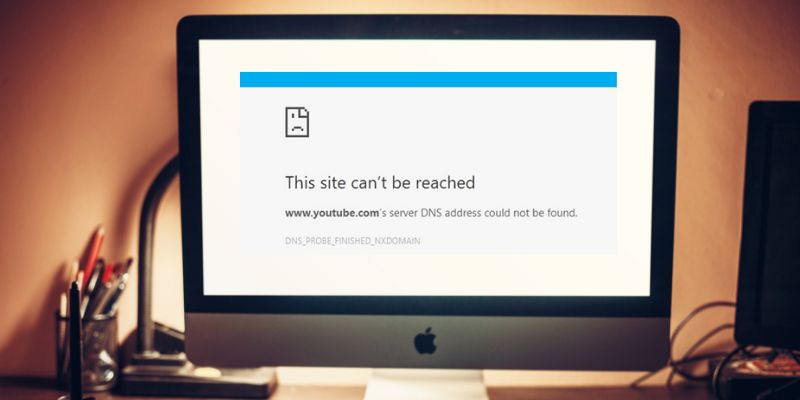
When you type a host address or URL into your browser, the DNS resolver will contact a DNS server to identify the IP address connected to that hostname. That address goes back to your computer, and you see the website you want to access. But sometimes you will get an error telling you that the DNS Server is not responding.
To fix this problem, there are several different things you can try. To make sure that the website is not causing the error and your Internet connection is working correctly, do this quick check first.
Also read: How to Fix DNS Errors and Regain Access to the Internet
1. Check the Source of the Problem
Access the website from another device, perhaps using a 4G connection, to see if it loads. If it works correctly, the problem is either with your router or the device. Connect to the router with the other device to see if the site loads that way. If it does, you are probably looking at a problem with your machine.
2. Uninstall and Re-install Network Drivers
Before you attempt this fix, make sure you have the needed drivers available as a backup. Go to the PC manufacturer’s website, and download the latest network adapter driver. Since your PC can’t connect to the Internet, use a different PC to download a driver and save it to a USB flash drive so you can install it on your PC if needed. All you need to know is your PC’s manufacturer and model name or number.
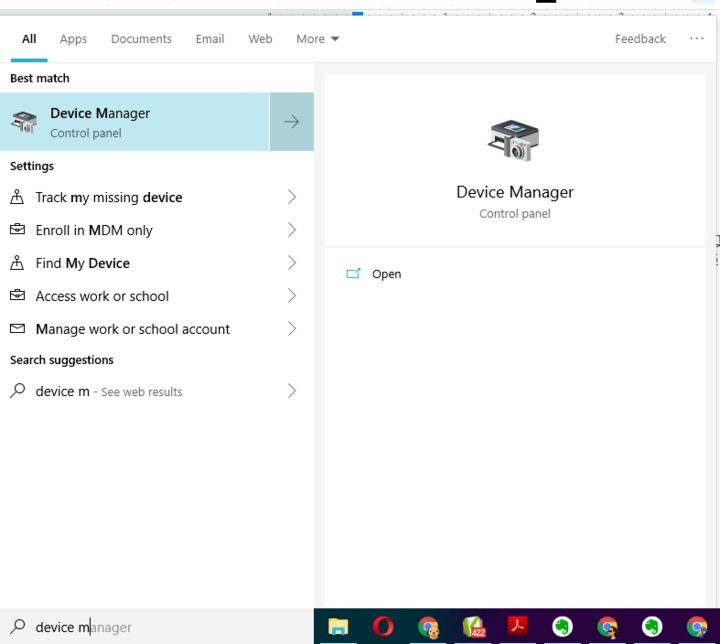
1. In the search box on the taskbar, type “Device Manager,” and find Network Adapters in the list of results.
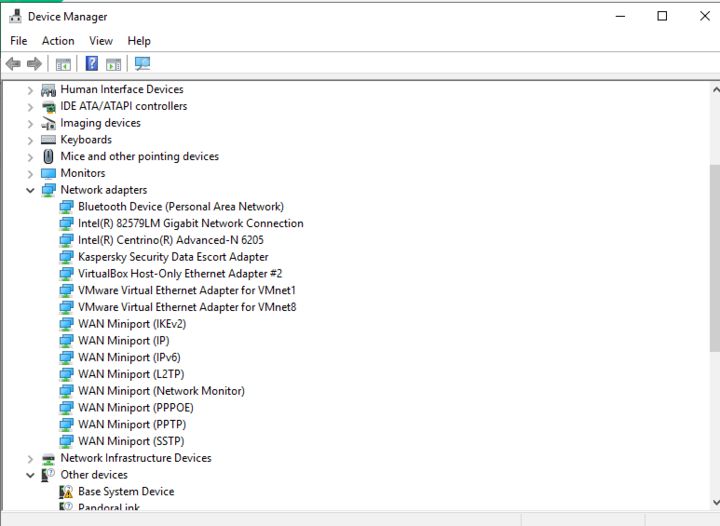
2. Expand Network adapters and locate the network adapter for your device.
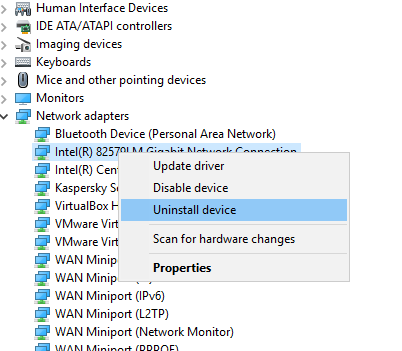
3. Right-click the network adapter.
4. Select Uninstall device.
5. Click the “Delete the driver software for this device?” checkbox and click Uninstall.
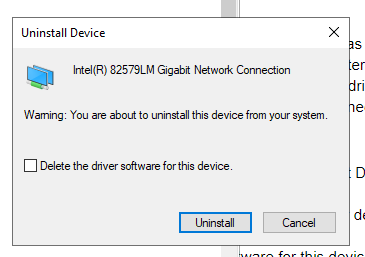
6. After uninstalling the driver restart your machine.
After your PC restarts, Windows will automatically look for and install the network adapter driver. Check to see if that fixes your connection problem. If Windows doesn’t automatically install a driver, try to install the backup driver you saved before uninstalling.
3. Clear the DNS Cache
Your DNS cache stores the locations (IP addresses) of web servers that contain web pages which you have recently viewed so your computer can access them more quickly. Clearing it may eliminate any errors and let your machine recheck the DNS server for the address.
1. Type cmd in the search window and open Command Prompt as an administrator.
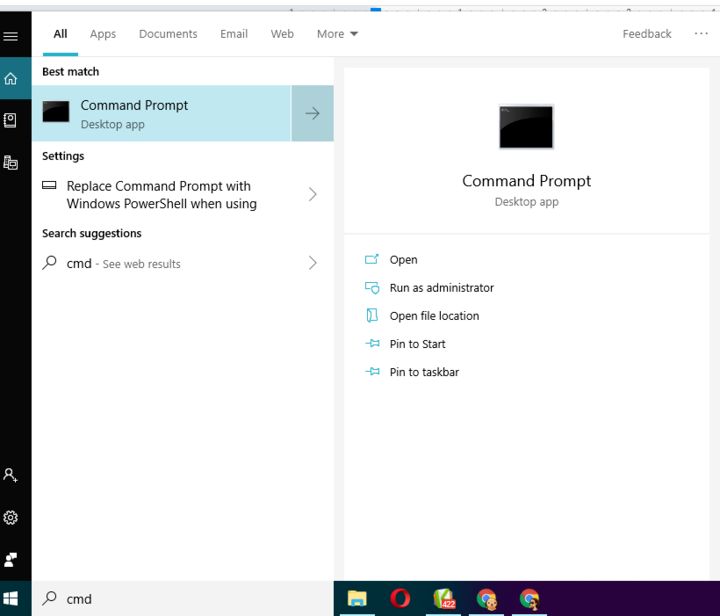
2. Type the following into the Command prompt window:
ipconfig /flushdns

3. Check to see if this has resolved the issue.
4. Update Network Drivers
A device driver is a piece of software that allows your operating system to start, use and control a hardware device. If they are not up to date, they may fail to work. Here’s how to update them.
1. Go to the Control Panel and open “Device Manager.”
2. Expand Network adapters by clicking on the triangle in front of it.
3. Right-click on your network.
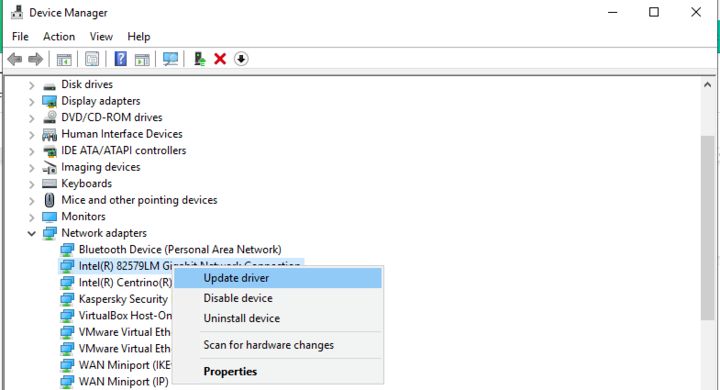
4. Click “Update Drivers.”
5. Let the computer check for updates to the driver.
6. Install the drivers if an update is found.
Also read: How to Find the Best Alternative DNS Server
5. Update Your Router Software to the Latest Version
Just like the drivers need to be kept up to date to work correctly, it is also true for the software that runs your router. Each manufacturer of routers will have a different way to do this. Start checking online by searching for “update [name of router]” to learn how to do this for your make and model.
6. Turn Off Microsoft Virtual Wi-Fi Miniport Adapter
This option may or may not be available on your machine. If it is, the following instructions show how to disable it.
1. Go to the Control Panel.
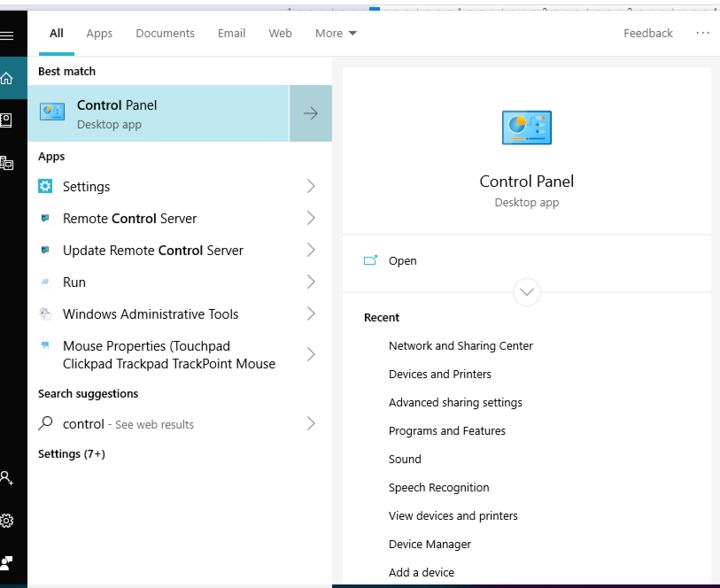
2. Expand Network adapters by clicking on the triangle in front of it.
3. Right-click on the Virtual Wi-Fi Miniport Adapter (if it is there).
4. Click Disable.
7. Alter TCP/IP settings
TCP/IP, or the Transmission Control Protocol/Internet Protocol, is a suite of communication protocols used to interconnect devices on the Internet.
1. Type control panel into the search box.
2. Click Network and Internet.
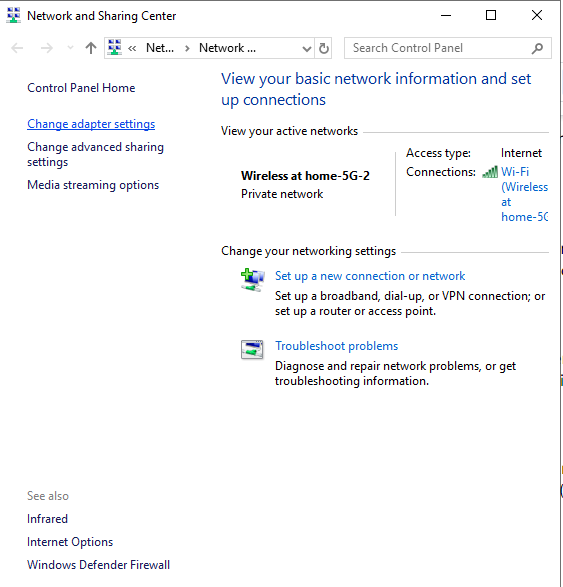
3. Open the network and sharing center.
4. Click “Change Adapter Settings” on the left side of the window.
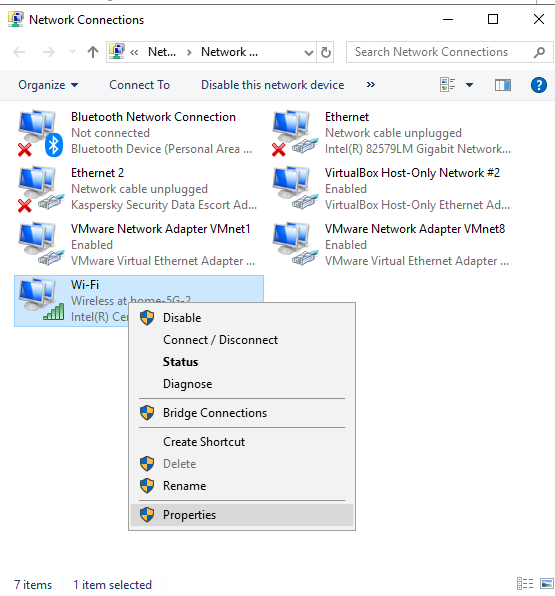
5. Right-click on the Wi-Fi network you are using.
6. Click Properties.
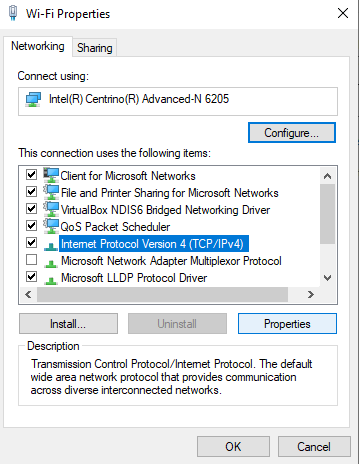
7. Select “Internet Protocol Version 4 (TCP/IPv4)” and click the Properties button.
8. On the next screen select “Obtain IP Address automatically” and “Obtain DNS Server Address automatically.”
9. Hit OK.
There are still other ways to try to solve the DNS Server not Responding Error, but these are some of the most common. Hopefully, one of them will work for you. Let us know your results.
Also read: 9 of the Best Dynamic DNS Providers You Can Use for Free
Tracey Rosenberger spent 26 years teaching elementary students, using technology to enhance learning. Now she’s excited to share helpful technology with teachers and everyone else who sees tech as intimidating.
Subscribe to our newsletter!
Our latest tutorials delivered straight to your inbox
Sign up for all newsletters.
By signing up, you agree to our Privacy Policy and European users agree to the data transfer policy. We will not share your data and you can unsubscribe at any time. Subscribe
