When it comes to Windows customization, changing desktop wallpaper is the first and foremost thing most of us do. In fact, I use the Dynamic Theme app to automatically set a new Bing image as the wallpaper on a daily basis.
Often times we try to set high-quality images as our desktop wallpapers. However, when you set a JPEG image as your wallpaper, Windows automatically compresses the image and reduces the quality of the said image. To avoid that and enjoy your desktop wallpaper in its original quality, here’s how to modify or disable wallpaper compression in Windows 10.
Note: though I’m showing this in Windows 10, the same steps are applicable to Windows 7 and 8.
Why Is Windows Compressing the Wallpaper?
This wallpaper compression feature was first introduced in Windows Vista. When you set a JPEG image as the wallpaper, Windows will compress and reduce it to 85% of its original quality. By compressing and reducing the image quality, Windows is able to reduce the original image size, and save some memory and disk space in the process.
Modify or Disable Wallpaper Compression
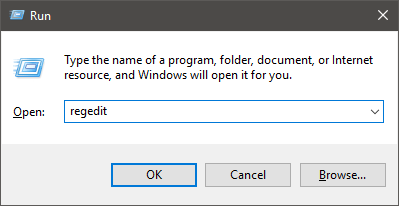
To change or disable wallpaper compression in Windows, we need to create a new registry value and configure it. To start, press “Win + R,” type regedit and press the Enter button to open Windows Registry. Alternatively, you can also search for it in the Start Menu.

After opening the Windows Registry, navigate to the following location. If you are using Windows 10 with Creators Update, simply copy the below path, paste it in the address bar and you will be taken to the required location automatically.
HKEY_CURRENT_USERControl PanelDesktop

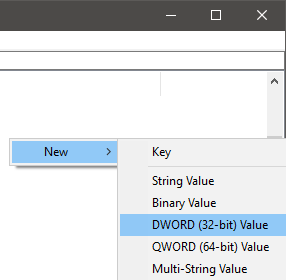
Right-click on the right panel and select the “New” option and then “DWORD (32-bit) Value.”

Name the new DWORD value as “JPEGImportQuality” and press the Enter button.

After creating the value, double-click on it to set the image quality. As mentioned earlier, Windows compresses the JEPG wallpaper to 85% of its original quality. If you want to disable the wallpaper compression, then select the “Decimal” radio button, enter “100” in the value data field and click on the “OK” button.

If you want to set a custom quality setting, then enter a value between 0 and 100. For instance, if you want the image quality to be 90% then enter 90 in the value data field and click the OK button.
Once you are done making the changes, this is how it looks in the Registry Editor.

Just restart your system or sign out and sign in to make the changes take effect. From this point forward, you can enjoy your desktop wallpapers in their full glory.
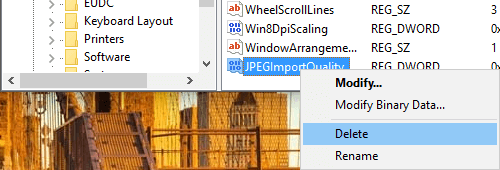
If you want to revert back, simply right-click on the newly created value and select the option “Delete.”

That being said, if you just don’t want to mess with the Registry Editor just to disable wallpaper compression, then simply use a PNG image as your wallpaper, and Windows won’t compress it like the JPEG image.
Do comment below sharing your thoughts and experiences about using the above method to change or disable wallpaper compression in Windows.
Vamsi is a tech and WordPress geek who enjoys writing how-to guides and messing with his computer and software in general. When not writing for MTE, he writes for he shares tips, tricks, and lifehacks on his own blog Stugon.
Subscribe to our newsletter!
Our latest tutorials delivered straight to your inbox
Sign up for all newsletters.
By signing up, you agree to our Privacy Policy and European users agree to the data transfer policy. We will not share your data and you can unsubscribe at any time. Subscribe
