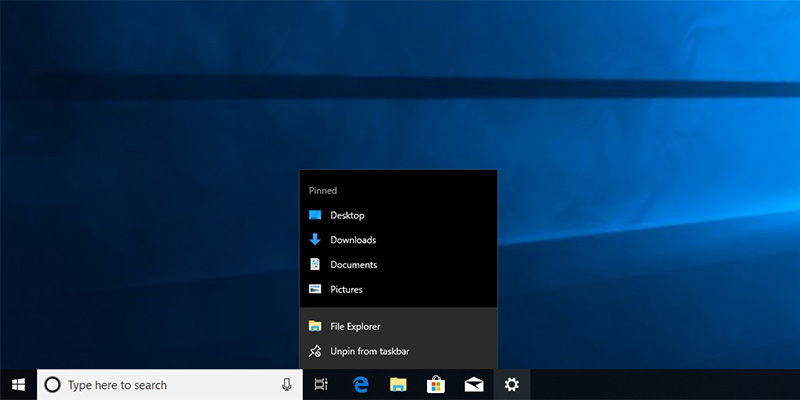
If you’ve ever right-clicked on an app icon on the taskbar or in the Start menu, you might’ve seen that Windows shows you a list of recent items that you’ve opened with that application. In fact, Windows also shows you the recently opened files and frequently accessed places in the File Explorer’s File menu, too. This is pretty helpful for some users. However, if you are not using this feature or don’t like showing your recent items and frequent places for privacy reasons, you can easily disable them.
Also read: How to Delete Windows Explorer Address Bar History in Windows
Disable Recent Items from Settings App
If you just want to disable recent items and frequent places for your user account, only then you can use the Settings app to do that. It is faster and easy to configure from the Settings app; there’s no need for registry hacks or policy changes.
1. To open the Settings app, click on the “Notifications” icon appearing at the bottom-right corner, and then click on the “All Settings” button.
2. In the Settings app, go to “Personalization” and then “Start” appearing on the left sidebar. On the right panel, toggle the switch under “Show recently opened items in Jump Lists on Start or the taskbar” to “Off.”
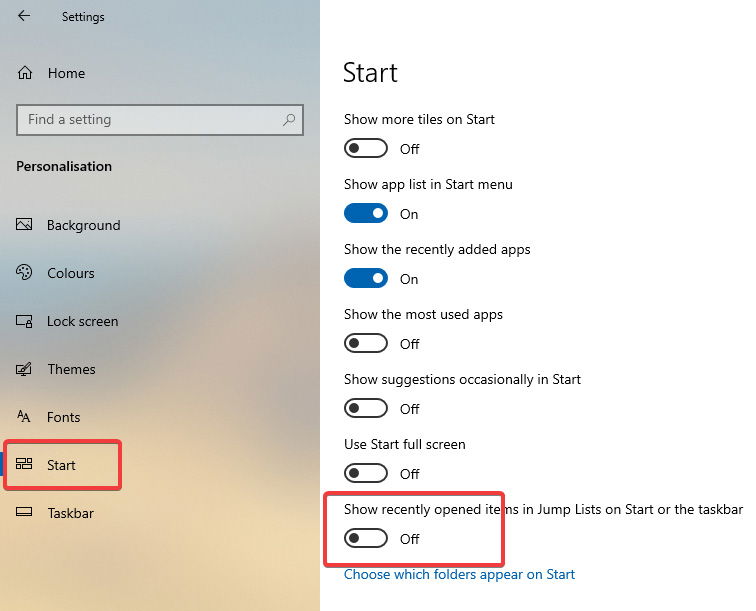
As soon as you toggle the switch to the off position, the recent items and frequently places will be turned off immediately. If you want to enable them, just toggle the switch to the On position.
Also read: How to View and Clear Activity History on a Windows PC
Disable Recent Items Using Group Policy (All Users)
While the Settings app allows you to turn off recent items and frequent places on a per account basis, it has no option to disable them for all users. For that, you need to modify a policy within the Group Policy Editor which is available to all Pro and Enterprise users. This method is particularly useful for system administrators.
1. Open the Start menu, search for “gpedit.msc” and press Enter to open Group Policy Editor. Next, go to “User Configuration -> Administrative Templates -> Start Menu and Taskbar” location.
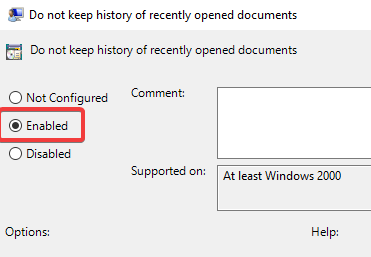
2. On the right panel find and double-click on the “Do not keep a history of recently opened documents” policy. This is the policy that lets you enable or disable recent items and frequent places.

3. In this Window select the “Enabled” radio option and click on the “Apply” and “OK” buttons to save the policy changes.
Group Policy changes require system restart or force update to apply the changes, so either restart the system or execute gpupdate /force in the command prompt as an administrator.
To enable the recent items and frequent places feature, you just have to select “Disabled” or the “Not Configured” option.
Also read: How to Use Clipboard History in Windows 10
Disable Recent Items from Registry (All Users)
If you are using the Windows 10 Home version and need to turn off recent items and favorite places for all users on your system, then you can use the Registry Editor.
1. First, press Win + R, type regedit and press Enter to open the Windows Registry. Now, copy the below path, paste it in the address bar and press Enter to go to the target key.
HKEY_LOCAL_MACHINESOFTWAREMicrosoftWindowsCurrentVersionPoliciesExplorer
2. On the right panel, see if you have a value named “NoRecentDocsHistory.” If you have the value, proceed to the next step. Otherwise, right-click in the empty space and select “New -> DWORD (32-bit) Value.” Name the value as “NoRecentDocsHistory.”
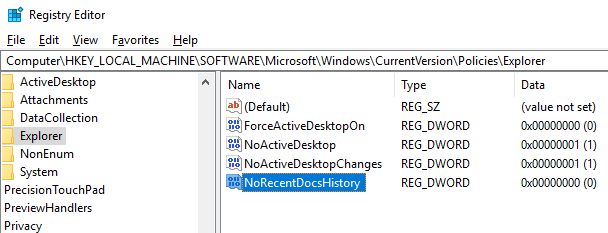
3. Double-click on the newly created value and set the value data to “1.”
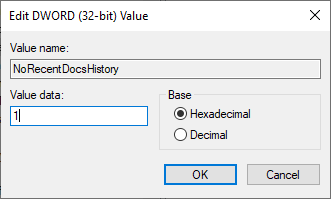
You’ve now successfully disabled recent items and frequent places in Windows 10. To make the changes take effect, restart the system. If you want to revert the changes, change the value data back to “0” to simply delete the “NoRecentDocsHistory” value.
Vamsi is a tech and WordPress geek who enjoys writing how-to guides and messing with his computer and software in general. When not writing for MTE, he writes for he shares tips, tricks, and lifehacks on his own blog Stugon.
Subscribe to our newsletter!
Our latest tutorials delivered straight to your inbox
Sign up for all newsletters.
By signing up, you agree to our Privacy Policy and European users agree to the data transfer policy. We will not share your data and you can unsubscribe at any time. Subscribe
