Most laptops, notebooks and all-in-one desktops come with an integrated webcam that allows you to run tasks like video chatting, facial recognition for login authentication, etc. Due to the widespread usage of these webcams, they have always been a target for crackers to record and steal personal information. To avoid these kinds of unwanted usage situations, developers included a small LED light next to the webcam which lights up when the webcam is running. But is that really safe?
In fact, security engineers from around the world have proven time and time again that you can easily turn off the LED light either by modifying a few related files or by modifying actual drivers itself. This is applicable for external webcams that are connected via the USB interface as well. To avoid all the hassle of being compromised, there have been several DIY solutions like masking the webcam with a piece of tape, unplugging the webcam, using win32 API functions or third party software, etc. But here is a more elegant way to easily disable an integrated or USB-attached webcam with just a few clicks using Windows inbuilt tools.

Disable Webcam in Laptop
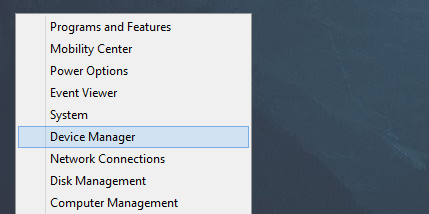
To disable the webcam module on your computer, we are going to use the Device Manager tool in Windows. First, press “Win + R,” type devmgmt.msc and press the Enter button to open up the device manager. If you are using Windows 8, then simply press “Win + X” to open the Power User menu and select the option “Device Manager.”
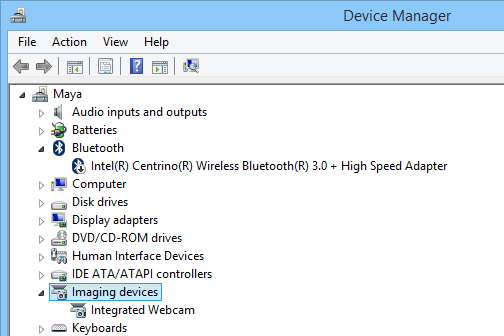
In the Device Manager, find “Imaging Devices” and double-click on it to get it to display the option “Integrated Webcams.” If you are using a USB-attached webcam, then the name of the device will be something like “USB Camera.”
Note: depending on your webcam, the webcam module may also appear in other places of Device Manager like System Devices, Universal Serial Bus Controllers, etc.
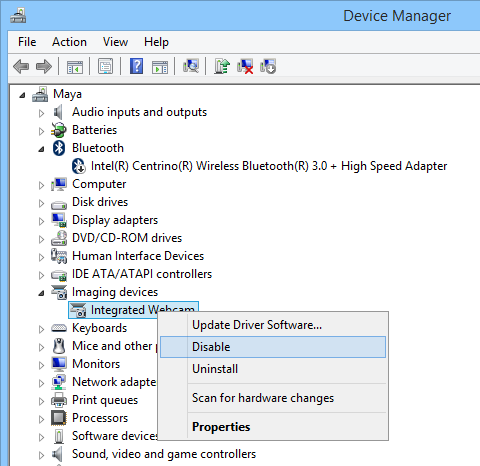
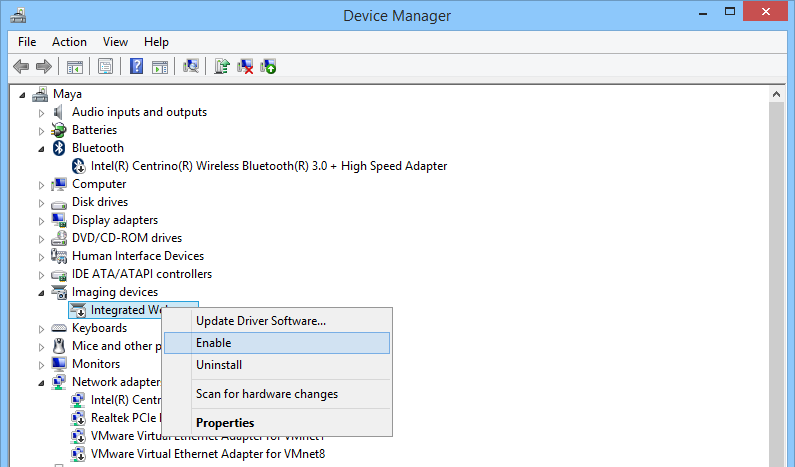
Now right click on the “Integrated Webcam” and select the option “Disable” to completely disable the integrated or USB attached webcam on your computer.
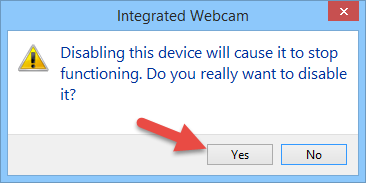
At this point, you will receive a warning message stating that the target device will stop functioning. As this is what we want to accomplish, click on the “Yes” button to finish the process.
Once the webcam has been disabled, Device Manager displays a small down arrow icon next to the webcam module which visually represents the device being down.
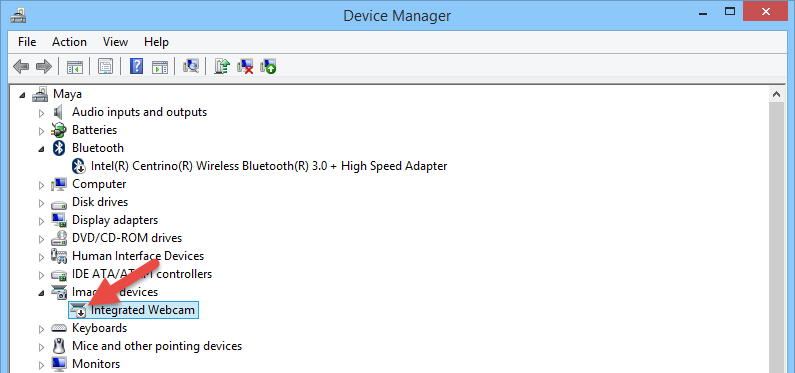
If you ever want to re-enable the integrated webcam, just open the device manager, right click on the webcam module and select the option “Enable.”
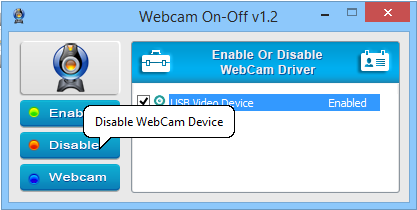
That’s all there is to do, and it is that simple to completely disable an integrated or USB-attached webcam without messing with a whole lot of DIY stuff. Of course, if you want a simple software that can do all this work with just a single click then try WebCam on-off. The good thing is that the software is portable and it just works without any unnecessary settings.
Hopefully that helps, and do comment below sharing your thoughts and experiences about using this simple trick to completely disable your integrated webcam.
Vamsi is a tech and WordPress geek who enjoys writing how-to guides and messing with his computer and software in general. When not writing for MTE, he writes for he shares tips, tricks, and lifehacks on his own blog Stugon.
Subscribe to our newsletter!
Our latest tutorials delivered straight to your inbox
Sign up for all newsletters.
By signing up, you agree to our Privacy Policy and European users agree to the data transfer policy. We will not share your data and you can unsubscribe at any time. Subscribe
