In Windows 10 the Action Center or the Notification Center is one of the new notable features. Unlike in Windows 8, the notifications actually stay there until you clear them. This is a big improvement over the previous versions of Windows, and having a unified notification center that can be used by all apps alike is helpful.
But if you are someone who is looking for a way to disable the Action Center in Windows 10, then here is how you can do it easily in two different ways.
Disable Action Center Using Windows Registry
Disabling the Action Center in Windows 10 using the Windows Registry is easy and applicable to both Pro and Home users. To start, press “Win + R,” type regedit and press the Enter button.
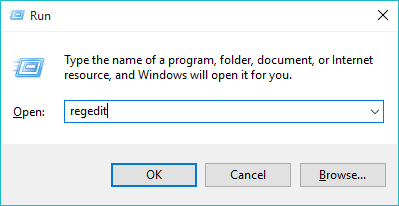
The above action will open the Windows Registry. Navigate to the following key:
HKEY_CURRENT_USERSoftwarePoliciesMicrosoftWindows
Once you are there, we need to create a new key. To do that, right-click on the “Windows” key, and select the “New” and then “Key” options.
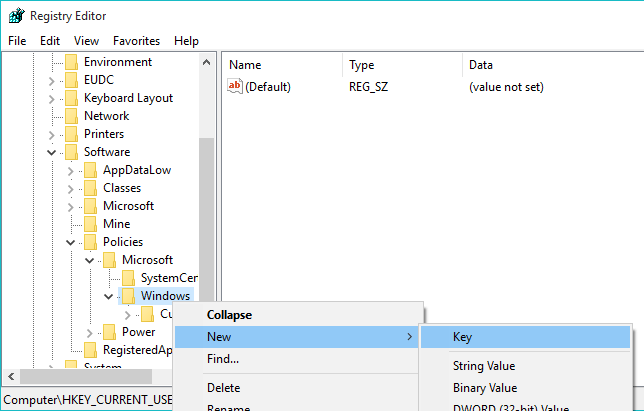
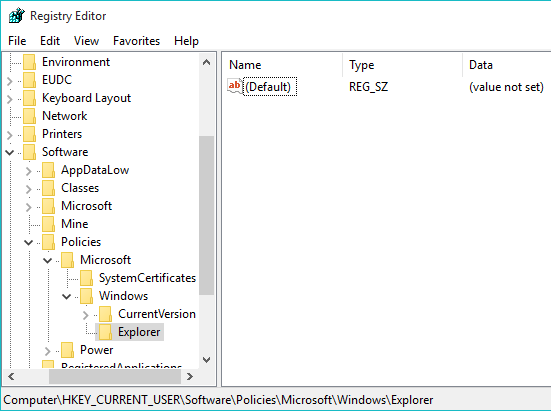
Now, rename the key as “Explorer.” Once renamed, this is how it looks like in your Registry editor.
After creating the Explorer key, right-click on the right pane and select the “New” option and then “DWORD 32-bit Value” to create a new DWORD value.
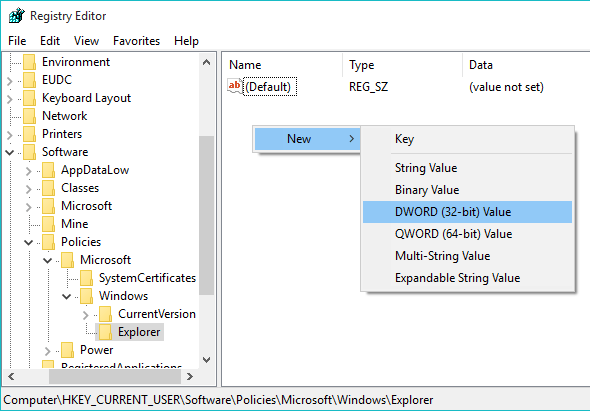
Rename the key to “DisableNotificationCenter.” By default, the value data is set to “0” which simply means that the Action Center is enabled.

To change the Value Data, double-click on the newly created value and enter the Value Data as “1.” Click on the “Ok” button to save the changes.
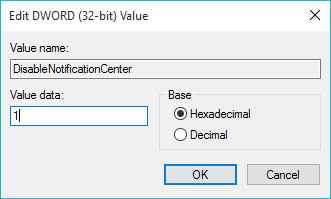
You’ve successfully disabled the Action Center in Windows 10. Just restart your system to see the changes.

As you can see, the Notification icon has completely disappeared from the taskbar, and you can no longer access it or the shortcuts to different options provided by the Action Center.

If you want to you can easily revert back either by changing the Value Data back to “0” or by simply deleting the newly created value.
Disable Action Center Using Group Policy Editor
You can also disable the Action Center using the Windows Group Policy Editor, but this approach is only applicable to Pro users. To start, press “Win + R,” type gpedit.msc and press the Enter button.
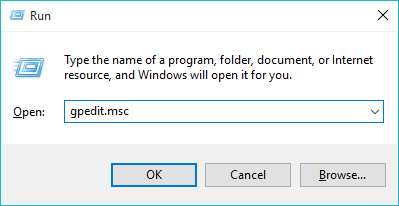
The above action will open the Group Policy Editor. Navigate to the following group:
User Configuration > Administrative Templates > Start Menu and Taskbar
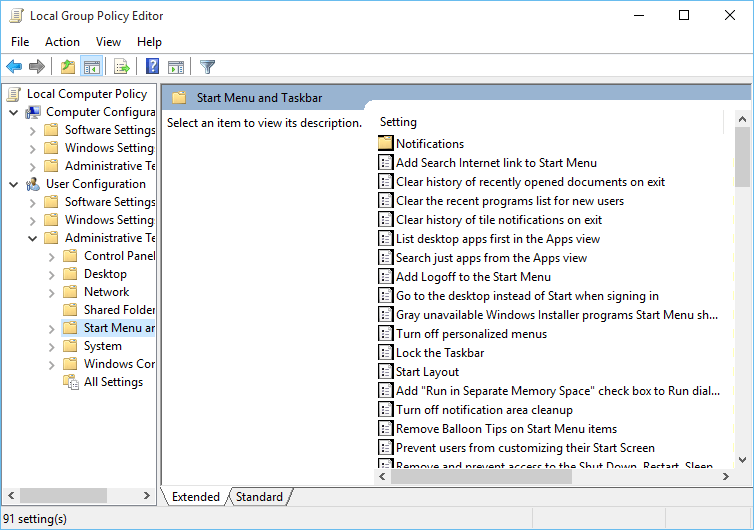
Once you are there, scroll down in the right pane and find the “Remove Notifications and Action Center” Policy.
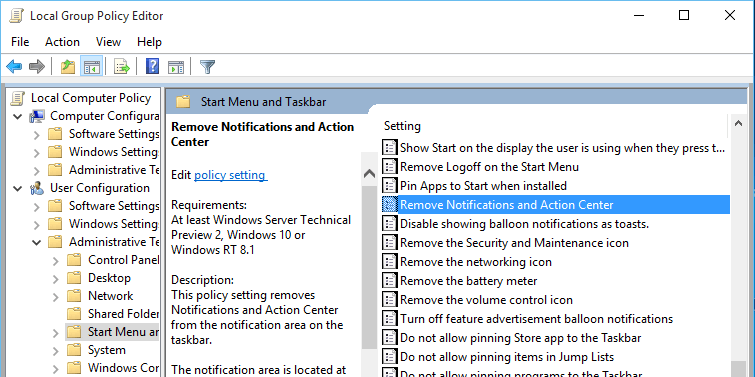
Double-click on it to open the Policy settings window. Select the “Enabled” radio button, and click on the “Ok” button to disable the Action Center.
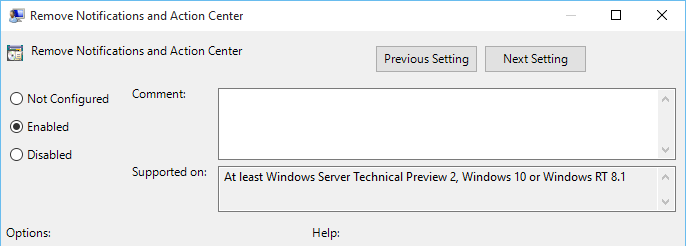
It is that simple to disable Action Center in Windows 10. Just restart your system to make the changes take effect.

If you ever want to revert back, simply change the option either to “Not Configured” or “Disabled.”
Do comment below sharing your thoughts and experiences about using the above methods to disable Action Center in Windows 10.
Vamsi is a tech and WordPress geek who enjoys writing how-to guides and messing with his computer and software in general. When not writing for MTE, he writes for he shares tips, tricks, and lifehacks on his own blog Stugon.
Subscribe to our newsletter!
Our latest tutorials delivered straight to your inbox
Sign up for all newsletters.
By signing up, you agree to our Privacy Policy and European users agree to the data transfer policy. We will not share your data and you can unsubscribe at any time. Subscribe
