Anyone who has played around with any kind of video knows how huge uncompressed video files can be. The huge size of video files is what has led to the proliferation of video compression algorithms like DivX, Xvid, MP4 etc, but how exactly do you compress an uncompressed video to one of these formats, to save space and maintain your sanity ?
In this post, we’ll teach you exactly that. We’ll be using an open source application called Virtualdub to compress a video file while still retaining the quality of the original.
VirtualDub is a video capture/processing utility for Windows. It is free and open source and is released under the GNU GPL license.
To get started with using Virtualdub, download and install it from virtualdub.org. By default, Virtualdub does not come with any video compression codecs built in, because of licensing restrictions. You can however get started by downloading the Xvid codec from www.xvid.org. This is the format that we will compress our video to.
Once you have the codec installed, launch Virtualdub and click ctrl+O to load the uncompressed video. Virtualdub should load the video and you should see a screen similar to the one below.
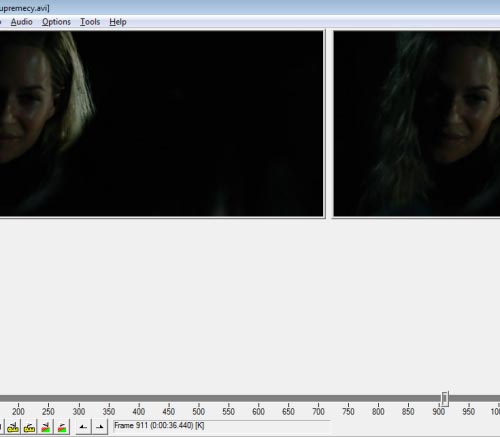
This is called the timeline view.
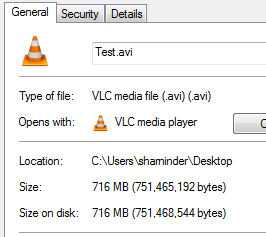
A video format like the .avi that I have loaded here has two parts, the video part and the audio part and we can treat both parts seperately for compression. To give an idea about the level of compression we achieve, the uncompressed file is about 716MB in size. We’ll look at the size of the compressed file once we’re done with the process.
Click on Video and chose the Compression option (Or click ctrl+P). From the list of Codecs displayed on the left side of the window, choose the “Xvid MPEG-4 Codec” and click on
Configure
.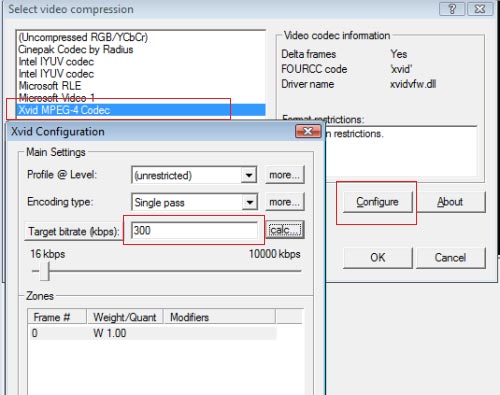
The only option that you need to worry about in the Configure window is the Target bitrate. When you open this window for the first time, you will see a default value in it which is the bitrate of the original file. Mine was 700 kbps. I changed it to 300 kbps. 300 is a decent enough bitrate if you’re producing video for the web and are concerned about the size of the file, which is what this tutorial is about, right ?
Click on Ok and come back to the time-line view.
Now, we need to select a compression codec for the Audio part of the file. From the Audio menu, select the option titles “Full processing mode“. Now, select Audio again and click on Compression.
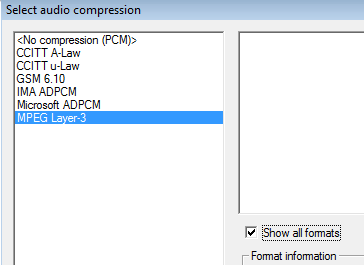
From the list of Audi codecs, choose MPEG Layer-3 and click on Ok to get back to the time-line view.
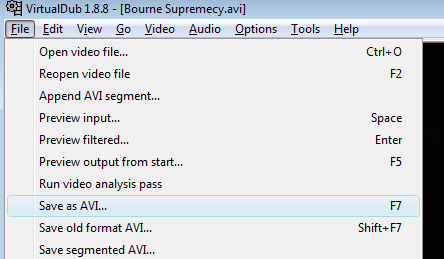
Now, to create the compressed file, choose the File->Save as AVI option and give a new name for the compressed file. Virtualdub should now start saving the compressed file to your chosen location.
After the compression process is done, you can check out the size of the new file.
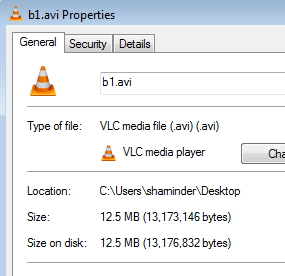 Isn’t that amazing ?
The compressed file will, obviously, be of slightly lower quality but I’m sure you can live with that, considering the huge savings in space.
Sharninder is a programmer, blogger and a geek making a living writing software to change the world. His tech blog, Geeky Ninja, is where he shares his wisdom, for free !
Subscribe to our newsletter!
Our latest tutorials delivered straight to your inbox
Sign up for all newsletters.
By signing up, you agree to our Privacy Policy and European users agree to the data transfer policy. We will not share your data and you can unsubscribe at any time. Subscribe
