
It’s known that Windows devices tend to get slower over time. One reason is the accumulation of cache files. Although cache files provide a faster experience, they may also impact the device’s performance if left unchecked. This tutorial discusses the best methods to clear cache data safely and easily on Windows 10/11.
Looking to reach your WindowsApps folder? Even if you can’t access it by default, there are ways to get to it.
Content
- What Is Cache and Why You Should Clear It
- 1. Delete Temporary Files
- 2. Clear Temporary Files Through Settings
- 3. Using Disk Cleanup
- 4. Clear the Browser Cache
- 5. Clear DNS Cache
- 6. Clear Microsoft Store’s Cache
- 7. Clear Location History
- 8. Deleting Restore Points
- 9. Setting Up Storage Sense
- 10. Using Dedicated Software
- Frequently Asked Questions
What Is Cache and Why You Should Clear It
Cached data in Windows usually consists of temporary files that your computer needs to use, frequently including:
- Assets that apps and programs need in order to load instantly when opened the next time.
- Information about usage habits.
- The last component of an app that was in use so that it loads faster when you reuse it again later. This could be a specific part or a feature in an app.
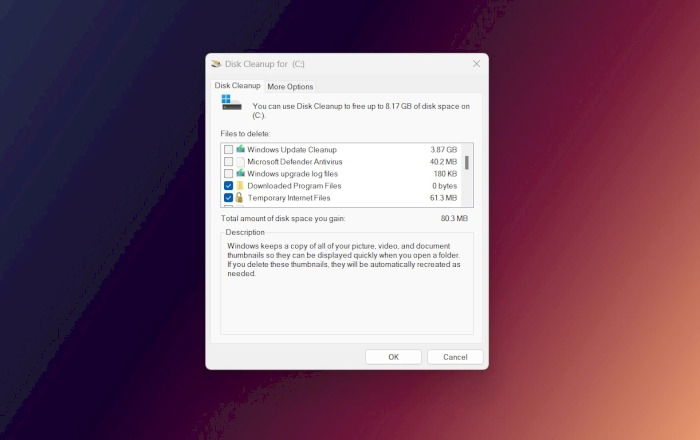
Cache files or cached data should not be confused with cache memory, as the latter is a hardware component. More specifically, cache memory is a fast type of memory that’s mainly used by the CPU.
As useful as cache may be, these files tend to accumulate on your device and occupy disk space that may affect your Windows PC’s performance. In addition, cache data may become corrupted or outdated, so clearing it may help fix any issues across your system.
Many methods are available on Windows to remove cache files. Consider them successive steps to follow to clear all cache files from all over the system.
1. Delete Temporary Files
While the location of Windows cache is not fixed, the best-known storage path of the cache in Windows is usually “C:WindowsTemp.” It’s safe to delete these temporary files.
- Press Win + R to launch the Run command.
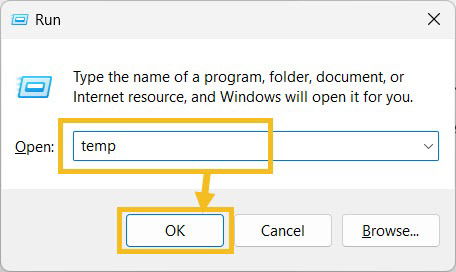
- Type “Temp” and hit “OK.”
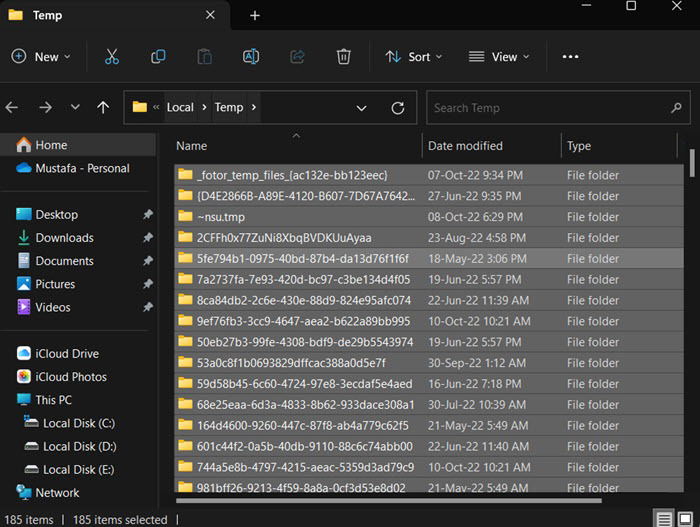
- Windows will open the “Temp” folder. Select all the files and delete them. Don’t forget to also delete the files from the “Recycle Bin” afterward to clear up space.
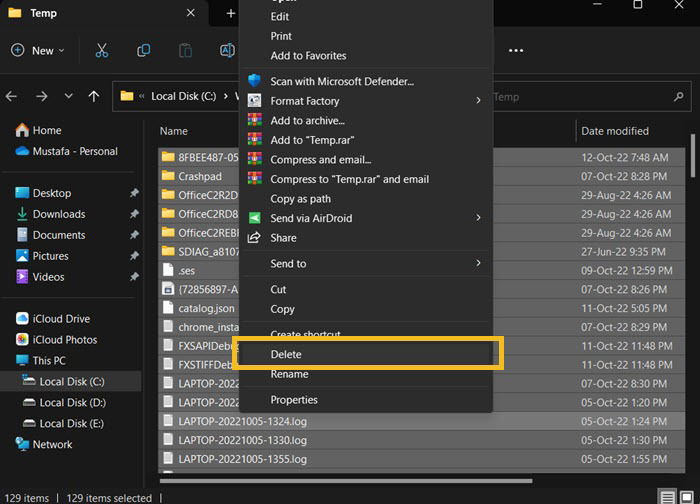
Note: You can press Shift + Delete after selecting the files to permanently delete them.
- Repeat the same steps from above for the %temp% folder. Launch the “Run” command and input
%temp%.
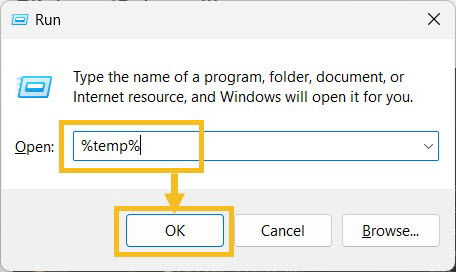
- Select all the files in this folder and delete them.
Tip: if the Settings app is not working properly in Windows, check out these fixes.
2. Clear Temporary Files Through Settings
Some of those files may not be deleted through the “Temp” folders. However, a quick visit to the “Settings” app will help you find and clear more cache files.
- Open Settings either through the Start menu or by clicking Win + I on your keyboard.
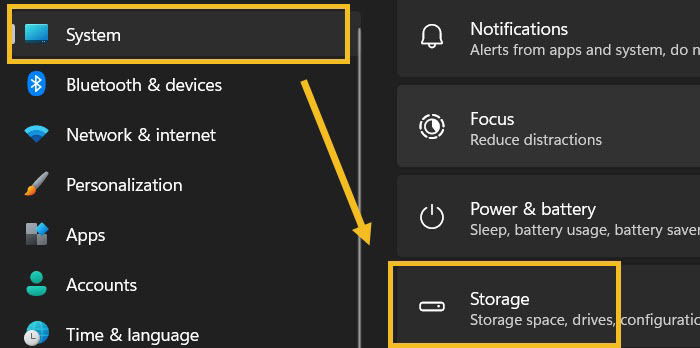
- On the right side, scroll until you find “Storage” and click on it.
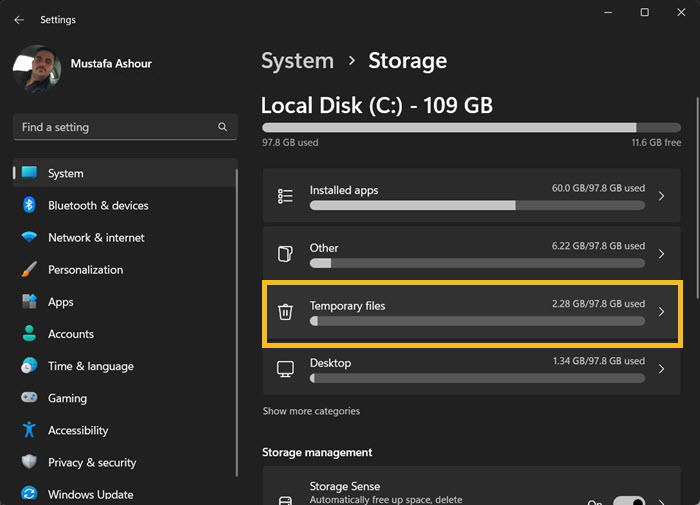
- Windows will display a storage breakdown to show you what takes up most of your disk space. Notice the “Temporary Files” section and click on it.
- You may need to click “Refresh” to bring up the most recent file information, then check the boxes next to the files you want to delete after carefully reading the description. Finally, click “Remove Files.”
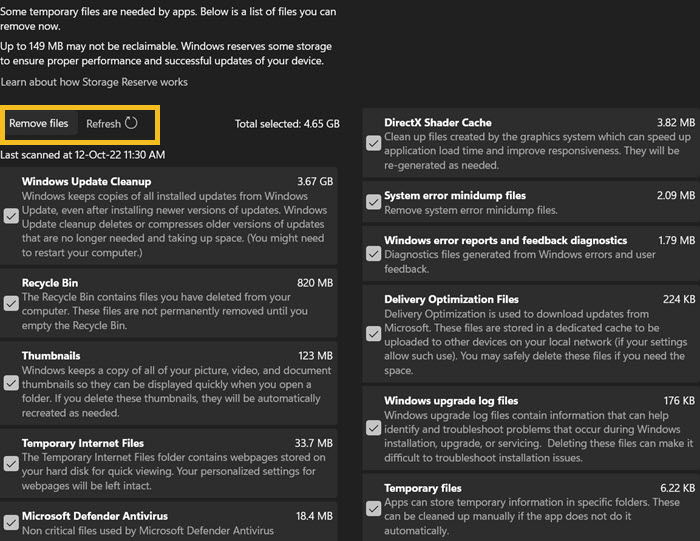
This folder includes residual files from your latest Windows update, thumbnail files, and Internet files like cached websites and web apps. However, deleting those files is safe and could free up considerable storage. In our case, we saved 4.6GB.
3. Using Disk Cleanup
Disk Cleanup is a built-in tool in Windows that lets users clean up specific partitions. Additionally, it includes the option to clear the system’s cached data and temporary files.
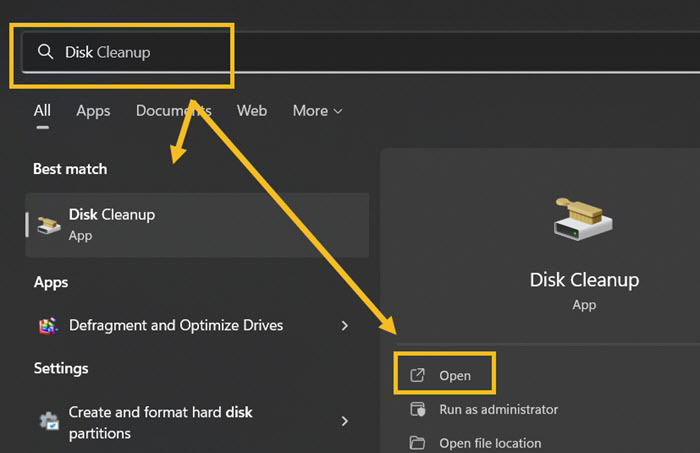
- Open Windows Search and type “Disk Cleanup.” Press “Open” to launch the program.
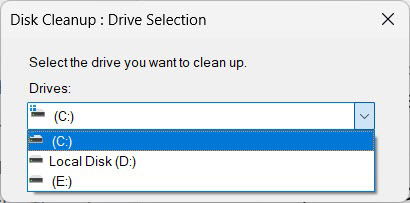
- A new window will appear, through which you can choose the partition you want to clean. We can start with the system partition, usually “C:”, as it contains the most cached files.
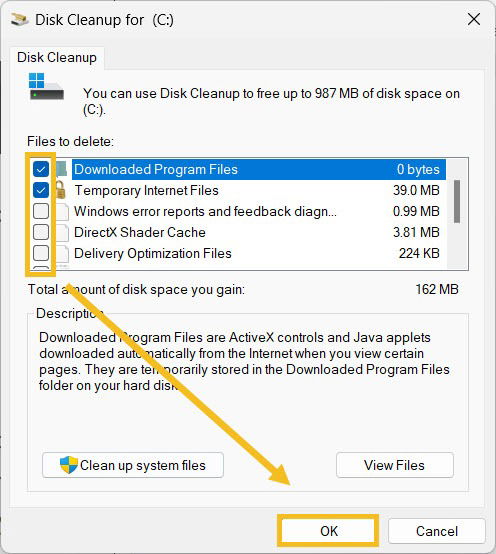
- Windows will scan the partition you’ve chosen and give you the option to select which cache files you want to clean. It’s safe to select all of them.
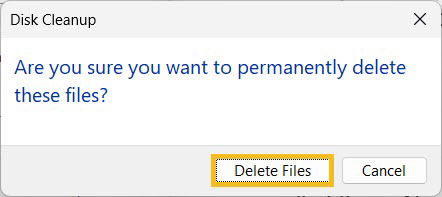
- Windows will require your confirmation before deleting the cache files. Click “Delete Files.”
- At this point, Windows will begin cleaning up, which should take a few minutes.
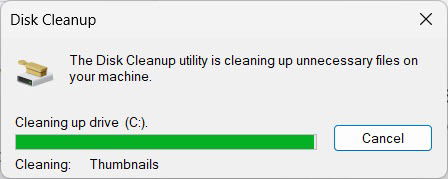
- You can repeat the same steps for the other partitions, but it’s pretty rare to find cache files on the non-system partitions.
- Clear even more cache files using Disk Cleanup. Relaunch the app and select a system partition just as before.
- This time, click “Clean up system files,” which allows you to dig deeper for more residual system files.
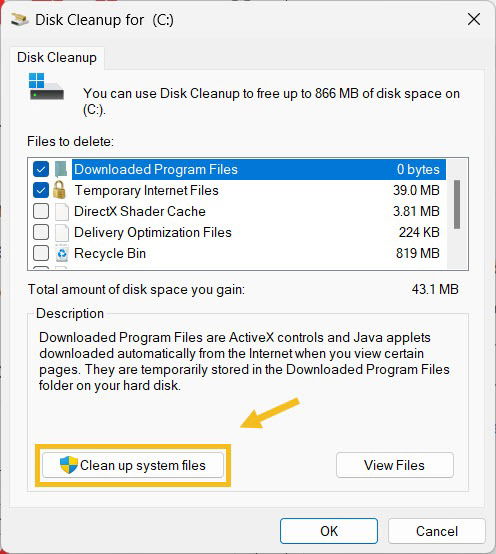
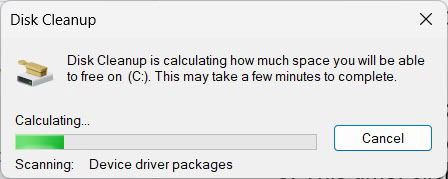
- The Disk Cleanup will restart and ask you to select the drive once again. This is not a glitch, as the tool will search for system files this time. Those files are still safe to delete.
- Windows will display even more cache files to delete.
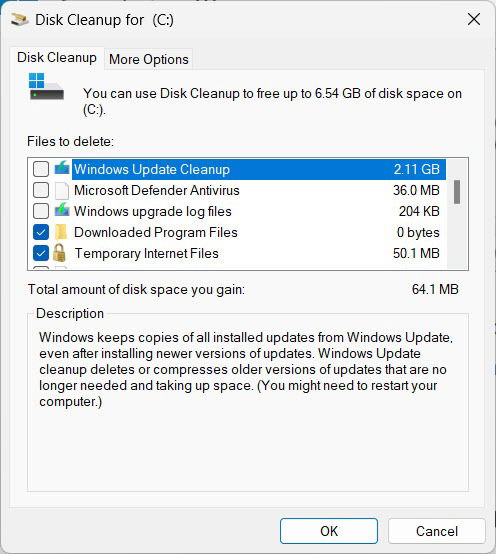
4. Clear the Browser Cache
Every time you visit a website online, your browser downloads and stores some of its static components on your Windows device to make the website load faster the next time you visit.
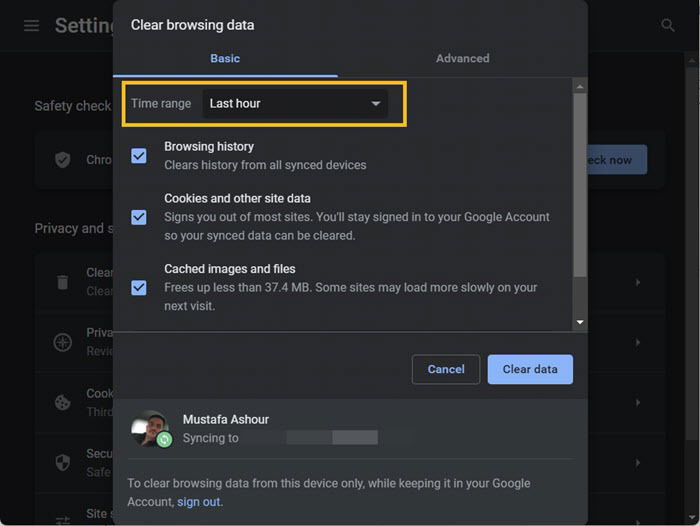
- Open your web browser, then press Ctrl + Shift + Delete to open the “Clear Browsing Data” settings. This works on Google Chrome, Firefox, Microsoft Edge, and other major web browsers.
- Through the newly opened window, start by choosing the time range in which you wish to delete cache files, including “All Time.”
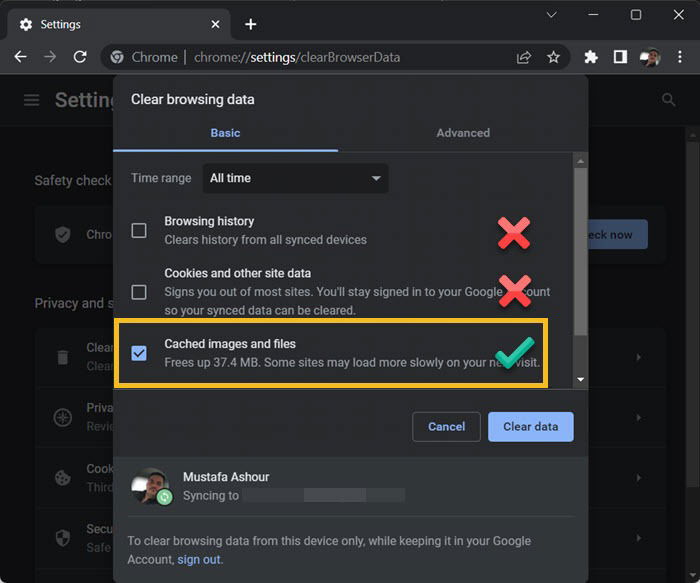
- Select the “Cached Images and Files” option. On other browsers, it may be labeled as “Cache” or “Temporary Files.” Leave the other settings alone if you wish to keep your history and cookies.
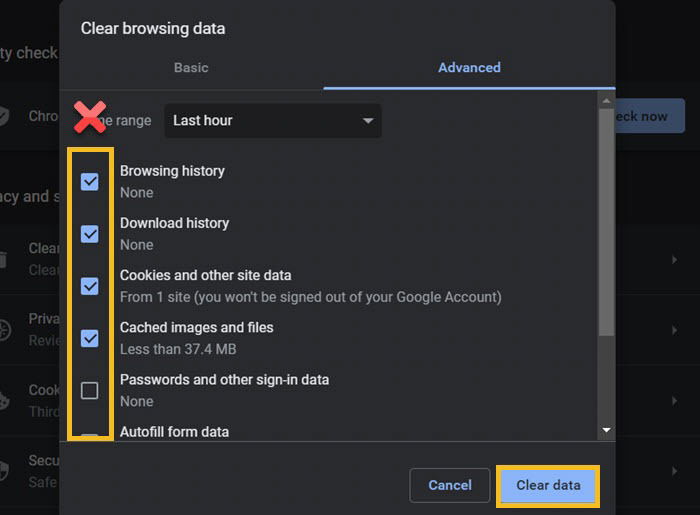
- Uncheck the options under the “Advanced” tab to avoid clearing any critical information, then click “Clear data.”
Tip: learn how to block cookie consent pop-ups in your browser.
5. Clear DNS Cache
Windows machines save DNS data continuously, as it helps the device connect to external servers easily. However, long-term use of Windows can result in the accumulation of data. You can easily clear the DNS cache (also known as Flush DNS Cache).
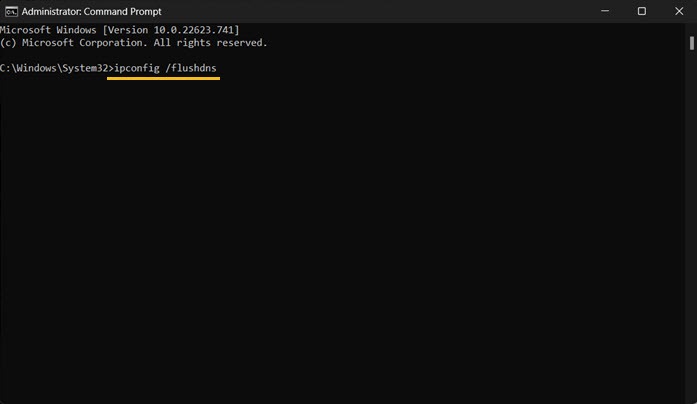
- Launch the Windows Search, type “Command Prompt,” and run it as an administrator.
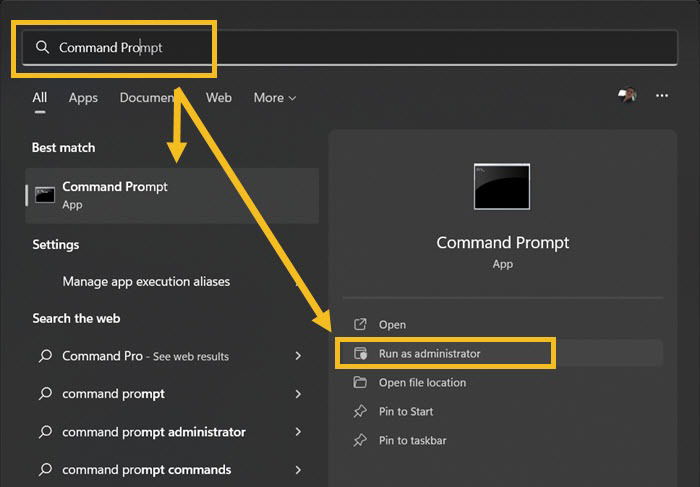
- Copy the next command to the Command Prompt, then press Enter.
ipconfig /flushdns
6. Clear Microsoft Store’s Cache
The Microsoft Store ends up storing many cache files, including files related to installing apps and games and assets used to display content in its main interface. Fortunately, you can delete these cache files in one step without impacting the Microsoft Store’s functionality or the apps and games you have downloaded.
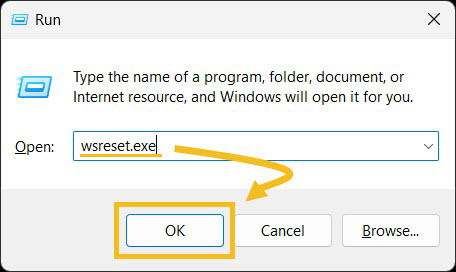
- Press Win + R to bring up the Run command.
- Type
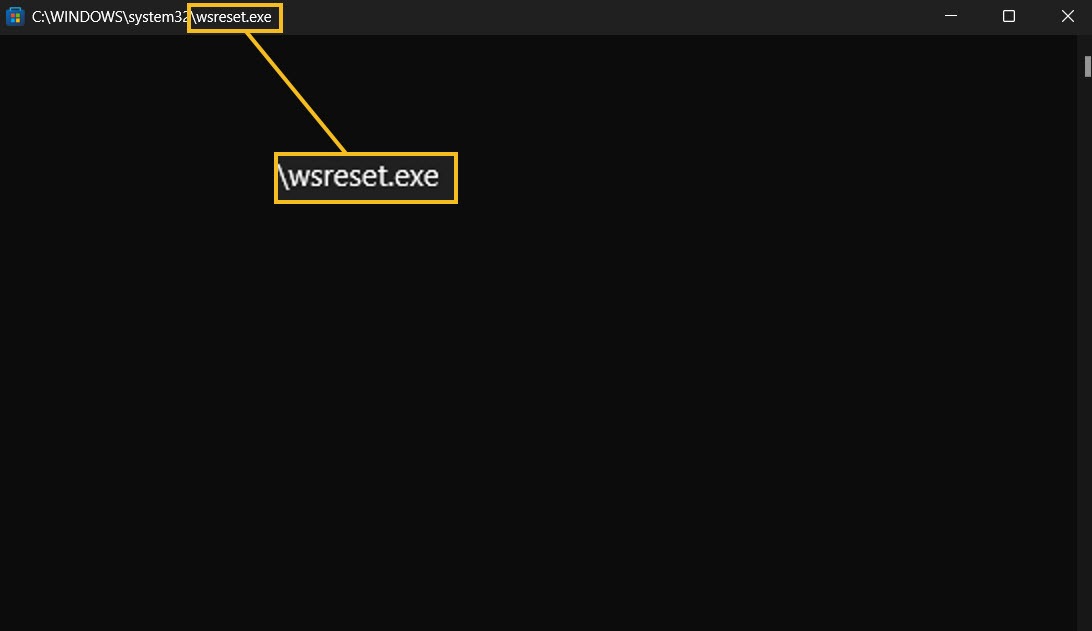
wreset.exeand click “OK.”
- A new cmd window will open and will start clearing Microsoft Store’s cache automatically with no further permission. The Microsoft Store will relaunch after that.
7. Clear Location History
If you frequently use location services on a Windows device, it will gradually store your past locations. Similar to other cache files, deleting location history may improve the functionality of your device and help fix any location-related issues. Furthermore, your Windows location history is accessible by other apps on Windows, so deleting it will improve your privacy.
- Press Win + I to quickly open the Settings app.
- Navigate to the “Privacy & Security” section.

- Scroll down and click on “Location.”
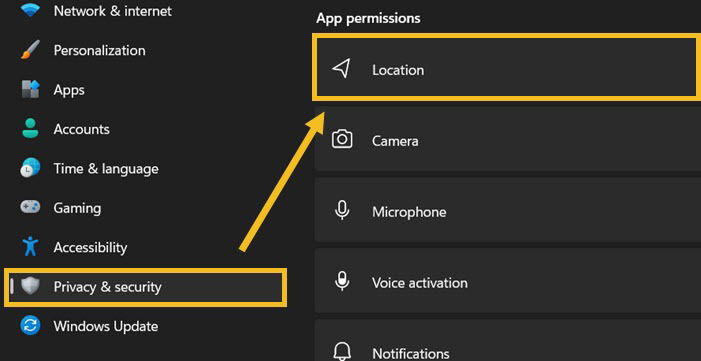
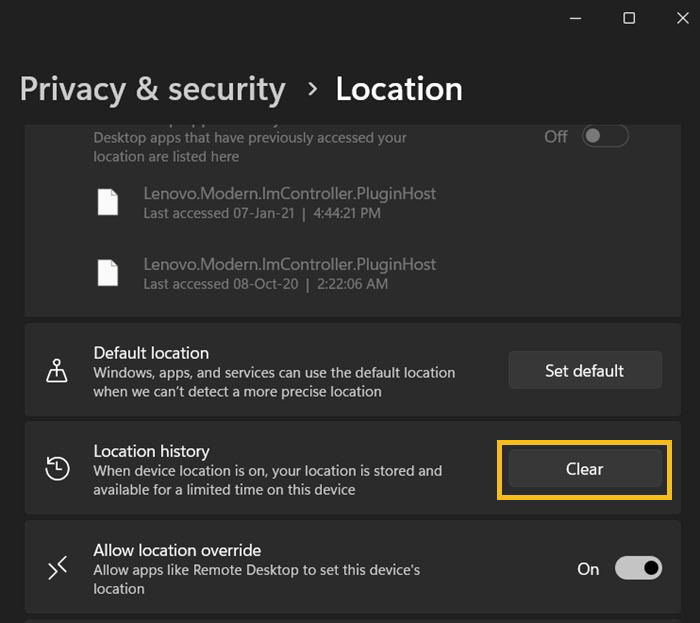
- Click “Clear” to delete the cache files related to the location services.
Get up to speed on how to set up a local web server on Windows (and other operating systems.)
8. Deleting Restore Points
Windows allows users to create multiple restore points to be used if the device runs into any critical issues. However, deleting unused restore points and the associated cache files will free up considerable space.
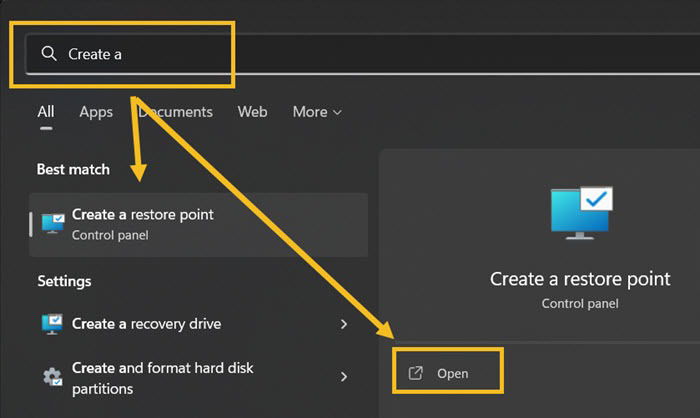
- Open Windows Search, type “Create a Restore Point,” then open it once it shows up in the search results.
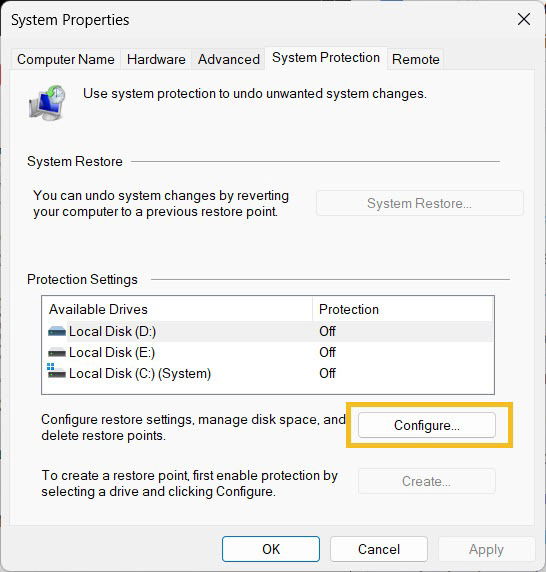
- In the System Properties window, switch to “System Protection” and click “Configure” to start deleting the old restore points. We recommend caution when doing this.
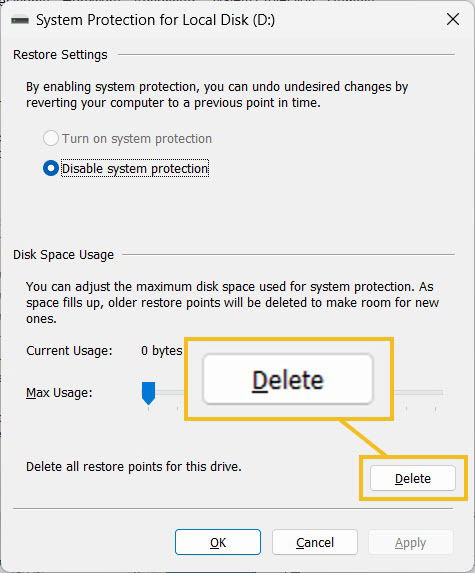
- In the next window, click the “Delete” button to remove your old restore points and associated cache files.
9. Setting Up Storage Sense
Storage Sense is a built-in feature in Windows 11/10 and allows your Windows device to clear itself of cache files continuously. Setting it up would improve your experience over time. However, in most cases, this option isn’t a substitute for the methods outlined above, as it can’t find and delete all types of cache files. Nevertheless, there’s no harm in setting it up.
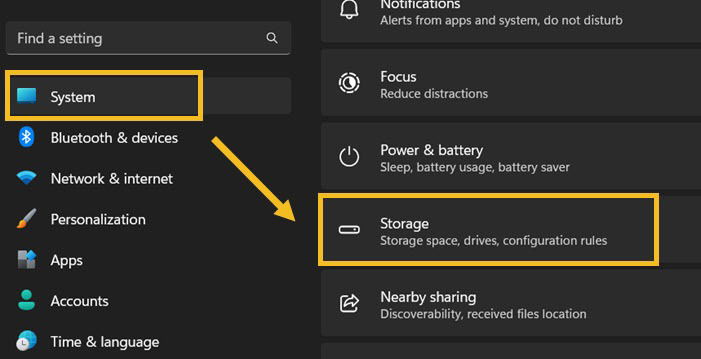
- Open the Settings app and go to “System -> Storage.”
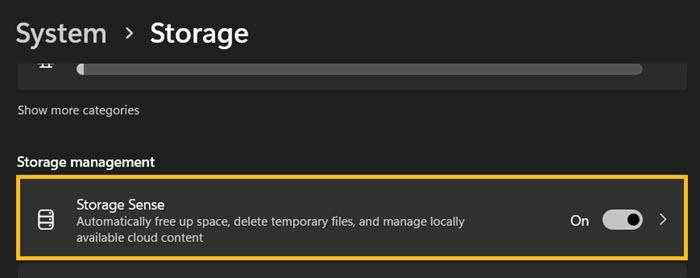
- Scroll down until you find “Storage Sense” and toggle it on. Click on it to open its full settings.
- Check the option underneath “Cleanup of temporary files” and toggle on “Automatic user content cleanup.”
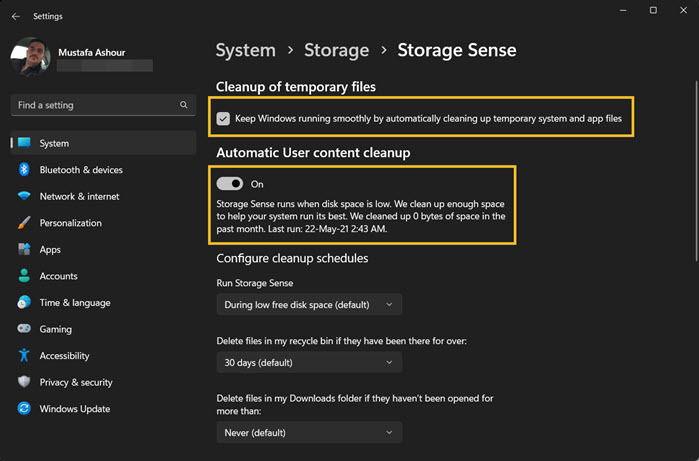
- Additionally, you may need to tweak its intervals and use the conditions below. For instance, if you choose to run Storage Sense only when the disk space is low, it may never run.
10. Using Dedicated Software
If you want to dig deeper for hidden cache files, you may need to use dedicated software, as some parts of the system aren’t accessible to the regular user, at least in an easy way.
One excellent option is to use CCleaner, which offers a 14-day trial period.
- Download and install CCleaner.
- Open the app and navigate to the “Custom Clean” settings.
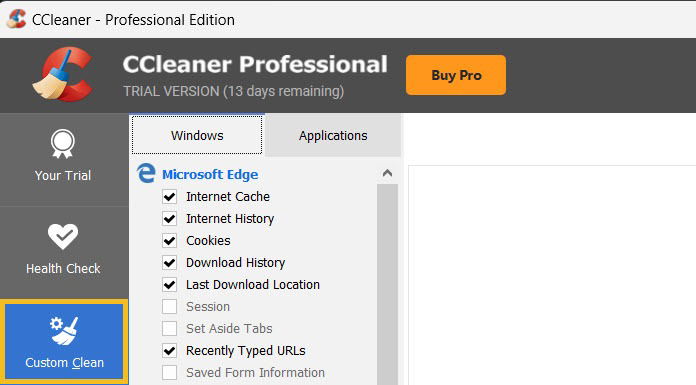
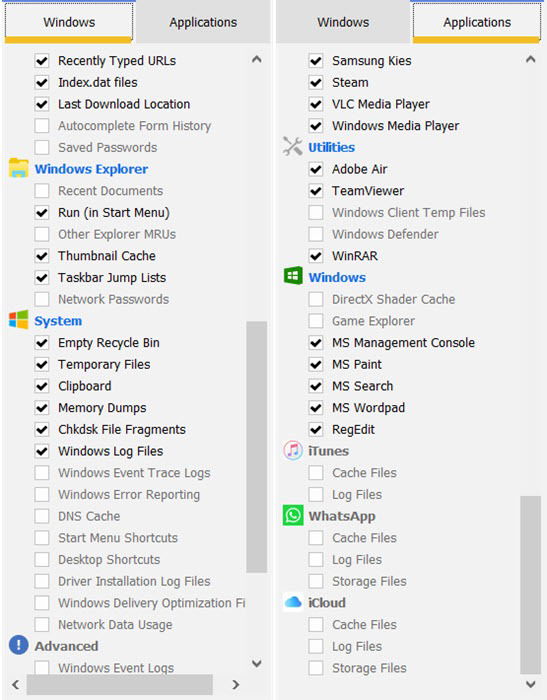
- You’ll see two main menus: Windows and Applications. Choose what to clean under each. For instance, under Applications, you can clear the cache for apps like iCloud, WhatsApp, iTunes, Spotify, and more.
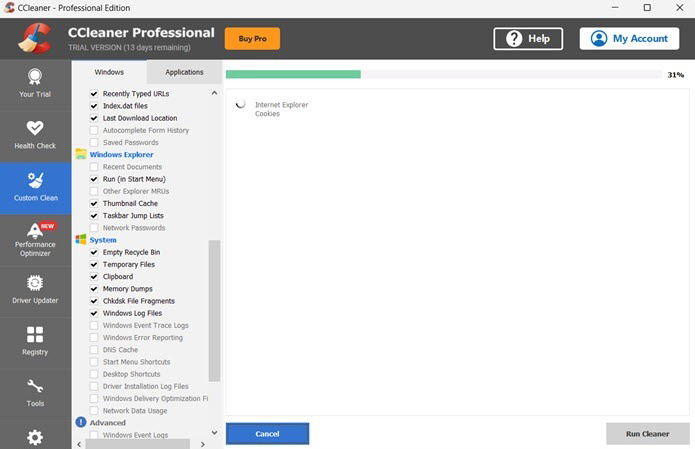
- Click “Analyze” and wait until the process is complete.
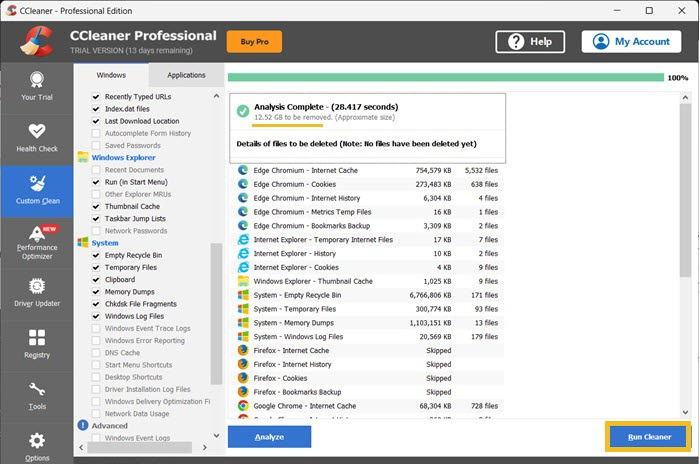
- The program will tell you how much space you’ll save alongside the files that it will delete. Take a look and skip what you don’t want to delete, then click “Run CCleaner.”
Tip: PC performance still low? You might want to start cleaning your Windows registry. For more privacy, consider clearing recent files on File Explorer and your Jump Lists.
Frequently Asked Questions
Will my apps stop working after clearing the cache?
No, your Windows apps will work fine. The majority will start re-caching their essential and updated assets once launched. What may happen is that some apps will load slower the first time you launch them after clearing the cache. But overall, your apps will work better after clearing their old cache.
How frequently should I clear the Windows cache?
There’s no set rule, and you may only do this if you notice that your PC is running slower than usual or when you need to free up some space. Typically, you should clear your Windows device cache twice a year.
Are cache files different from cookies?
Yes. Cookies are used by web browsers to store some vital information like sign-in data, and that’s why are not recommending to erase them. However, cache files in a web browser are usually images and text-based files, and clearing them doesn’t, for instance, sign you out of a website.
Why clear the cache on Windows if there will be a new cache?
The newly created cache will be fresh and smaller than the old cache, so even after weeks of usage, the newly created cache will be smaller in most cases than the old cache you cleared, especially if it was left to accumulate for years.
Image credit: Windows via Unsplash. All screenshots by Mustafa Ashour.
Mustafa is a tech content writer who’s a geek at heart. His passion lies in writing about technology, especially software-related topics. He’s also interested in digital marketing, business development, and entrepreneurship. He holds a Bachelor’s degree in Accounting and Finance.
Subscribe to our newsletter!
Our latest tutorials delivered straight to your inbox
Sign up for all newsletters.
By signing up, you agree to our Privacy Policy and European users agree to the data transfer policy. We will not share your data and you can unsubscribe at any time. Subscribe
