Windows Explorer has always been adapted to meet new expectations. From XP to 7, it would have been difficult to recognise, and 8 reinvented its interface entirely with the ribbon menus.
Despite these aesthetic changes, it lacks one feature Mac OS X has boasted for a long time: control over the colour of entities listed within it.
Also read: How to Fix the “Someone Else Is Still Using This PC” Error in Windows
You may remember that we explained how to change folder colours using Folderico last year, and a reader asked at the time if it was possible to change the colour of the actual file name. This is possible, albeit limited.
The methodology is not our own – rather, the solution was first found by a user on Seven Forums, and it is more of a hack rather than an actual solution.

1. Open Windows Explorer and find the file or folder you wish to change the name colour for. This can include pictures or videos, and the change will be reflected in other programs as well.

2. Right-click the entity and select the “Properties” option from the pop-up menu. This should open another, smaller window featuring various details and buttons.
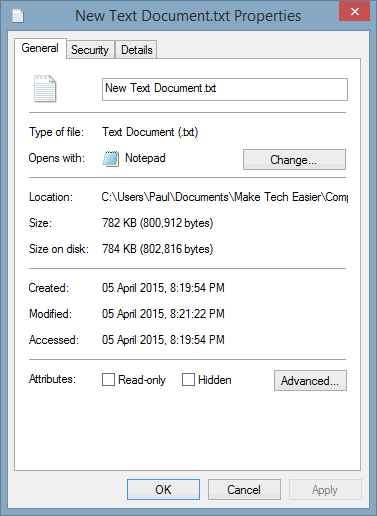
3. At the bottom of the Properties window, one button will read “Advanced.” If you do not see this, check which tab you are viewing: it should be the first, labelled “General.” Once you have found the “Advanced” button, click it.
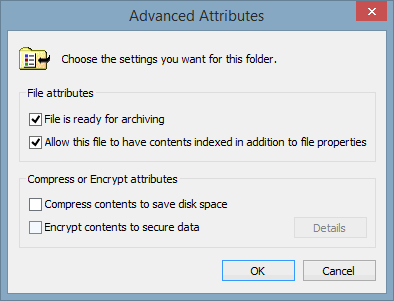
4. Another sub-window will appear offering several more options. The bottom two are of particular interest, as they control how the file name displays.

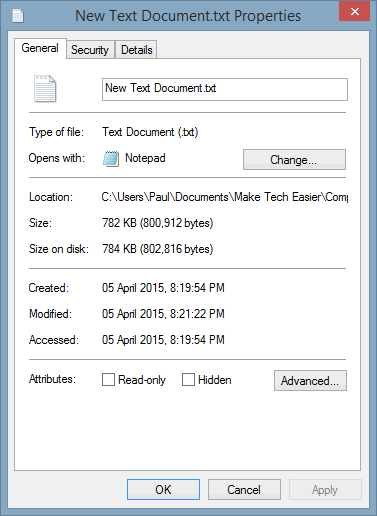
5. Choose either to compress the entity and save disk space, or to encrypt the file. Encryption results in a slightly larger file, so if space is at a premium, compression makes more sense. If you choose to encrypt the file, it would be prudent to back up the encryption key. Confirm your intent via the prompt, then close the windows that opened until you are back at the Explorer session.

6. Depending on the options checked, the file name should be coloured. If you compressed it, then it will appear as blue. If it is encrypted, it will be green. It is not possible to check both boxes, nor is it possible to change the specific colours they display in.
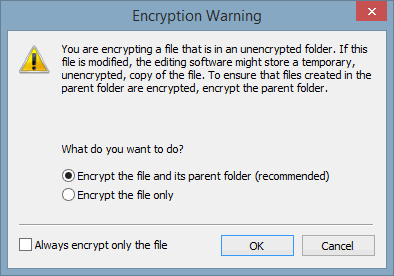
It should be noted also that encrypting the file will prompt Windows to offer to encrypt the entire folder. Whether you choose to do so or not is entirely your own preference.

If you have explored the core folders in Windows prior to this, you may have noticed a few examples are coloured: these are compressed as standard, meaning the same principles hold true for both.
Compressing the file will not compromise your ability to access it, and it can be edited even after this. However, encrypting the file carries certain risk should you choose not to back up the encryption key.
We would be inclined to compress files, should you choose this route to colour file type names. Windows’ implementation of this functionality is clunky at best, though it is at least feasible and may benefit some readers.
Should you be prepared to use an alternative to Windows Explorer, XYplorer can accomplish this task, and three other Explorer alternatives have also been covered.
Paul is a Northern Irish tech enthusiast who can normally be found tinkering with Windows software or playing games.
Subscribe to our newsletter!
Our latest tutorials delivered straight to your inbox
Sign up for all newsletters.
By signing up, you agree to our Privacy Policy and European users agree to the data transfer policy. We will not share your data and you can unsubscribe at any time. Subscribe
