Upgrading a computer involves more than simply ensuring you have the correct components to create a seamless system that runs efficiently. Beyond the hardware, it’s crucial to consider how your current operating system responds to these changes. In the past, many users faced frustration upon discovering that a Windows reinstallation was necessary to make their systems compatible with new hardware. But what about Windows 10? Is it possible to replace the motherboard without reinstalling the operating system?

This Isn’t Always the Case Anymore
Since the earlier days of computing, when customers were often satisfied with their systems, and were so for several years, Microsoft has made immense progress in making its operating system adaptable to the needs of various niches of consumers. The growth of the enthusiast market helped this along, but it wasn’t until Windows 10 that things really became easier.

When upgrading to a new motherboard while running Windows 10, the process is often seamless. In most cases, the operating system will automatically recognize the change and adapt, effectively “learning a new language” to communicate with the updated hardware. It typically boots without issue, and you might encounter a “Setting Up Devices” screen during startup. This indicates that Windows is detecting the new hardware and installing the necessary drivers.
What Happens If an Error Occurs?
Occasionally, the process isn’t as smooth, and you might encounter an error. Most commonly, this is related to activation, as Windows tries to verify that the license is being transferred to a new computer rather than being used on multiple systems. Some Windows licenses are restricted to a single device, which can complicate transfers when switching motherboards.
Since a Windows license is tied to the motherboard, changing it can sometimes confuse the activation system.
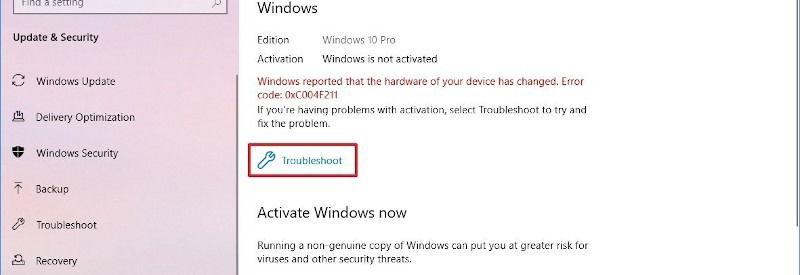
The simplest way to resolve this issue is by using the Windows Activation Troubleshooter. To do this, open the Start menu and navigate to Settings > Update & Security > Activation. Here, you’ll see whether Windows is activated and the specific error message. By selecting “Troubleshoot,” you can launch the troubleshooter to resolve the activation issue.

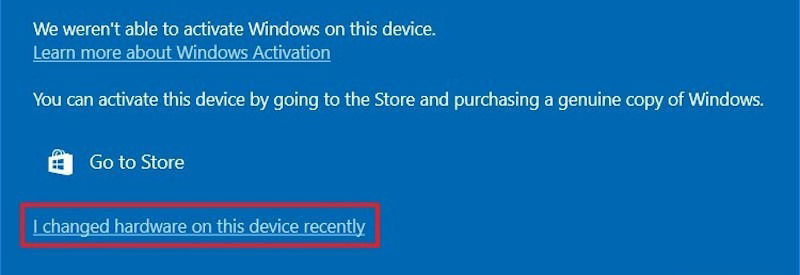
During the process, the troubleshooter might inform you that Windows cannot be activated at the moment. Don’t worry—simply click on the option labeled “I changed hardware on this device recently” to proceed.

You’ll be directed to a screen prompting you to sign in to your Microsoft account. After signing in, you can link your current device to the Windows license you want to activate. Once this is complete, your system should be ready to go!
If errors persist, you may need to reach out to Microsoft support. This could happen if you’ve activated the license multiple times, reaching an activation limit. In such cases, a representative can help resolve the issue so you can continue using Windows under your license.
What About Other Issues?
If Windows struggles to run on your new system and the issue isn’t related to license activation, it might be due to a setup hiccup causing a driver conflict. Although this is uncommon in Windows 10, resolving it typically involves booting into a recovery drive. From there, you can use the built-in diagnostic and troubleshooting tools to identify and address the problem.

Advanced Repair Options
Within the installation media, you’ll find advanced options that provide access to troubleshooting tools, including automatic repair. This feature can often resolve the issue. If driver conflicts are causing the problem, you can boot into Safe Mode and disable the problematic drivers to regain system stability.
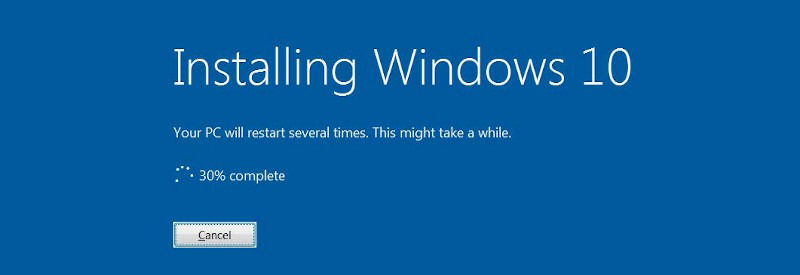
However, these methods are not always foolproof. If they don’t work, your best option to get the system running smoothly again may be to perform a clean reinstall of Windows.
Final Thoughts
While it’s often possible to replace the motherboard without reinstalling Windows 10, the transition may not always be flawless. To ensure optimal performance and avoid potential hardware conflicts, a clean installation of Windows is highly recommended after changing to a new motherboard.
Windows is designed to adapt to new hardware for user convenience, but it cannot guarantee a seamless transition every time. Therefore, it’s essential to prepare for any issues:
- Back up your important data.
- Keep copies of your essential applications handy.
- Have Windows 10 installation media ready in case a reinstall is needed.
For the best results, uninstall drivers for core components—such as the graphics card and chipset—on your old system before moving Windows to the new hardware.
If you have additional tips or questions, feel free to share them in the comments!