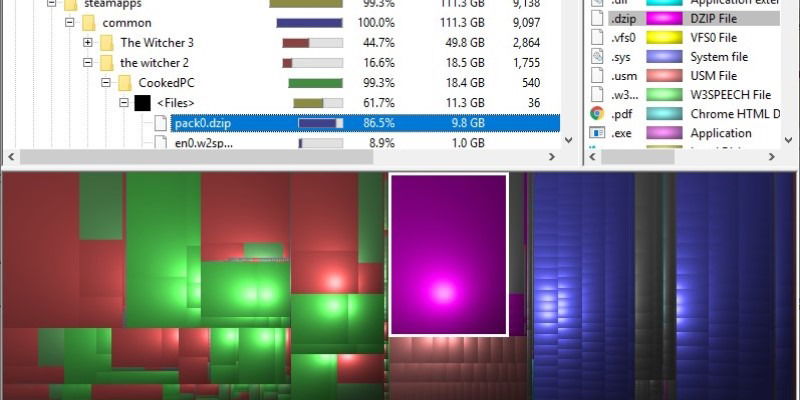
When your disk(s) get full, it’s time to clean up. But that’s easier said than done. Sure, you can use Windows’ Disk Cleanup utility, and it might free up a few gigabytes. But what if you need to free up a few hundred gigabytes?
A disk space analyzer offers a visual representation of how large each directory is. This makes it easier to spot what eats up your disk space and potentially delete unwanted stuff.
There are a lot of such utilities, and they all basically do the same thing. But since visual representation is the most important difference between them, images will help you decide what you like most. Find out some of the best disk space analyzer tools for Windows 10.
Also read: How to Free Up Disk Space on Windows 10 with Storage Sense
1. SpaceSniffer
This program has a very simple interface and visual style. The clean visuals make it very easy to read through directory names.
Another advantage is that you have a portable version download available. A portable app can be downloaded and run without the need to be installed on a system. Which means you could also put this on an USB stick, carry it around and run it on any computer you use.
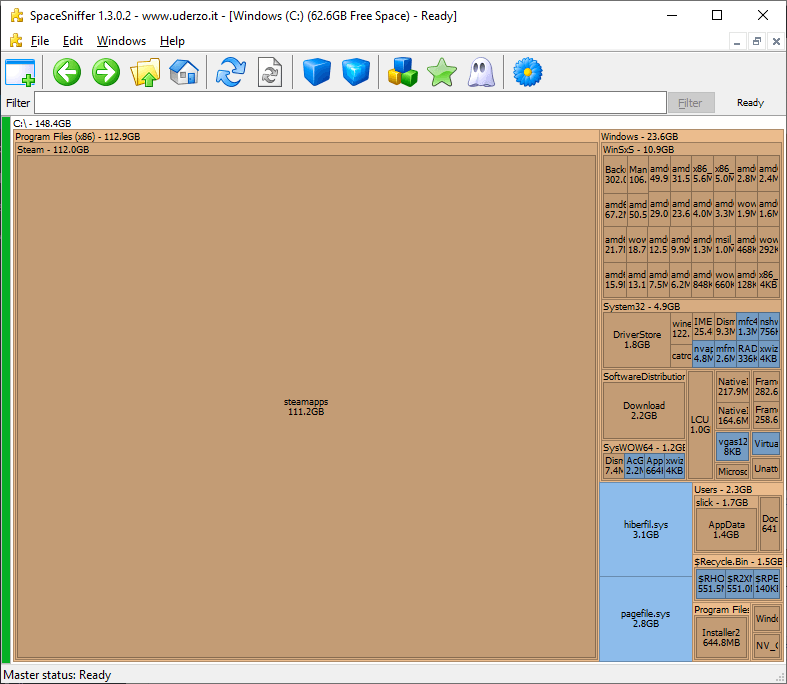
In the top menu bar you can increase or decrease the level of detail. But you can also do this with individual elements instead of doing it globally. For example, with a few clicks on “steamapps,” as seen in the picture above, you can reveal what folders are contained within.
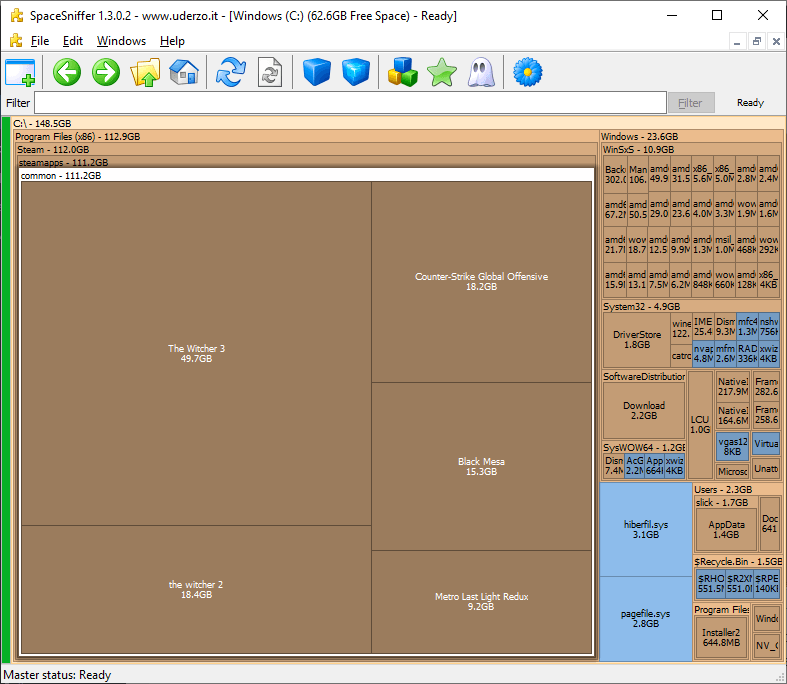
You can also double-click on a directory which contains too many elements. This will zoom into that directory, making it take up the entire main window. Since graphical elements will be larger, text labels will be less crowded, making things easier to read.
2. WinDirStat
You might prefer a tree view instead of the tile view seen in the previous utility. WinDirStat combines both of these views, in a hybrid that looks like the following image.
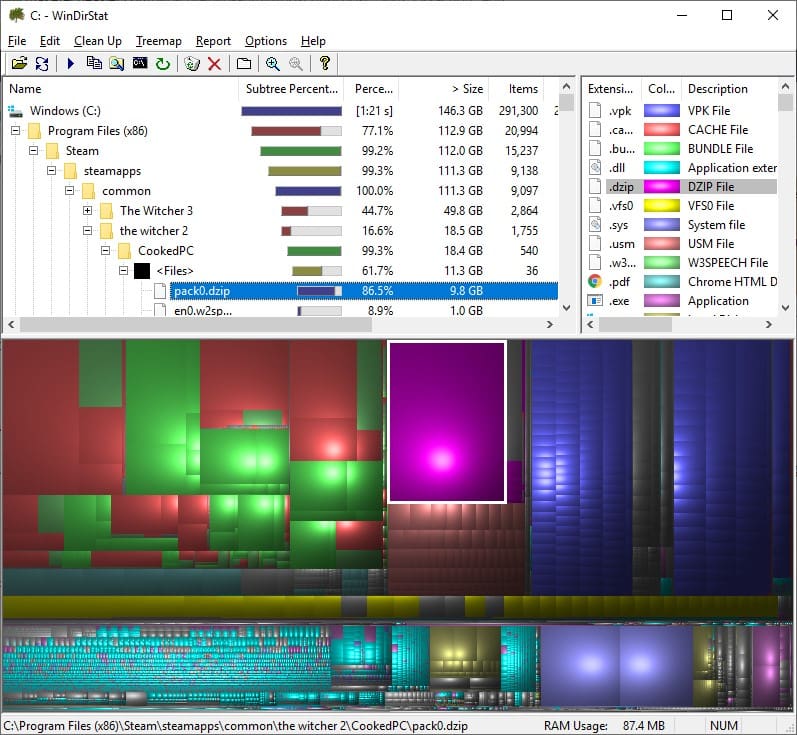
When you click one of the tiles in the fancy graphical view at the bottom, you are automatically taken to the corresponding directory in the tree view. You can see this in the previous picture. And since the tree view automatically sorts directories from largest to smallest, it’s easy to browse through it until you can find large folders and files that you don’t need.
A feature you may find useful can be found in the top-right corner of the main window. For example, if you’re looking for MP3 files, you can click the extensions in that list. Doing so will highlight every such file in the bottom tile view. It’s probably because of this feature the program takes a little bit more time for the initial scan of your drives. SpaceSniffer was significantly faster in this regard.
Also read: How to Find Out How Much Hard Drive Space You Need
3. HDGraph
A less common type of disk space analyzer/visualizer is the one that draws directories like the following image.
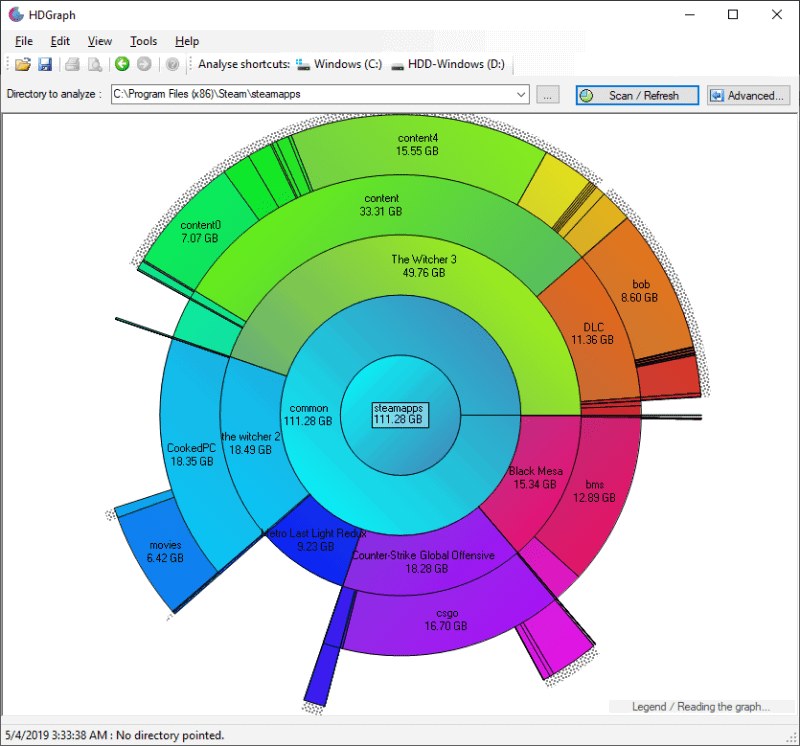
Depending on how you think and visualize things, this might paint a clearer picture for you or make things seem more confusing. It’s all a matter of preference.
You won’t find many features in HDGraph. If you’re a minimalist, you will love the comfort offered by lack of clutter and complexity. If, however, you need more features, you’re better off with one of the first two programs. The functionality can be summarized in a few words. The tool draws the directories in concentric circles. You can right-click and select another directory to center the graph around. You can change scanning depth, view directory properties and the size of its components, or open File Explorer in a directory.
Just like the first program in this list, you can find a portable version of the app.
4. Windows Storage Settings
While it started out as a purely orientative app, Windows’ very own disk space analyzer has evolved to the point where it deserves a mention in this list. To open it, press the Win key, type “storage” and open the “Storage settings” application. After you select your desired disk, you will be presented with a window that looks like the following image.
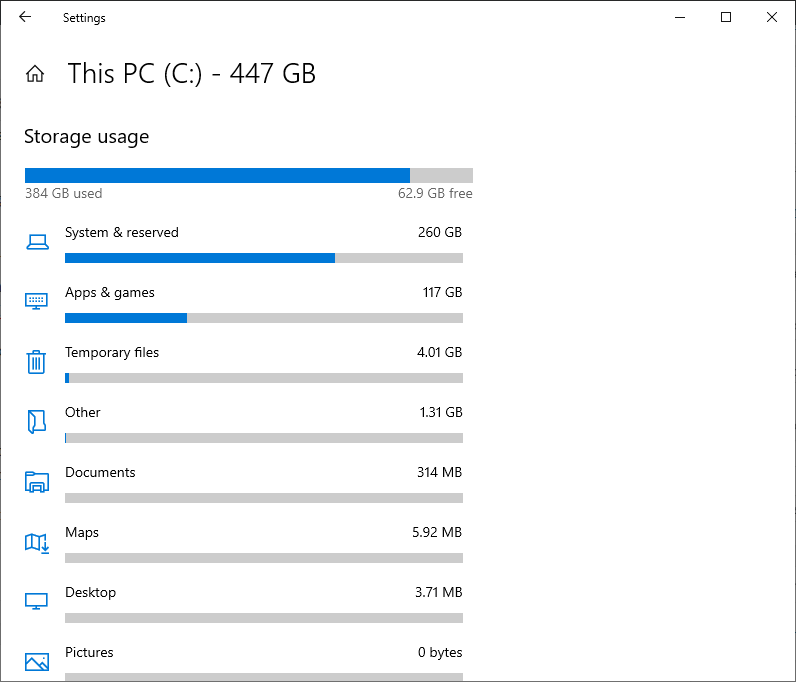
Depending on which section of disk space usage you analyze, you can now take appropriate actions from within this application. If you’re viewing temporary files, you can clean up what you don’t need: old windows updates, the recycle bin, temporary program files, error logs, and so on. In “System & reserved” you can tweak System Restore usage, which can get quite sizable on very large hard drives/SSDs.
This utility gives you a good way of managing disk space used by the operating system or things that integrate with it. However, that’s as far as its functionality extends. You won’t be able to analyze disk space used by random directories you have on your drives.
Either way, if you need something more, you can just install one of the first three apps and use them in conjunction with Windows’ integrated tool.
Fell in love with computers when he was four years old. 27 years later, the passion is still burning, fueling constant learning. Spends most of his time in terminal windows and SSH sessions, managing Linux desktops and servers.
Subscribe to our newsletter!
Our latest tutorials delivered straight to your inbox
Sign up for all newsletters.
By signing up, you agree to our Privacy Policy and European users agree to the data transfer policy. We will not share your data and you can unsubscribe at any time. Subscribe
