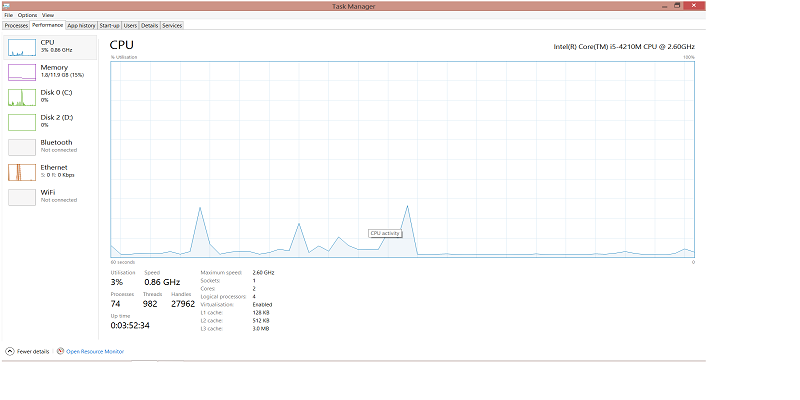
Working on your Windows 10 computer, you may have come across one or two memory consuming programs and services. If you have never bothered to check, then a look at the task manager applet may be important in knowing how much memory processes are consuming on your computer. Windows shell experience host is often a culprit for hoarding memory on Windows 10.
In the article we explain what Windows Shell Experience Host is and guide you as you resolve issues of memory over-consumption.
Also read: How to Optimize Delivery Optimization Cache in Windows 10
What is the Window shell experience host?
Universal Windows apps are always presented in a trademark Windows interface. The way these universal apps are presented is the primary function of the Windows shell experience host.
The function of this process makes it handle a lot of graphical elements pertaining to Windows applets. It handles elements such as the Start menu, visuals for notifications and even the taskbar transparency.
A common case of employing this process is when you set your desktop background to a slideshow. In this case you have just employed the help of the Windows shell experience host.
As much as it is in charge of this very aesthetically pleasing function, it could also trigger a skyrocketing of the CPU usage. With more updates, this is more on a decline but still an occurrence to be vigilant of.
If you ever experience this skyrocketed CPU usage, it will raise some curiosity as to why.
You should know this is an abnormality as Windows shell experience host will not usually consume a lot of your CPU. When there are these rare spikes, they usually sort themselves out and are reverted back to zero.
The image below shows what a normal memory use from this process should look like.
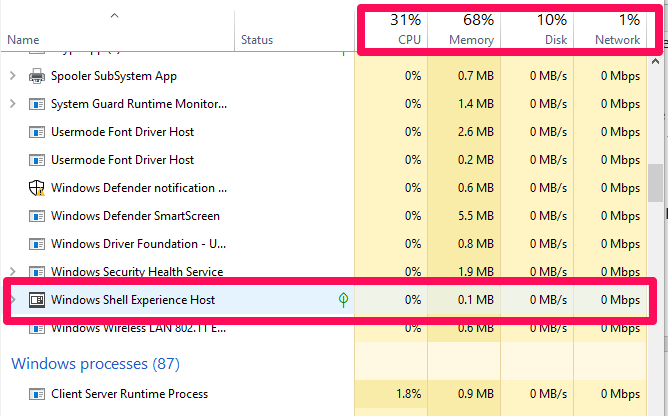
You should notice that the Windows shell experience host CPU and memory usage are at 0% and 0.1MB respectively. This is great and exactly how it should be on your system.
If you notice a spike in CPU usage of up to 25%, then you may be facing a problem with this Windows process and will need to troubleshoot promptly.
How to fix high resource consumption of Windows shell memory host
Once faced with this occurrence, you could try either of these fixes.
1. Perform a Windows update
To be on the safe side and as a best practice, it is better to have updates download automatically. If this is not the default for you, follow the next steps to perform an update.
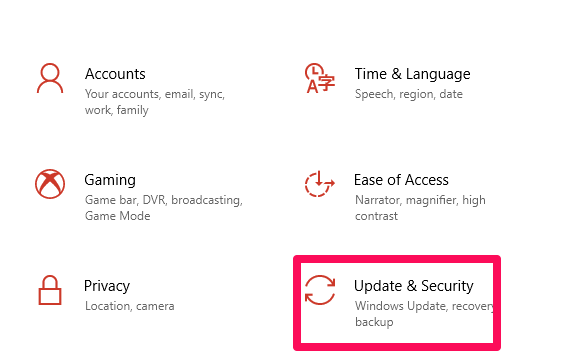
1. Open Settings in your Start menu, and select the “Updates and Security” option.
2. On the left pane select the Windows Update pane, and choose the “check for updates” button on the right pane.
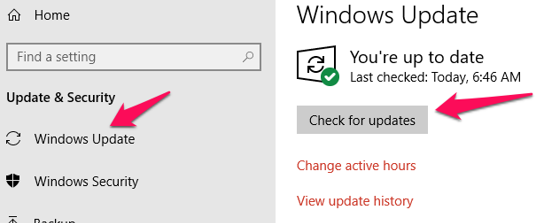
Windows will be forced to check if there are any updates. These updates will be downloaded. Make sure you install them and restart your computer if prompted to. Now, check to see if the issue is resolved. If it is not, proceed to the next step.
Also read: What Are Custom Views in Windows Event Viewer and How to Create One
2. Check for Common Potential Causes
The next thing to do if an update does not work is to check for common potential causes of this resource consuming issue. A few places to look are:
1. Slideshow background
Simply change your desktop background and see if this fixes the problem. If it does, then consider not reverting to the formal background again.
To change the desktop background, navigate to “Settings -> Personalization -> Background” to change the desktop background.
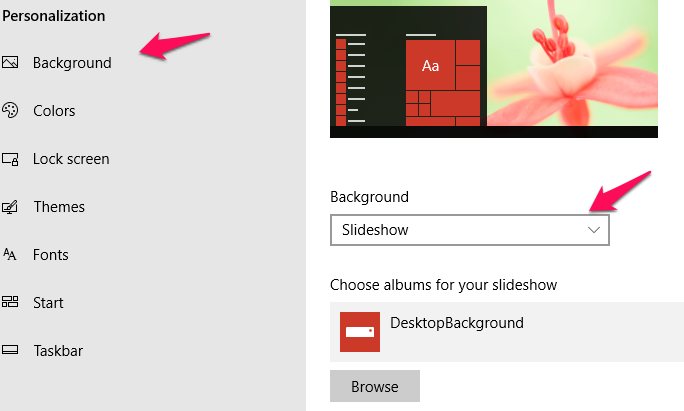
In the left pane of the personalization window, select the “Background” tab. On the right pane scroll down to the background dropdown list and select “solid color” or “slideshow” option. Afterward, check to see if the problem is resolved.
2. Accent Color
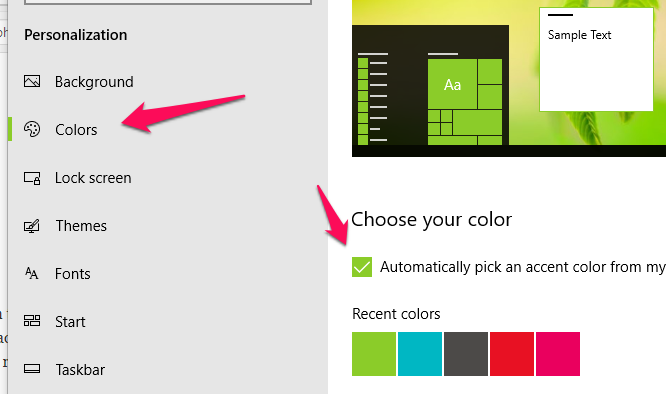
If the problem was not resolved, return to the personalization window. Select the “Colors” tab in the left pane. In the right pane uncheck the “Automatically pick an accent color from my background” option. After a few minutes, check to see if the problem has been resolved.
Conclusion
Windows 10 processes may once in a while trigger excessive resource consumption. In the case of the Windows shell experience host, just follow these processes to get your Windows 10 back to functioning normally again.
Afam is a writer with a passion for technology amongst many other fields. Aside from putting pen to paper, he is a passionate soccer lover, a dog breeder and enjoys playing the guitar and piano.
Subscribe to our newsletter!
Our latest tutorials delivered straight to your inbox
Sign up for all newsletters.
By signing up, you agree to our Privacy Policy and European users agree to the data transfer policy. We will not share your data and you can unsubscribe at any time. Subscribe
