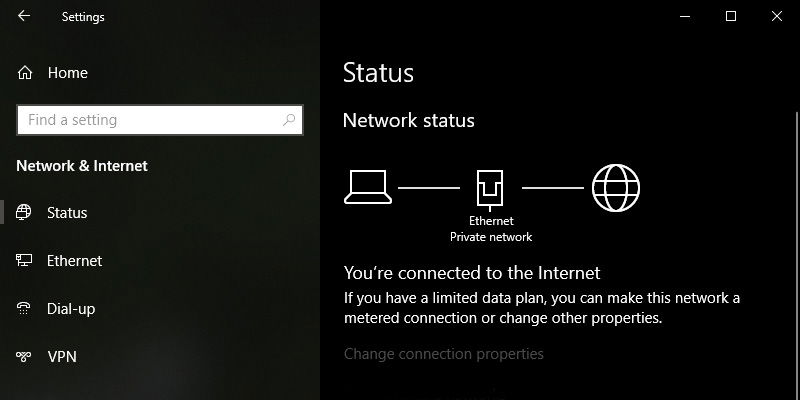
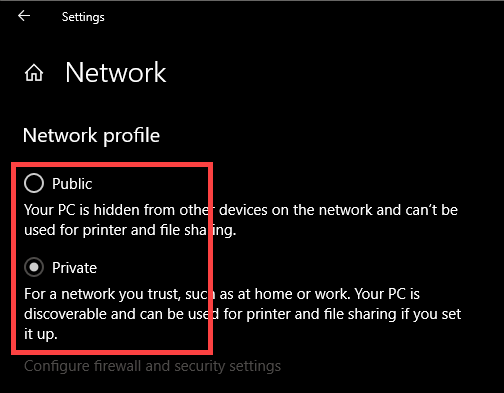
When you connect to a network on Windows, it will automatically detect whether the connected network is public or private and applies appropriate settings. For instance, the private network makes it possible to discover other devices on the same network and share files and a printer between them. A public network hides your system from other devices and blocks files and printer sharing. This mode is typically used when you are connecting to a public WiFi network, like in coffee shops or airports.
Though Windows does a good job of detecting the network, if it is not sure, it will ask you to choose a network type. Once you select the network profile type, Windows will apply the network settings accordingly.
If you think you or Windows chose the wrong network profile, you can easily change it. Here is how you can change the network profile from public to private or vice versa on Windows.
Also read: How to Change the Network Profile Name in Windows
Change Network Profile on Windows 7
1. On Windows 7 search for Control Panel in the Start menu and open it. Now, scroll down and click on the link “Network and Sharing Center.”
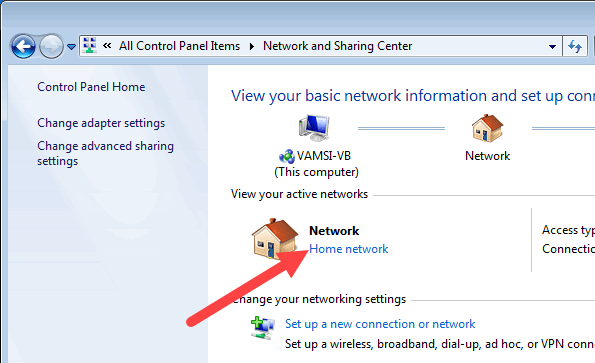
2. In the Network and Sharing Center window, you can see your active network under “View your active networks.” To set a network to public or private, click on the network profile under the network name.
3. You will be prompted to choose a network location. Windows 7 does a good job of explaining each network type. Read it thoroughly and choose the appropriate network type. Since we need to change from Public to Private, select “Home Network.”
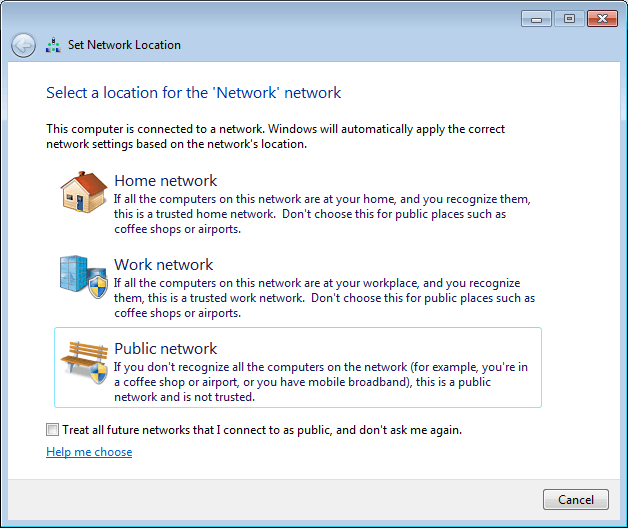
The changes are applied instantly. There is no need to restart.
Also read: How to Fix the Network Cable Unplugged Error in Windows
Change Network Profile on Windows 10
Windows 10 users can use the above method to set a network profile. Alternatively, you can also do that same thing from the Settings app. Since Windows 10 is slowly moving away from the Control Panel, I recommend you follow the below method.
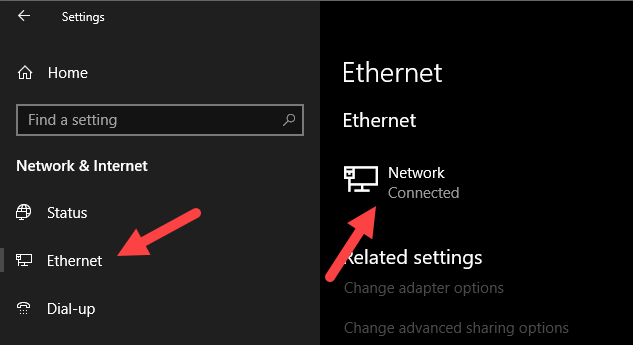
1. Open the Settings app from the Start menu. Go to “Network and Internet.”
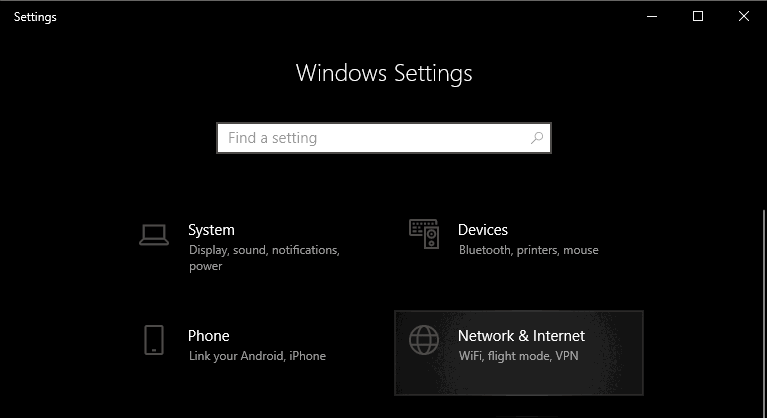
2. Select “Ethernet” on the left panel. If you are using WiFi, select “WiFi.” On the right panel click on the “Network” button.
3. Choose the “Private” network profile. Just as with Windows 7, the changes are applied instantly.
Change Network Profile from Local Security Policy
If you want to, you can force a certain network profile using Local Security Policy. This method is useful for system administrators or when you are unable to use the above two methods. Also, you should be using the Pro version of Windows.
Since you can effectively force a network profile and disregard user choice, only follow this method if you know what you are doing.
1. First, press Win + R, type secpol.msc and press Enter to open Local Security Policy.

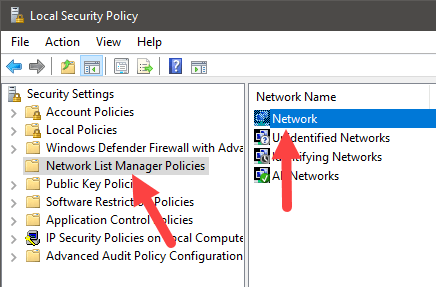
2. In the Local Security Policy window, select “Network List Manager Policies” on the left panel and then double-click on your network appearing on the right panel.
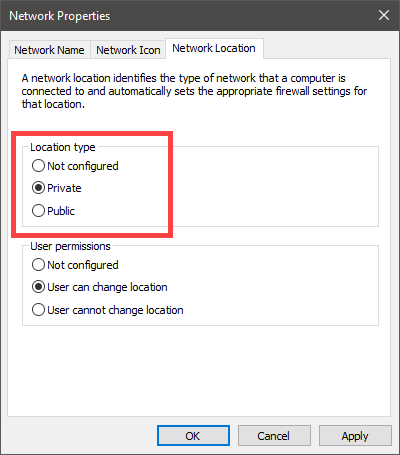
3. Select “Private” under “Location type.”
You can leave the defaults be under “User Permissions.” However, if you want to restrict users from changing the network profile type, select “User cannot change location.” To make sure a user can change the network profile, select “User can change location.”
4. Click “Ok” to save changes.
That is it. Restart your system, and the changes should take effect.
Comment below sharing your thoughts and experiences regarding using the above method to change the network profile on Windows.
Vamsi is a tech and WordPress geek who enjoys writing how-to guides and messing with his computer and software in general. When not writing for MTE, he writes for he shares tips, tricks, and lifehacks on his own blog Stugon.
Subscribe to our newsletter!
Our latest tutorials delivered straight to your inbox
Sign up for all newsletters.
By signing up, you agree to our Privacy Policy and European users agree to the data transfer policy. We will not share your data and you can unsubscribe at any time. Subscribe
