You just bought a new monitor but are not sure of the best options for using it with Windows 10? No problem, we will help you fine tune your display in Microsoft’s newest operating system. Fortunately, the Windows 10 Creators Update added two new display settings to provide your PC or laptop with a more pleasant experience. We will show you these, in addition to some older hacks.
1. Night Light
The lack of warmer colors while watching your computer screen at night can have negative effects on your body’s natural clock, making it difficult to sleep well at night. iPhones and many Android devices have the option to switch to warmer colors at night. With the Windows 10 Creators Update, Microsoft enables you to bring the blue light on your laptop or PC to a less severe color.
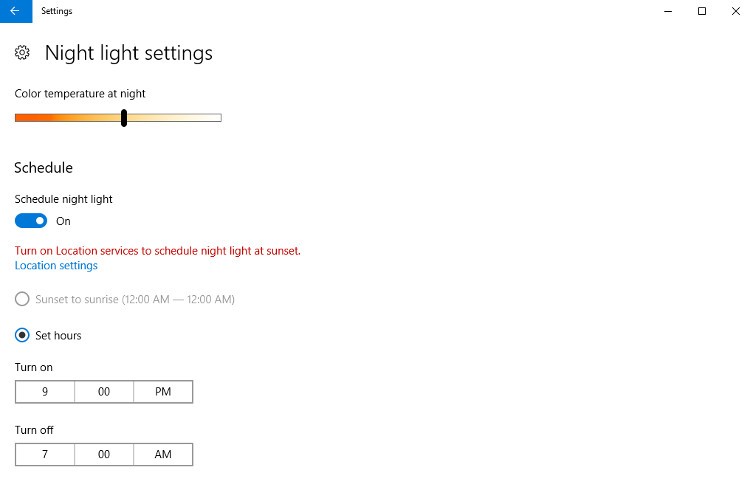
In order to turn this setting on, you need to navigate to the “Display” settings. The easiest way to do this is to type either display settings or night light in the search bar located in the bottom-left corner of your screen, then click “Night Light Settings.” You can turn the night light on instantly by clicking “Turn on now.” Windows 10 also gives you an option to schedule Night Light to either sunset to sunrise – based on your location – or hours of the day, which you can manually set.
2. Fine tune old apps with DPI scaling
Some old applications – where the developer did not release the proper patches – look blurry on your screen, deteriorating the quality of your display. Creators Update adds a new way for you to override the DPI (dots per inch) settings, forcing individual applications to scale properly on your screen.
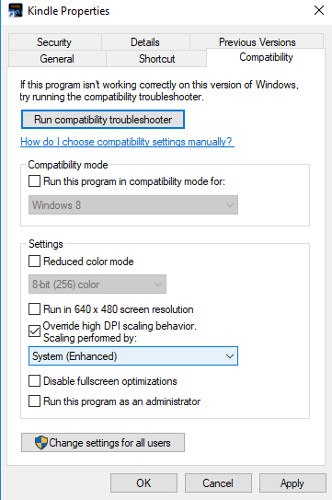
1. Choose the apps you’d like to adjust the settings on to make your display less blurry.
2. Right click on their icons and choose “Properties.”
3. Under the “Compatibility” tab, tick the box that reads “Override high DPI scaling behavior,” and then choose “System (Enhanced)” from the menu which will perform the scaling for you.
3. Use the native resolution of your display
This may sound like a basic tweak to fine tune your display; however, it is an old but important one. The native resolution of your screen allows you to view everything in detail at the maximum settings of your monitor. When the resolution is lower, all the icons, images, and videos can become blurry, and the quality of everything is degraded. To make sure you use your native resolution, navigate to the Display settings and choose the option at “Resolution” which has “Recommended” written in parentheses.
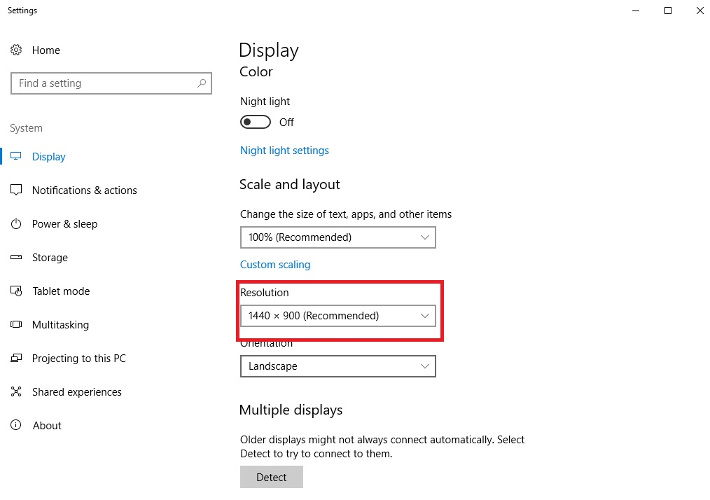
4. Scale the size of apps, text and icons
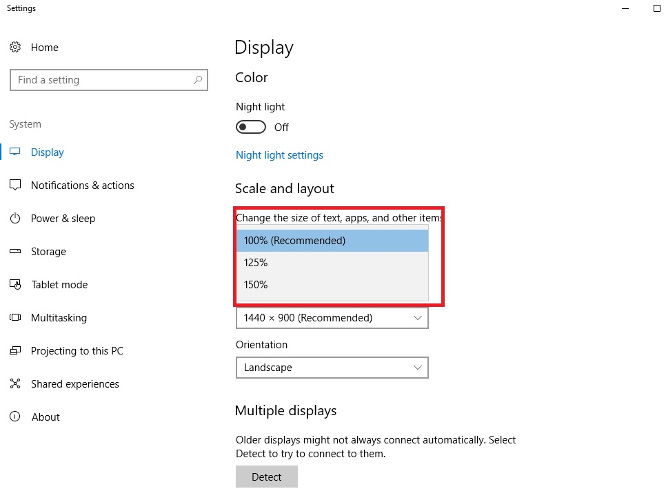
Many Windows users are not satisfied with the size of the text in the operating system. Many of them have trouble reading texts. To ensure your satisfaction, you need to scale the size of text, applications and icons. You need to head to the Display settings and find the option where you can scale up the size of text, apps and icons. Choose your preferred ratio from the drop-down menu and you are ready!
Conclusion
Windows 10 comes with many options for you to fine tune your display. Try them out and get the best viewing experience out of your monitor.
Benjamin Vitáris is a freelance journalist and tech blogger.
Subscribe to our newsletter!
Our latest tutorials delivered straight to your inbox
Sign up for all newsletters.
By signing up, you agree to our Privacy Policy and European users agree to the data transfer policy. We will not share your data and you can unsubscribe at any time. Subscribe
