There are several improvements in the Windows 10 Anniversary update. One of them is the Action Center with how the notifications appear. In the Action Center all the notifications appear in groups according to the apps, and you can easily dismiss a group of notifications rather than one notification at a time. Moreover, you can even reply to Skype and other messages directly from the notification center. You can also set app notification priorities so that the notifications from your favorite apps are not buried deep down in the Action Center.
The following is how you can set app notification priorities in the Windows 10 Anniversary update.
Set App Notification Priorities in Windows 10
Setting app notification priorities in Windows 10 is as easy as selecting a radio button. To start, click on the notifications icon appearing on the right-most-side of the taskbar, and then click on the “All Settings” button.
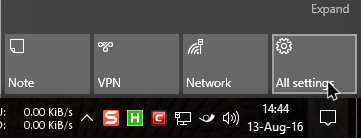
The above action will open the Windows 10 Settings app. Here, click on the “System” option.
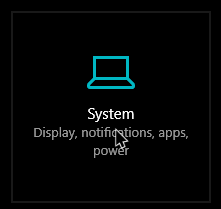
In the System settings, select the option “Notifications and Actions” appearing in the left pane.
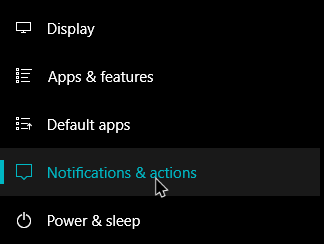
This window will show you all the settings related to the action center and the app notifications. Here, select the app you want to change the app notification priority for. In my case I’m selecting the WhatsApp application.

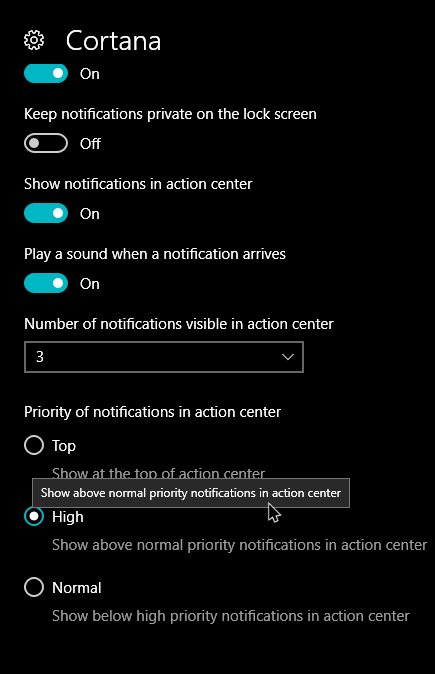
As soon as you select the app, it will show you all the notification settings of the target app. If you scroll down, you will see three notification priorities. Here is what the priorities actually mean.
Top: As you can tell from the name itself, when you set an app to the top priority, the notifications from that app will be shown on top of all the other app notifications. Since an app set to top priority can show notifications on top of all the others, you can only set one application as the top priority.
High: High priority is just below the Top, and any app set to this priority will be shown just below the Top priority notifications and on top of the Normal priority notifications. You can set as many apps as you want to the High priority.
Normal: The apps set to Normal priority will be shown just below all the High priority notifications.
To set an app priority, simply select the appropriate option under the “Priority of Notifications in Action Center.” In my case I’m changing the notification priority from Normal to High.
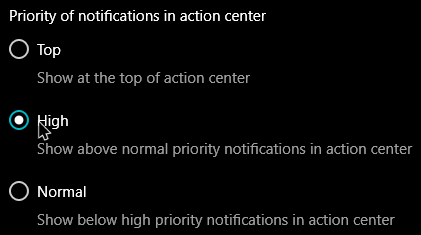
This app notifications will now be shown above the Normal priority notifications.
By default, the Cortana notifications are set to the Top priority. However, you can easily set any app to the top priority. All you have to do is select the “Top” radio button. If you try to set any other app to the Top priority, Windows will show you a confirmation message letting you know that another is set to this priority. Simply click on the button “Confirm” to apply the changes.
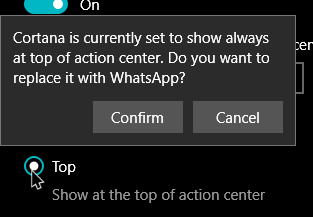
As soon as you change the top priority app, the previous app will be automatically demoted to High priority. You can see that change in the below image.
Do comment below sharing your thoughts and experiences about the app notification priorities feature in Windows 10.
Vamsi is a tech and WordPress geek who enjoys writing how-to guides and messing with his computer and software in general. When not writing for MTE, he writes for he shares tips, tricks, and lifehacks on his own blog Stugon.
Subscribe to our newsletter!
Our latest tutorials delivered straight to your inbox
Sign up for all newsletters.
By signing up, you agree to our Privacy Policy and European users agree to the data transfer policy. We will not share your data and you can unsubscribe at any time. Subscribe
