Cortana is one of the most improved features of the Windows 10 Anniversary update. Some of the improvements include, but are not limited to, better tracking for receipts, fliers, and the ability to set reminders without the need for place or time. However, if you are not a heavy Cortana user and don’t like that it collects data about you so as to provide you with personalized services, then you can just disable it completely.
Generally, you can kind of disable Cortana from the Privacy section in the Settings app. But this doesn’t completely disable the Cortana. Below are two ways to completely disable Cortana in Windows 10.
1. Disable Cortana Using Group Policy Editor
If you are using Windows 10 Pro or the Enterprise version, you can use the Group Policy Editor to disable Cortana. To start, press “Win + R,” type gpedit.msc and press the Enter button.

Once the Group Policy Editor has been opened, navigate to the following policy folder (Computer Configuration -> Administrative Templates -> Windows Components -> Search). Here, find and double-click on the policy “Allow Cortana.”

The above action will open the policy settings window. Here, select the “Disabled” radio button, and then click on the “OK” button to save the changes.
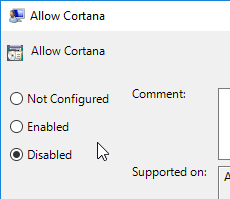
Just restart or sign out and sign into your system to make the changes take effect. Now, whenever you click on the Cortana icon, it will just act like a regular search bar.
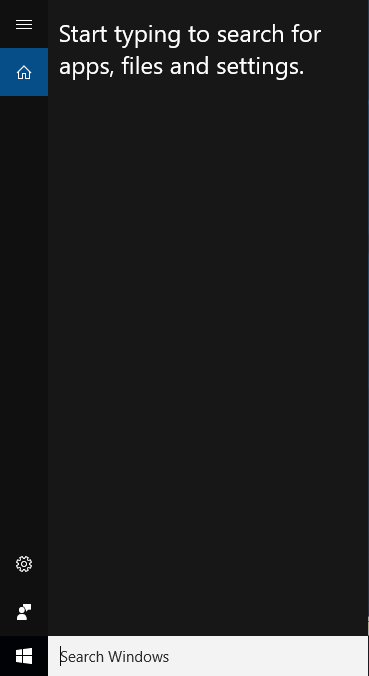
If you ever want to revert back, select either the “Enabled” or “Not Configured” options.
Disable Cortana Using Windows Registry
For users of then Windows 10 Home version, you can use the Windows Registry approach. Press “Win + R,” type regedit and press the Enter button.

In the Windows Registry, navigate to the following location.
HKEY_LOCAL_MACHINESOFTWAREPoliciesMicrosoftWindows
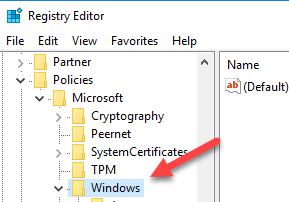
Once you are here, you need to create a new key. Just right-click on the “Windows” key, and then select the “New -> Key” option.

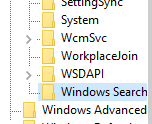
Name the key “Windows Search.” This is how it should look. If you already have the key, then just continue to the next step.
Now, right-click on the right panel, select the “New” option and then “DWORD (32-bit) Value.” This action will create a new DWORD value.
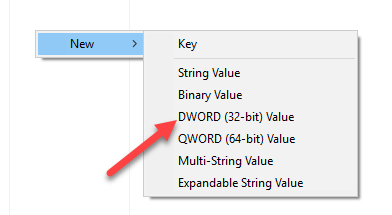
Rename the newly created value “AllowCortana.”

By default, the new key will have the “Value Data” set to “0,” which is fine. If not, double-click on the value, set the Value Data to “0” and then click on the “OK” button. to save the changes.
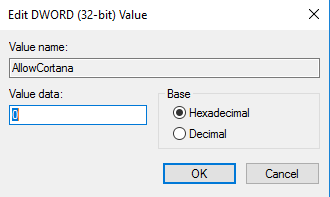
Just restart the system, and you will have Cortana disabled on your Windows 10 system. If you ever want to revert back, simply delete the DWORD value or just change the Value Data to “1.”
Do comment below sharing your thoughts and experiences about using the above method to completely disable Cortana in Windows 10.
Image credit: WindowsCentral
Vamsi is a tech and WordPress geek who enjoys writing how-to guides and messing with his computer and software in general. When not writing for MTE, he writes for he shares tips, tricks, and lifehacks on his own blog Stugon.
Subscribe to our newsletter!
Our latest tutorials delivered straight to your inbox
Sign up for all newsletters.
By signing up, you agree to our Privacy Policy and European users agree to the data transfer policy. We will not share your data and you can unsubscribe at any time. Subscribe
