When compared to Windows 8, Windows 10 has a lot of improvements in terms of features and usability. Some of those improvements include the ability to side load modern apps, install modern apps in a separate partition or another drive and the ability to move already installed apps. Installing and moving apps to another drive is particularly helpful if you have low disk space in the C drive or if you are using a low capacity hard drive like in notebooks.
Here is how you can install the modern apps on an external drive and even move the already installed apps to the drive or partition of your choice.
Install Modern Apps on an External Drive
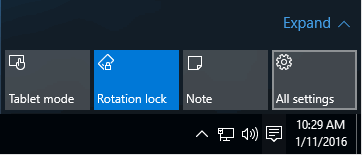
Installing modern apps in a separate partition or on an external drive is not hard. To start, insert the external drive and make sure that it is detected in the File Explorer. After that, click on the Notifications icon and then select the option “All Settings.” Alternatively, you can also use the Windows 10 keyboard shortcut “Win + I.”
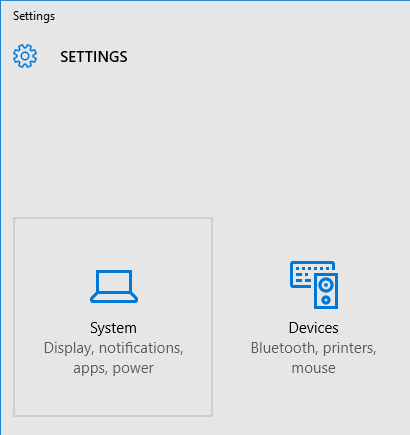
Once the Settings panel has been opened, select the option “System.” This is where you can edit most of the System-specific settings.
In the System window, navigate to the “Storage” panel. Here you will find all the drives in your system and the default install and download locations.

Just scroll down and select your external drive from the drop-down menu under “New apps will save to.” As you can see, I’m selecting my USB drive as my destination.
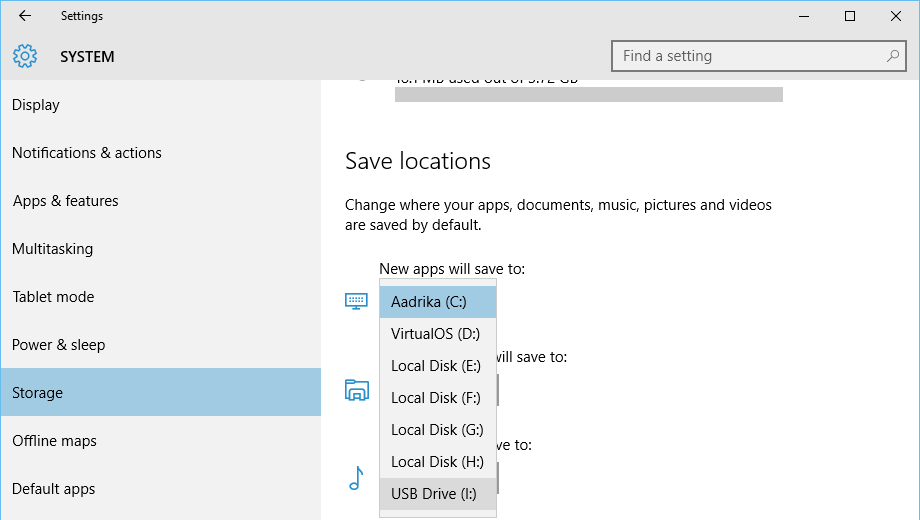
That’s all there is to do. From this point forward whenever you install a new app, it will be installed in the external drive. If Windows cannot find the drive while installing, you will be prompted to choose another location.
What Happens When You Remove the Drive?
What happens if you remove the drive and try to execute the already installed application? Actually, nothing happens. All Windows does is let you know that the app is offline because the external drive is not connected.

As soon as you connect the drive you can use the app like any other installed app.
Move Already Installed Apps to Another Drive
Now, if you already have a ton of apps that are consuming all your storage, then you might also want to move them to the external drive. Thankfully, Windows 10 does have a straightforward solution.
To start, open up the Settings window and then navigate to the System panel. Here, select the option “Apps and Features” from the left pane.
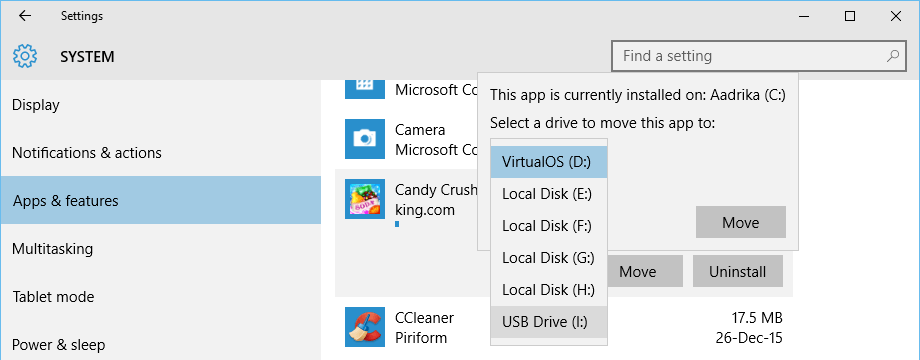
Once you are here, find the app you want to move, select it and click on the “Move” button.
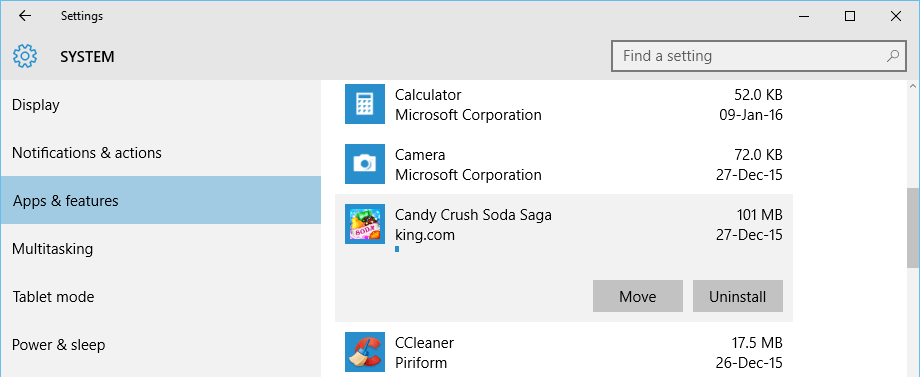
The above action will ask you to choose a drive. Simply select the drive from the drop-down menu and click on the “Move” button to complete the process. In my case I’m again selecting the external USB drive.
You’ve successfully moved the app. In fact, if you open the external drive you can see the folders related to the Windows apps. Of course, being system folders, you won’t have access to the “WindowsApps” folder unless you change the ownership.

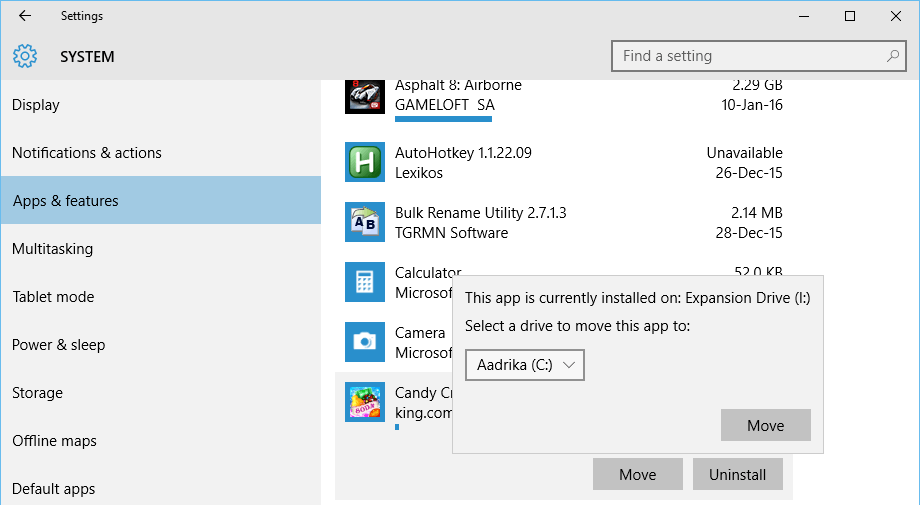
If you ever want to revert back, simply follow the same procedure, but select your C drive and click on the “Move” button.
It is that simple. Do comment below sharing your thoughts and experiences about using the above method to install and move apps to an external drive in Windows 10.
Vamsi is a tech and WordPress geek who enjoys writing how-to guides and messing with his computer and software in general. When not writing for MTE, he writes for he shares tips, tricks, and lifehacks on his own blog Stugon.
Subscribe to our newsletter!
Our latest tutorials delivered straight to your inbox
Sign up for all newsletters.
By signing up, you agree to our Privacy Policy and European users agree to the data transfer policy. We will not share your data and you can unsubscribe at any time. Subscribe
