When you insert or plug a new device into your Windows machine, the operating system detects it, and if compatible it displays a bunch of AutoPlay options. By selecting the AutoPlay option, you can easily and automatically interact with the plugged-in device. The good thing about the Windows AutoPlay option is that it can support different kinds of content like applications, music, video, etc.
As useful as it is, once you select the AutoPlay option the Windows operating system will remember it and will no longer ask you what to do when the hardware device with the same content is plugged in.
This can be quite frustrating at times, and if you ever want to, here is how you can stop Windows from remembering AutoPlay choices.
Using Group Policy Editor
Using Group Policy Editor to stop Windows from remembering the AutoPlay option is easy. However, the Group Policy Editor is only available for Pro and Enterprise version users, so make sure that you using either one of those.
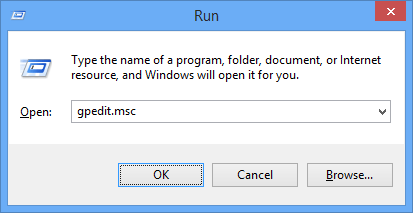
To start, press “WIn + R,” type gpedit.msc and press the Enter button to open the Group Policy Editor.
Once the Group Policy Editor has been opened, navigate to the following policy: “Computer Configuration -> Administrative Templates -> Windows Components -> AutoPlay Policies.”
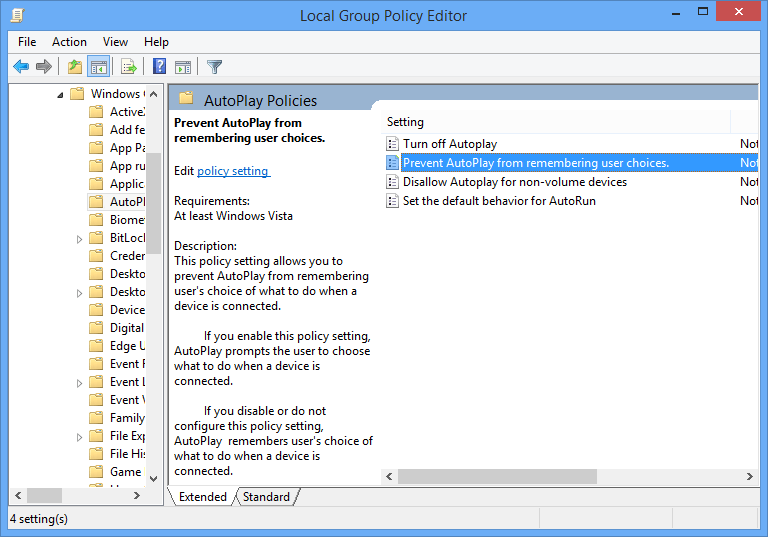
Double click on the policy “Prevent AutoPlay from remembering user choices” appearing on the right pane. This action will open the policy settings window. Just select the “Enabled” radio button, and click on the “Ok” button to save the changes.

From this point onward, Windows won’t remember the AutoPlay choices. If you ever want to revert the changes, simply select the “Disabled” or “Not configured” radio buttons and you are good to go.
Using Windows Registry Editor
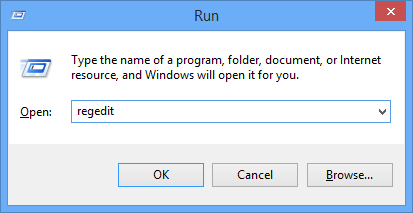
If you don’t have access to the Windows Group Policy Editor, you can also use the Registry Editor to achieve the same. To do that press “Win + R,” type regedit and press the Enter button to open the Windows Registry.
Once the Registry Editor has been opened, navigate to the following key.
HKEY_LOCAL_MACHINESOFTWAREMicrosoftWindowsCurrentVersionPoliciesExplorer
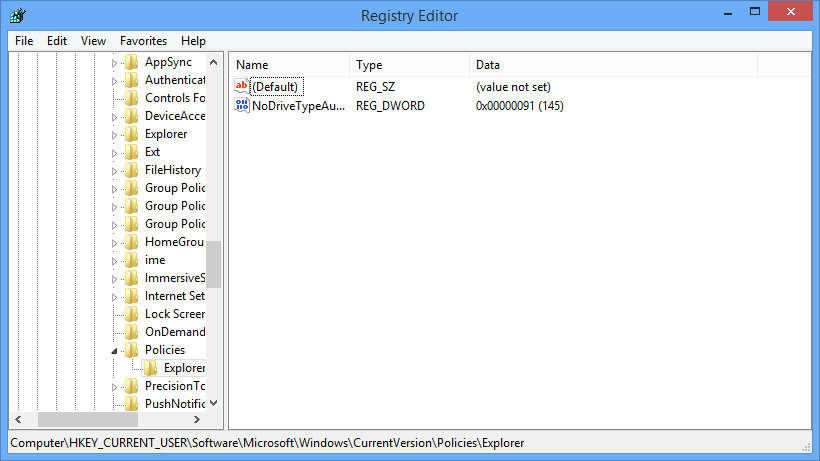
Now we need to create a new key. To do that, right click on the right pane and select the “New” option and then “DWORD (32-bit) Value.”
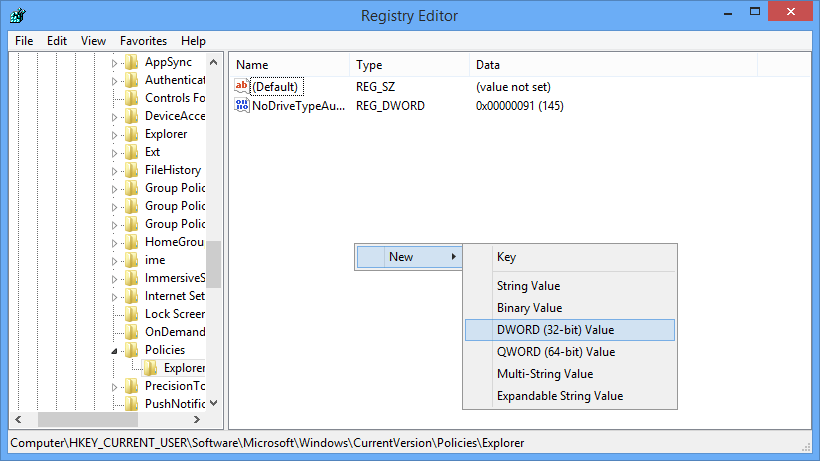
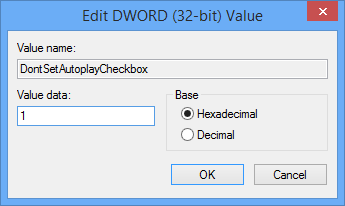
The above action will create a new key; simply rename it “DontSetAutoplayCheckbox” and press the Enter button.

Double click on it, enter the value data as “1” and click on the “Ok” button to save the changes.
Just restart or log off the system, and Windows will no longer remember the user’s AutoPlay options. If you ever want to revert the changes, either change the value data to “0,” or just delete the newly created key.
Do comment below sharing your thoughts and experiences about using the above methods to stop Windows from remembering a user’s AutoPlay choice.
Vamsi is a tech and WordPress geek who enjoys writing how-to guides and messing with his computer and software in general. When not writing for MTE, he writes for he shares tips, tricks, and lifehacks on his own blog Stugon.
Subscribe to our newsletter!
Our latest tutorials delivered straight to your inbox
Sign up for all newsletters.
By signing up, you agree to our Privacy Policy and European users agree to the data transfer policy. We will not share your data and you can unsubscribe at any time. Subscribe
