Do you have thousands of contacts in your iPhone? Whether you need to create a backup (aside from iCloud) or export the emails and other information to reach out in mass emails through Mail Merge, here’s a step-by-step tutorial how to do it in Windows 8.
In iTunes for Windows 8, you can export the contacts in two ways: Outlook and Windows Contacts. This tutorial features the Windows Contacts export in CSV file.
Before you proceed, make sure you have iTunes installed on your computer, and if not, you may download it here.
Note: it’s highly recommended to back up your iPhone before you export or make any changes.
1. Connect your iPhone to the computer; iTunes should launch automatically. If not, run the iTunes app.
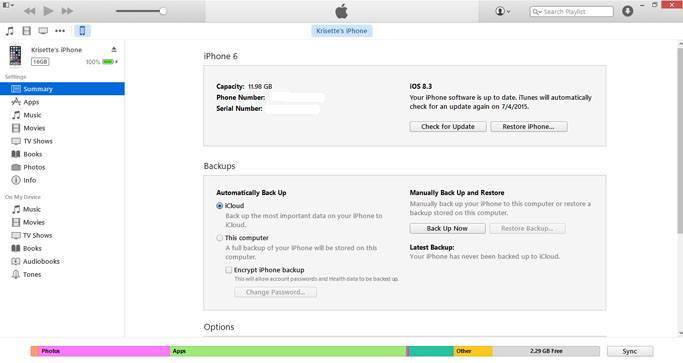
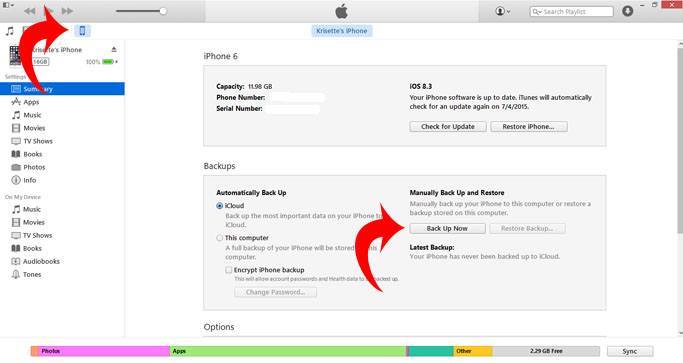
2. Click the iPhone icon followed by the “Backup now” button.
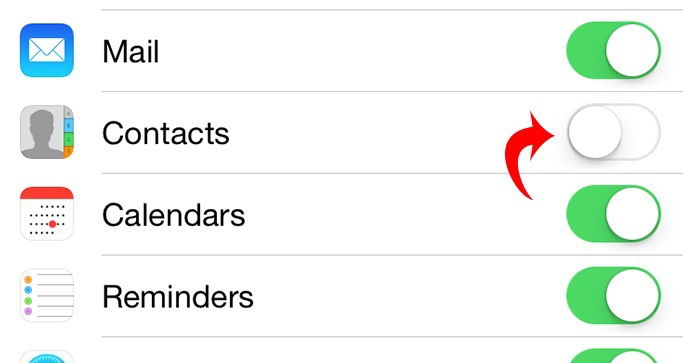
3. After the backup, disconnect your iPhone and go to Settings, then iCloud, and toggle off the “Contacts” if your contacts are being synced OTA (over the air).
How To Export iPhone Contacts to Windows Contacts
Note: when the Contacts are toggled on for OTA, you will not see the checkbox beside the Sync Contacts on iTunes. Make sure it’s toggled off.
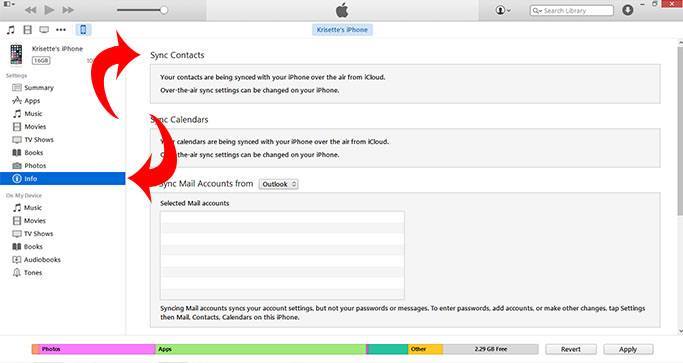
4. Click the Info tab and check the box “Sync Contacts.”
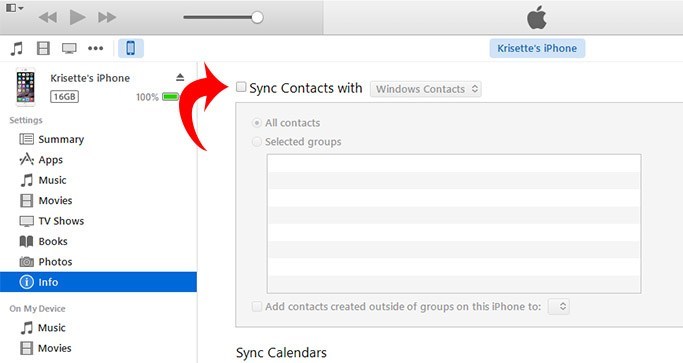
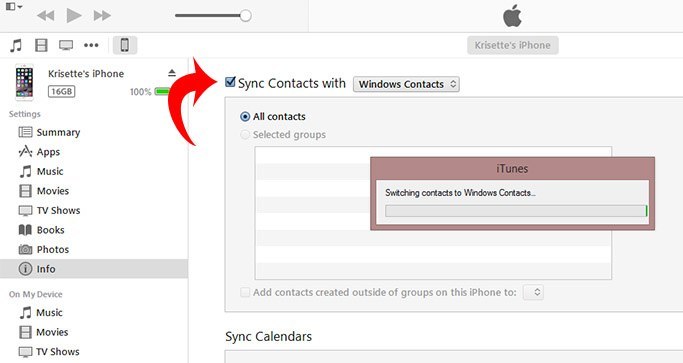
5. Choose Windows Contacts (You can choose all contacts or select a few for export). Click the “Apply” button for the change to take effect.
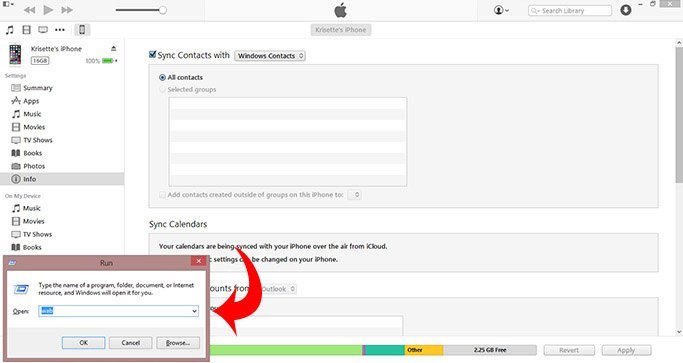
6. On your keyboard press “Window key + R” to launch the Run window. Type wab and click OK.
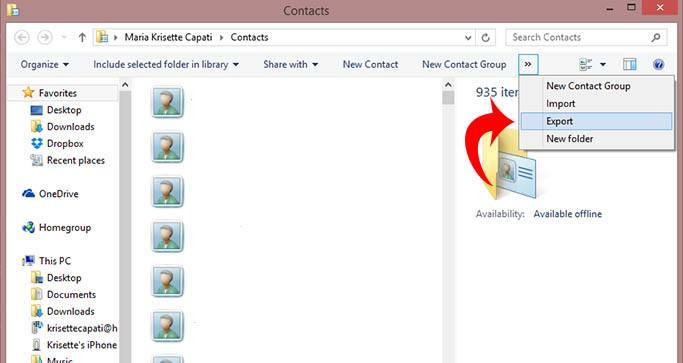
7. You will see a new window with folders and files. Click the double arrows on the screen to display additional commands.
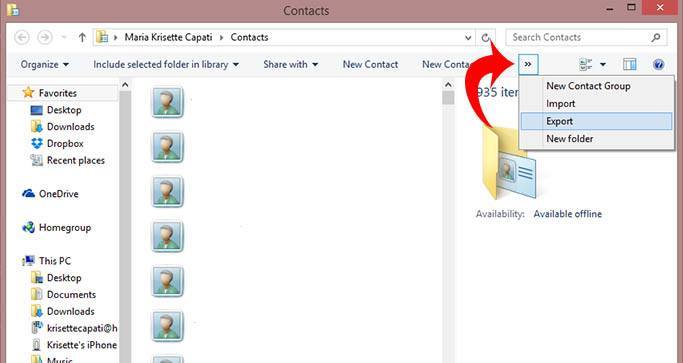
8. Choose the Export option.
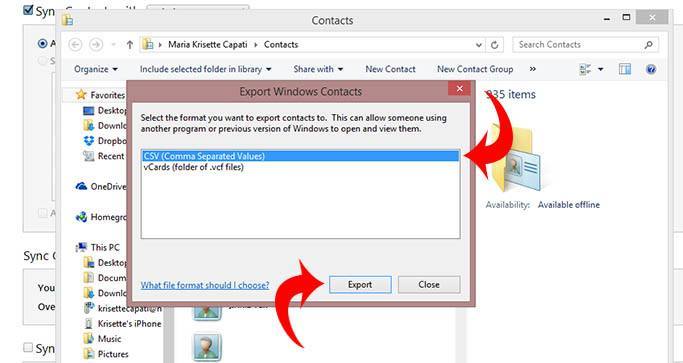
9. A new window will appear that shows the format type. Select the CSV format and click Export.
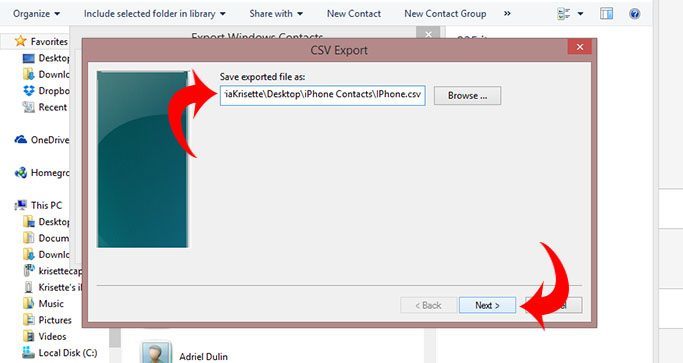
10. After this another window will pop up showing you addresses where you want to save the file. Browse through your folders and files for wherever you want to save the CSV file and hit “Next.”
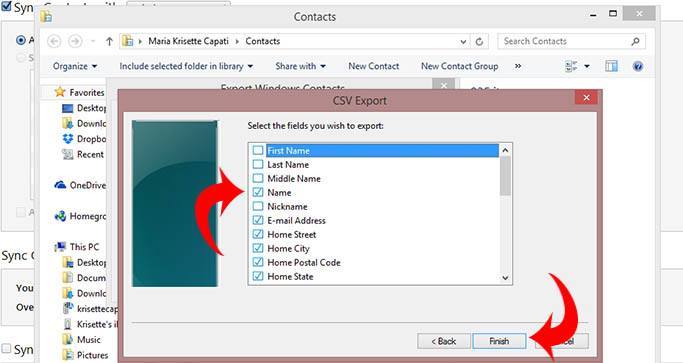
11. Check the appropriate fields you wish to export to when this window pops out and click Finish.
12. When you see this dialog box it means the export is successful. Click OK and go to the folder or file where you saved the CSV file to check. You can open using it using MS Excel.
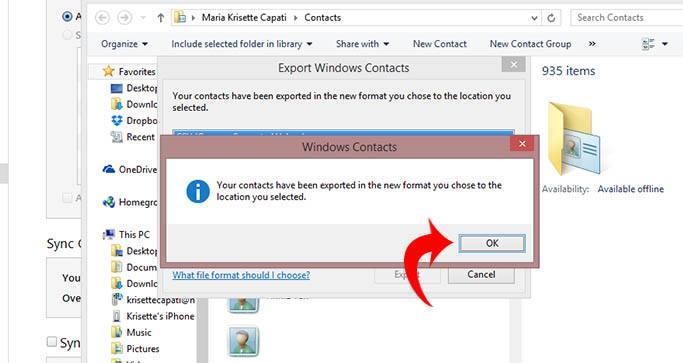
Note: the window above doesn’t close automatically. Click close after the export.
On the other hand, you can also choose the VCF format in step 11 in case you want to export your contacts from your iPhone to another device. You only need to save the file in an external memory card, and in the other smartphone you can import via SD Card.
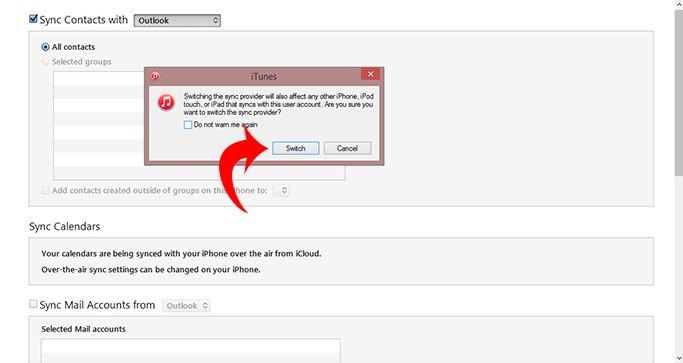
Meanwhile, if you want to sync your iPhone contacts with Outlook, you can switch and select the “Outlook” option. A warning box will pop out asking you if you want to switch. Click Switch.
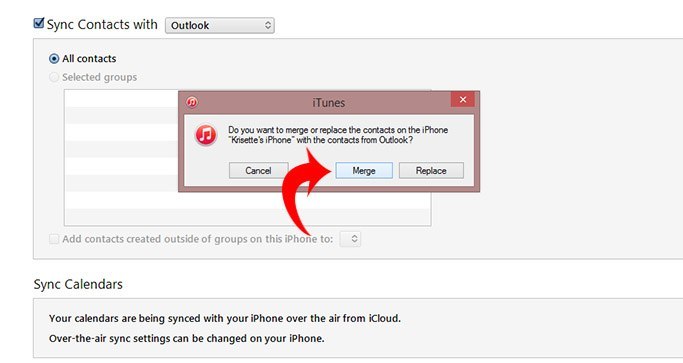
You can Merge or Replace your iPhone contacts with Outlook. Click Apply for the change to take effect.
Let us know how it works after using this tutorial. Remember to back up your device before making any changes.
Krisette is a technology writer who loves to cover disruptive technologies, trends, and a myriad of rumors and news updates. To satiate the inconsolable longing to feed her gadget addiction, she simply writes and tinker her gadgets for reviews. You may follow her blurbs, too! @krisettecapati
Subscribe to our newsletter!
Our latest tutorials delivered straight to your inbox
Sign up for all newsletters.
By signing up, you agree to our Privacy Policy and European users agree to the data transfer policy. We will not share your data and you can unsubscribe at any time. Subscribe
