For most Windows users, OneDrive has become a default and central place to store and sync data between computers. To increase the accessibility, Microsoft deeply integrated OneDrive into Windows by providing 15GB of free online cloud storage space, and you can also use OneDrive as the default location to save any office documents or files. If you want to save or sync other files and folders, all you have to do is drag and drop them into the OneDrive folder. But sometimes, dragging and dropping is not the easiest of options, and it may confuse the beginner users. Here we will show you how to add the OneDrive option to your right click’s “send to” menu so that you can easily copy files and folders into your OneDrive account.
Add OneDrive To Send to Menu
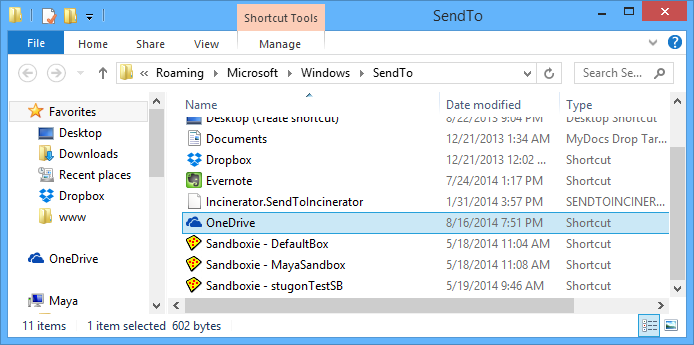
1. To add OneDrive to the Windows send to menu, press “Win + R” to open the run dialog box. Here type shell:sendto and press the Enter button. This action will open the “send to” folder located in your user account.
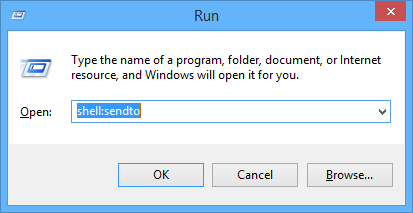
Alternatively, you can also open “send to” folder by entering the below address into the address bar of your Windows explorer:
%APPDATA%/Microsoft/Windows/SendTo
Any shortcuts placed here will be visible in the send to menu when you right click.
2. Here in the send to folder, right click and select “New” and then “Shortcut” to create a shortcut to the OneDrive folder.
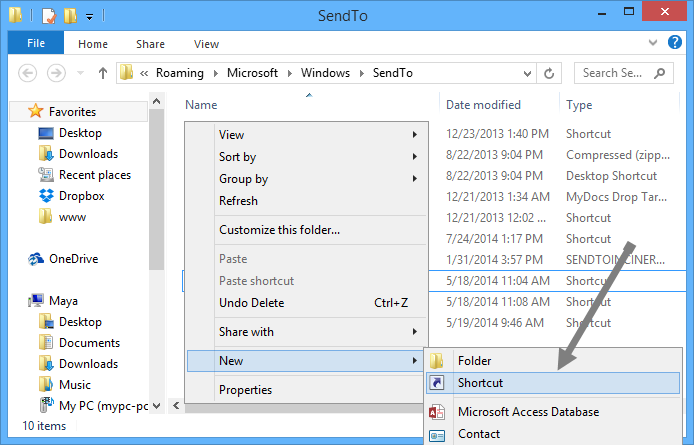
3. This will open the “Create shortcut” window, which allows you to easily create shortcuts for any apps, files or folders. Click on the “Browse” button to continue.
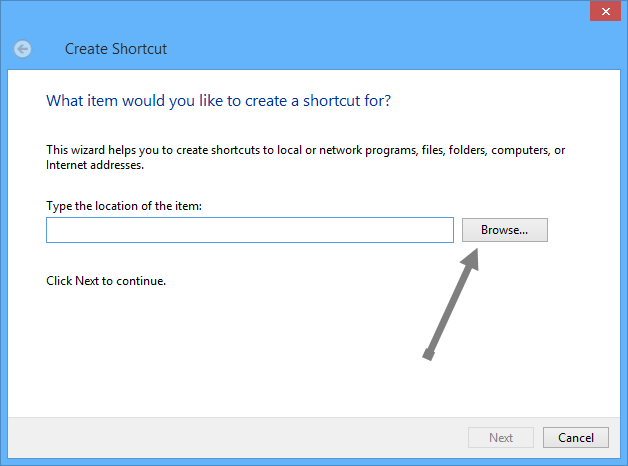
4. The above action will open the “Browse for files and folders” window. Here navigate and select the OneDrive folder and click on the “Ok” button. Usually the OneDrive folder will be just below the Desktop location.
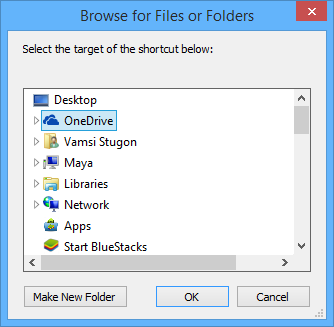
5. Depending on the location of your OneDrive folder, the “Type the location” field will be filled automatically. Click on the “Next” button to continue. By default, the OneDrive location will be something like C:Users<user>OneDrive unless otherwise customized.
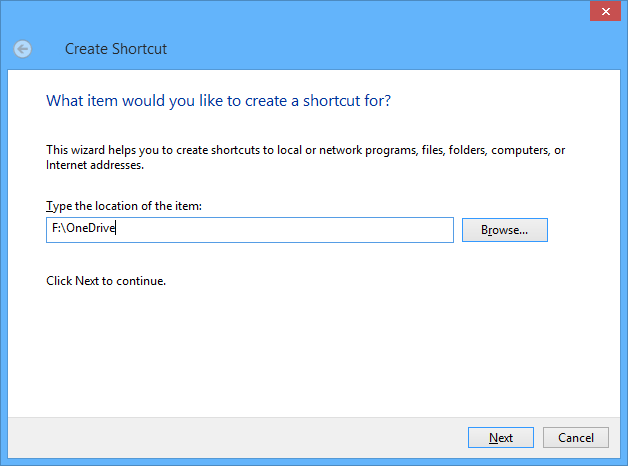
6. Here in this window, the name of the shortcut is automatically set to “OneDrive.” If you want to customize it, just enter the name of your choice and click on the “Finish” button.
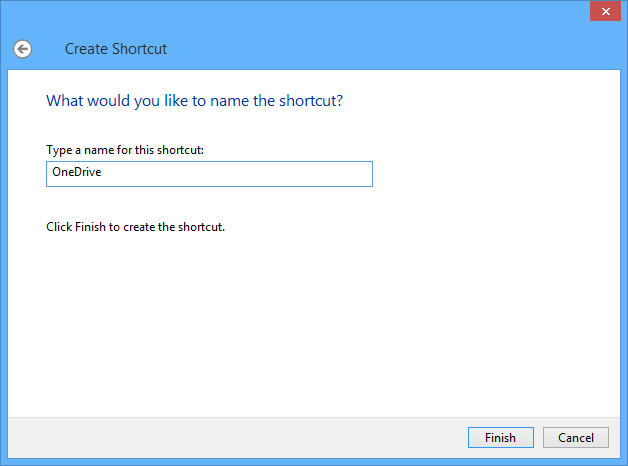
That’s it, you have successfully created a shortcut to OneDrive folder in the Windows send to menu.
From this point forward whenever you want to copy files or folders into OneDrive folder, just right click on that file or folder (you can also select multiple files and folders), select “send to” and then click on OneDrive.
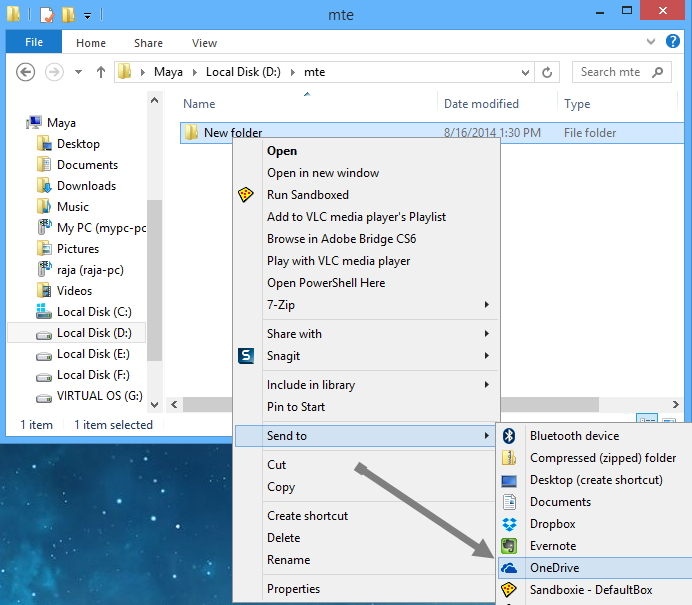
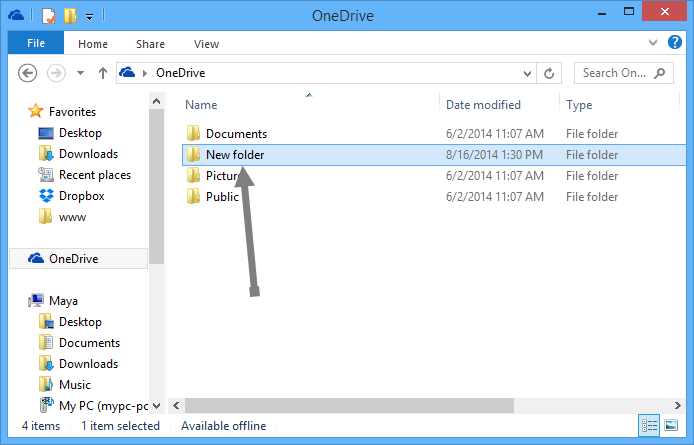
The above action will immediately copy all the selected file(s) or folder(s) to the root of the OneDrive folder. If you want to move them to a subfolder in the OneDrive folder, create another shortcut to that said subfolder using the above outlined procedure.
That’s all there is to do, and it is that simple to add OneDrive to your Windows send to menu. Do comment below if you face any problems while adding OneDrive to the Windows send to menu.
Vamsi is a tech and WordPress geek who enjoys writing how-to guides and messing with his computer and software in general. When not writing for MTE, he writes for he shares tips, tricks, and lifehacks on his own blog Stugon.
Subscribe to our newsletter!
Our latest tutorials delivered straight to your inbox
Sign up for all newsletters.
By signing up, you agree to our Privacy Policy and European users agree to the data transfer policy. We will not share your data and you can unsubscribe at any time. Subscribe
