
Windows is no stranger to errors and unexplained hiccups, especially when it comes to Windows Update errors. One such commonly seen issue is the Windows Update install error 0x80070103, which is encountered by users when trying to install OS updates. This error can be traced to one or more root causes and can be fixed easily if you know what to do. Let’s find out a bit more about it and the fixes you can use to get rid of it.
Good to know: enjoy an uncluttered Windows experience by removing ads from your OS. Here’s how.
Content
- 1. Run Windows Update Troubleshooter
- 2. Stop Driver Updates From Reinstalling
- 3. Run SFC and DISM Scans
- 4. Delete Windows Temp Files
- 5. Restart the Windows Update Services
- 6. Reset Windows
- Frequently Asked Questions
1. Run Windows Update Troubleshooter
The first fix you should try is running the Windows Update troubleshooter. If there are some surface-level configuration issues with Windows Update, the troubleshooter should be able to fix them in no time. Follow the steps below to do so:
- Press Win + I to open Settings.
- Navigate to “System -> Troubleshoot -> Other troubleshooters.”
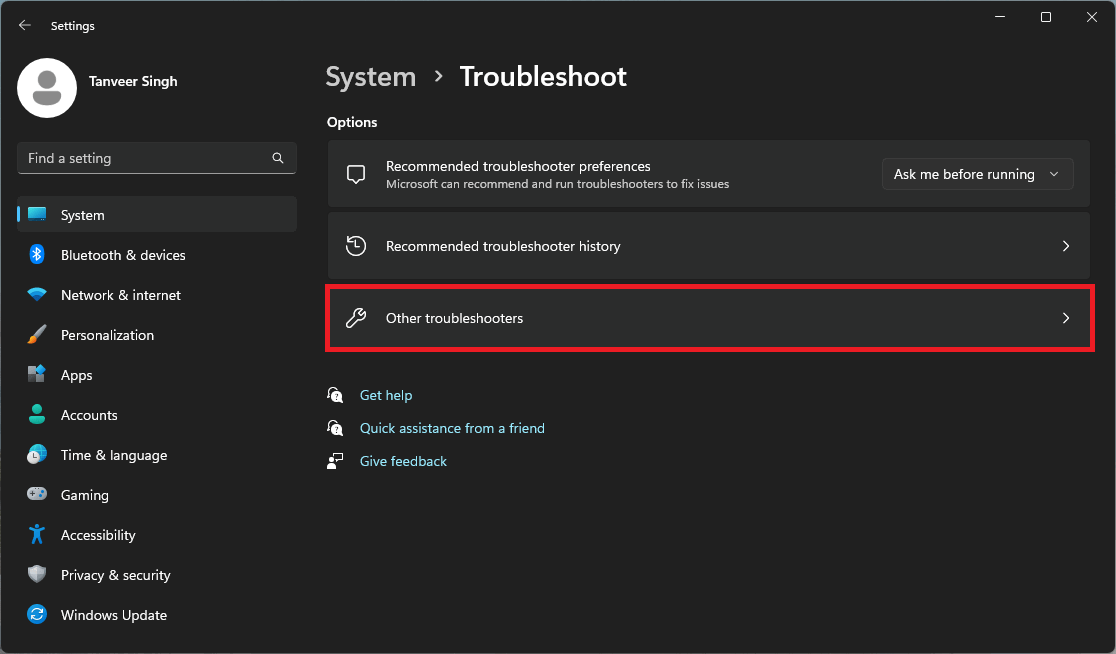
- In Windows 10, the path is “Settings -> Update & Security -> Troubleshoot -> Additional troubleshooters.”
- Next to “Windows Update,” click “Run” to start the troubleshooter.
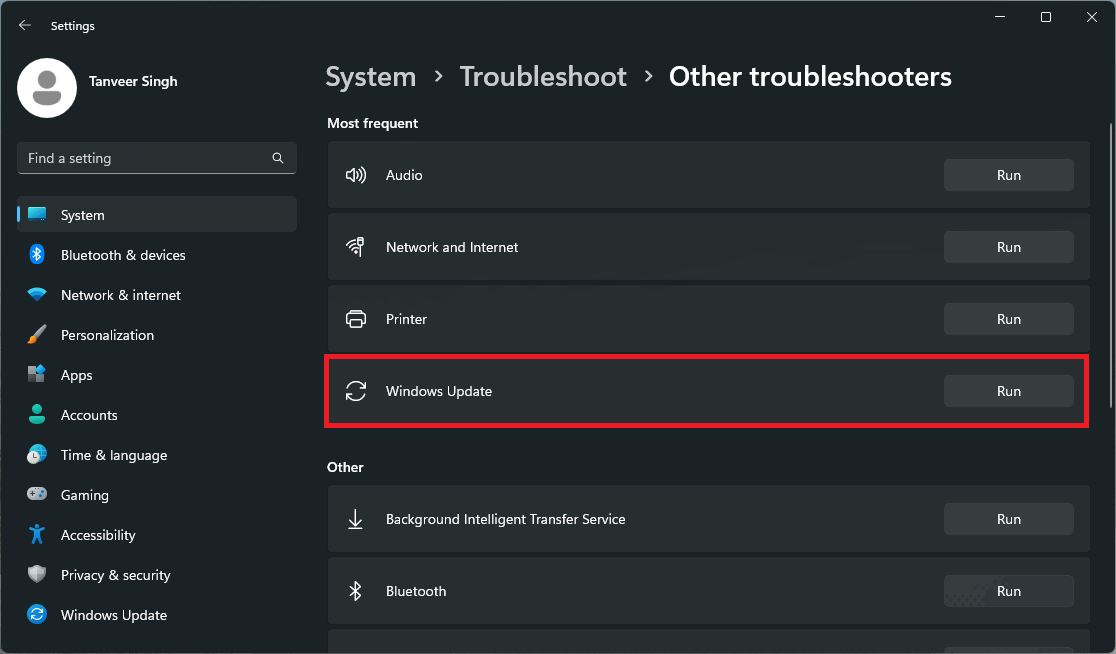
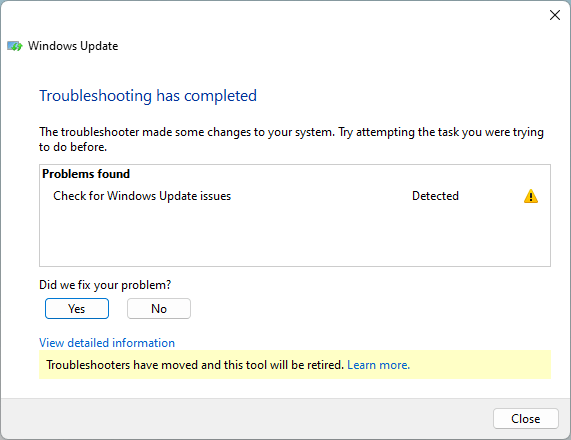
- Once the troubleshooter finishes scanning the computer and fixing any problems it detected, try installing Windows updates again.
Tip: learn how to remove old and useless drivers in Windows.
2. Stop Driver Updates From Reinstalling
The Windows Update install error 0x80070103 is known to show up if you try installing drivers that are already installed on your system. This has also been cited as the main cause for the error by Microsoft. There is a solution to this problem which you can implement by following the steps below:
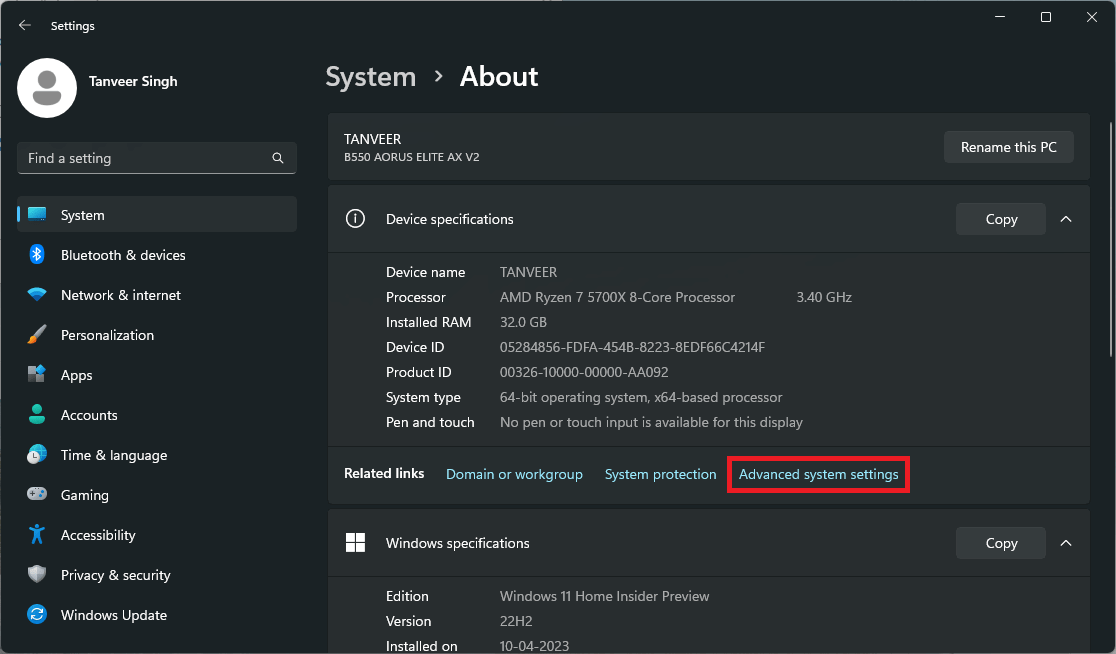
- Go to “Settings -> System -> About.”
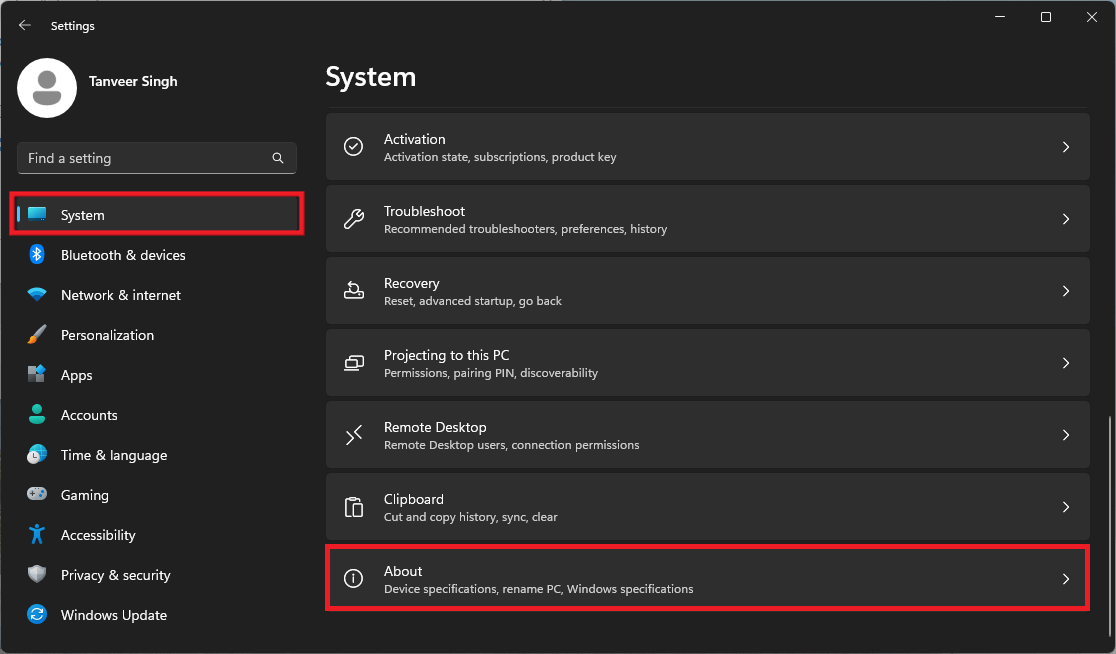
- Just below “Device specifications,” click “Advanced system settings.”
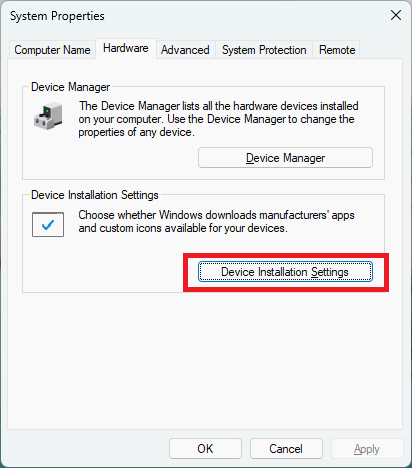
- Select the “Hardware” tab and click “Device Installation Settings.”
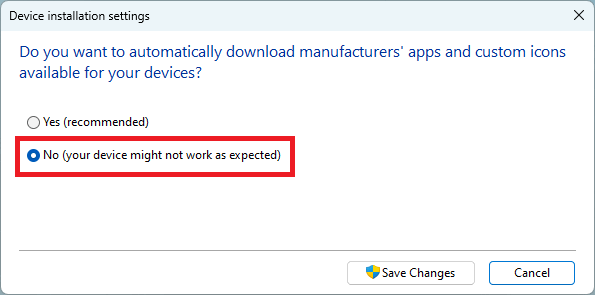
- Select “No” and click “Save Changes.” This will prevent Windows from automatically installing updates to drivers already installed on your computer, thereby potentially fixing the install error 0x80070103.
3. Run SFC and DISM Scans
Corrupted system files are often behind many Windows errors. The install error 0x80070103 is also sometimes caused due to corrupted or damaged Windows files. But you can use built-in Windows diagnostics tools like the SFC and DISM scans to fix this and resolve the error.
You should start with the SFC scan and if it doesn’t fix the issue, only then should you run the DISM scan. This is because the SFC scan replaces corrupted system files with their cached copies and should be able to fix many commonly-faced Windows errors. The DISM scan, however, is a deeper diagnostics tool used to repair the Windows image. Refer to our guide on how to run SFC then DISM on your PC.
Tip: you should also get up to speed on how to delete cache on Windows.
4. Delete Windows Temp Files
Temporary files related to Windows updates can also prevent the normal installation of updates. Deleting these files can sometimes fix the Windows Update install error 0x80070103. Follow the steps below to do so:
- Right-click the Windows button and click “Run.”
- Type
%temp%and press Enter.
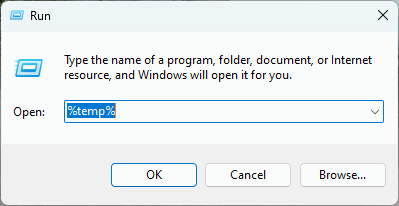
- You can simply select everything here by pressing Ctrl + A. Right-click the selection and click “Delete” to delete all the temporary files.
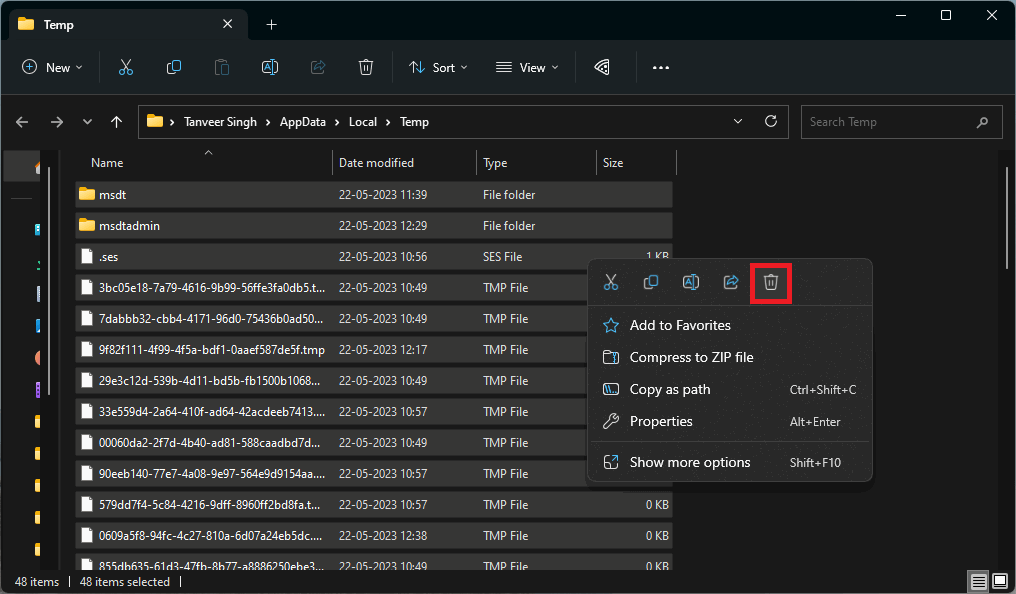
- Restart your computer and see if the error persists.
5. Restart the Windows Update Services
There are quite a few services responsible for ensuring Windows Update runs smoothly. Sometimes, these services can stop functioning properly due to changes by a third-party app or misconfigured settings. You can restart these services to try to fix the Windows Update install error 0x80070103.
- Type “Command Prompt” from the Windows search box. Make sure to click “Run as administrator” to run it with full privileges.
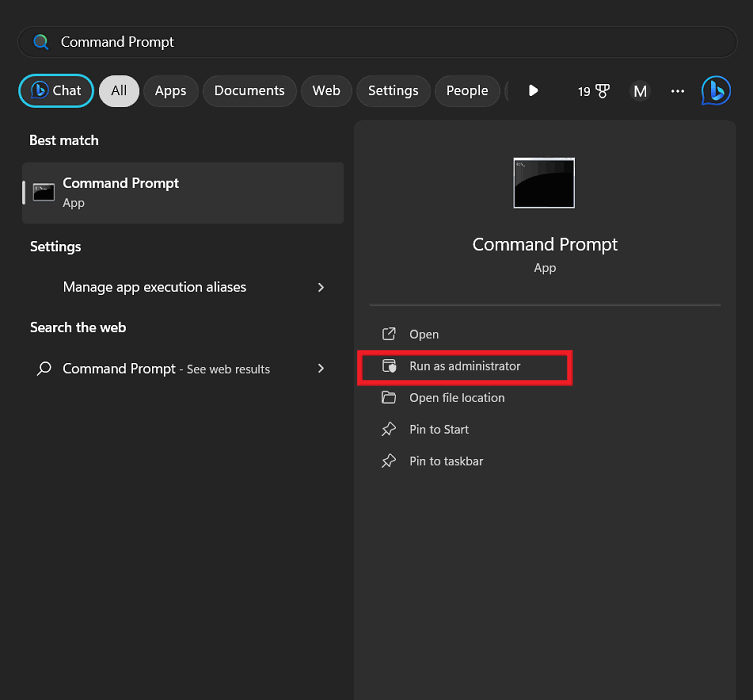
- Execute the following commands one by one by pressing Enter after each command:
net stop wuauserv
net stop cryptsvc
net stop bits
net stop msiserver
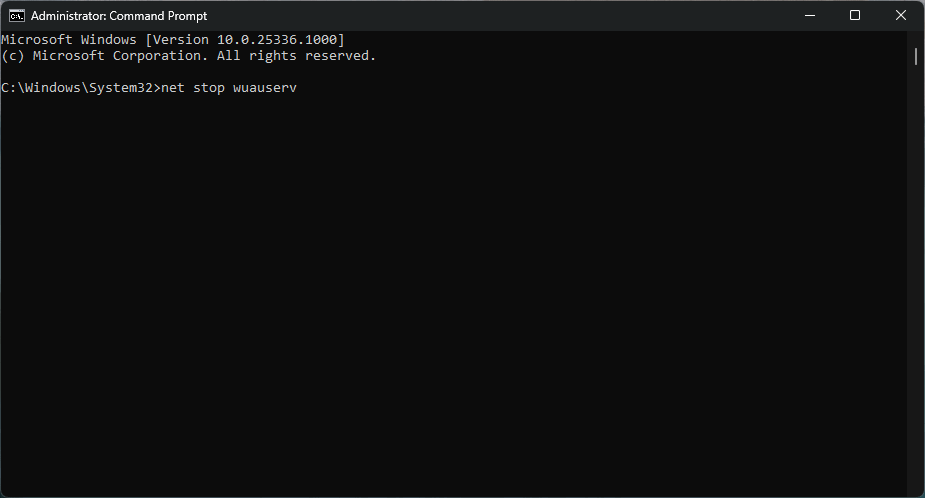
- Next, rename the “SoftwareDistribution” and “catroot2” folders by executing the following command one after the other:
ren C:WindowsSoftwareDistribution SoftwareDistribution.old
ren C:WindowsSystem32catroot2 Catroot2.old
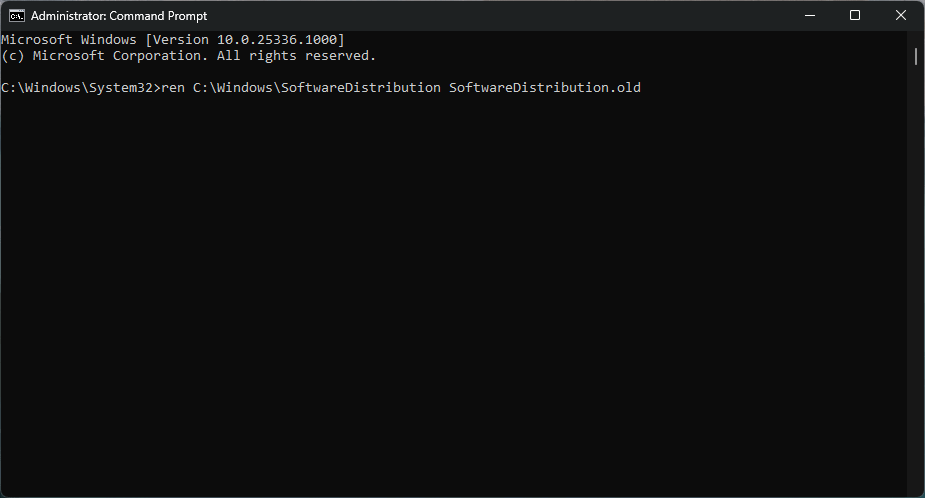
- Finally, start the services again by executing the following commands one by one:
net start wuauserv
net start cryptsvc
net start bits
net start msiserver
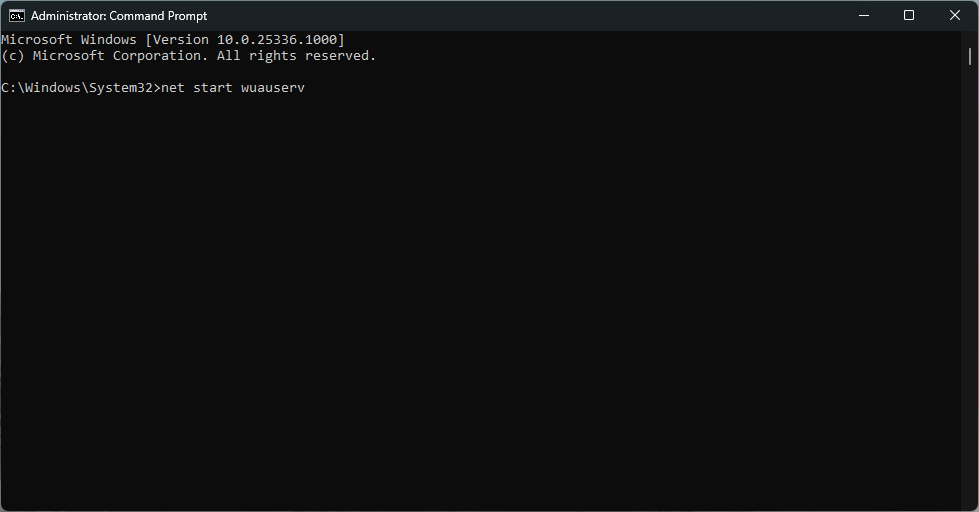
- These steps should resolve the install error you’re facing while installing Windows updates.
6. Reset Windows
If none of the above fixes worked for you, then you might have to use the last resort i.e. resetting Windows. You can use this fix to revert Windows to its original state, thereby reverting all settings and configurations to their factory state. This should remove any root causes behind the Windows Update install error 0x80070103.
You can reset/reinstall Windows without losing your files if you’re worried about your data being lost during this fix.
FYI: is it worth updating to Windows 11? Check our list of top reasons why you should install the latest Windows version.
Frequently Asked Questions
Can I just ignore the 0x80070103 error?
The Windows update error 0x80070103 is one that Microsoft is fully aware of. They have cited duplicate driver installs as the reason behind it and also advised users that the error is harmless. That being said, even if you don’t fix the error proactively, your system’s functionality won’t be affected. Hence, you can safely ignore the error if you can live with it. If you really don’t like the annoying error prompts and want to resolve the issue, you can attempt the fixes we’ve listed above.
How do I force install a Windows update?
If you’re unable to rectify the underlying issue behind the install error 0x80070103, you can manually install a Windows update by downloading it from Microsoft’s website. Visit the Microsoft Update Catalog webpage and search for the update you’re trying to install by typing its “KB” number in the search bar. (You can see the KB number of the respective update in the Windows Update settings). Download the right update after verifying its details and install it from the downloaded location. Don’t forget to restart your PC after the installation.
Is it safe to disable Windows Update permanently?
Windows updates have been notorious for introducing fresh new bugs with almost every version that Microsoft ships. Due to these occurrences, you might feel inclined to stop Windows updates permanently. While it might not affect your system performance in the short term, your system’s security could get compromised in the future due to a newly-emerged threat. You can always make do without new Windows feature updates, but missing out on security updates could prove disastrous, especially if your computer houses sensitive data.
Image credit: Unsplash. All screenshots by Tanveer Singh.
After a 7-year corporate stint, Tanveer found his love for writing and tech too much to resist. An MBA in Marketing and the owner of a PC building business, he writes on PC hardware, technology, video games, and Windows. When not scouring the web for ideas, he can be found building PCs, watching anime, or playing Smash Karts on his RTX 3080 (sigh).
Subscribe to our newsletter!
Our latest tutorials delivered straight to your inbox
Sign up for all newsletters.
By signing up, you agree to our Privacy Policy and European users agree to the data transfer policy. We will not share your data and you can unsubscribe at any time. Subscribe
