
Have you ever wanted to be a spy? Well, real spies don’t look like James Bond. They don’t stand out or call attention to themselves – they hide in plain sight. Using your Windows machine, you can transmit secret information that is hidden in harmless files such as a .ZIP archive or an innocent cat pic. We show you how in this tutorial.
Want to send text messages from your PC? Here’s how to link Android to your Windows computer.
Content
- 1. Write an Invisible Text Message in an Image File
- 2. Record a Secret Voice Message Inside a Song
- 3. Hide an Image Inside Another Image
- 4. Hide Multiple Files (an Archive File) Inside an Image
- 5. Hide Any File in Another Plain File
- Frequently Asked Questions
1. Write an Invisible Text Message in an Image File
An image file is comprised of 1s and 0s, just like every other file on your computer, including text files, allowing you to technically open an image file in a text editor and start typing directly inside the raw data. When viewed normally, the image itself will not visibly contain anything resembling the text that you typed, but when opened in a text editor, your message will be visible. Here’s how:
- Using Notepad++, open an image of your choice by dragging the image into the empty space of the editor or by clicking “File -> Open.”

- You should see a whole bunch of weird text symbols and gibberish. Scroll down a bit until you’re around the middle of the file.
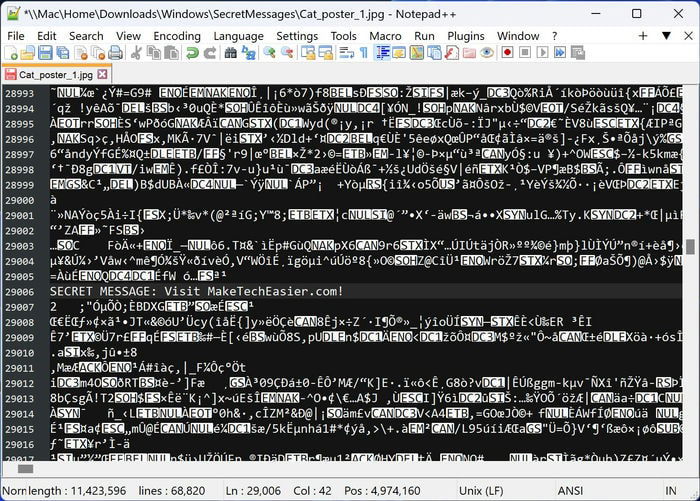
- Type your secret message somewhere in the middle.

- You’ll want to save the image into a new file through “File -> Save As.”
- If you take a look at your image, you should see that it’s mostly unchanged. You may see some visual artifacts or a visual glitch. (In our case, we noticed the bottom half of our image tinted with a light blue.)
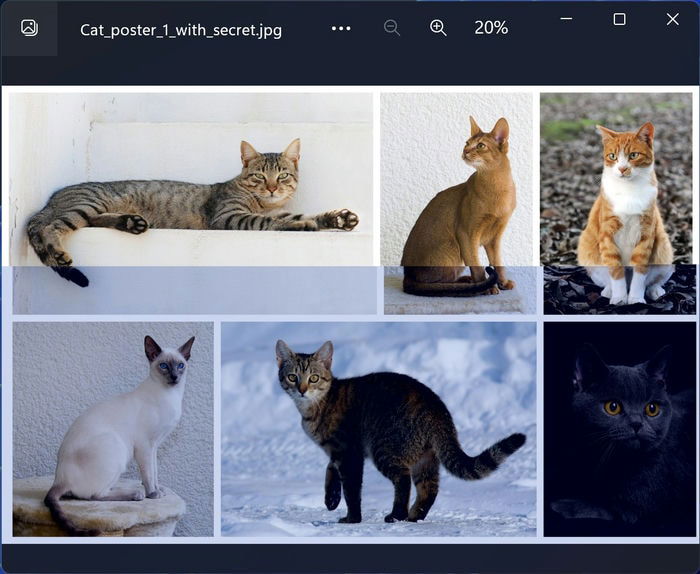
This is something to be expected from tampering with the raw data of an image file, but it will still effectively hide your secret message. Only those who think to open an image in a text file would ever see your message.
2. Record a Secret Voice Message Inside a Song
You may want to send a secret message that’s more personal than just some text on a screen. To that end, you can record a voice message and plant it discreetly inside any song file. With some audio editing, you can disguise your message, and an untrained listener will just think it’s part of the song. Just make sure you have a microphone set up before you start!
- Using Audacity (and we have a cheatsheet for that), open a song by clicking “File -> Open.”
- Pick a good spot in the song where you think a noise (your voice) would be drowned out by the music. Click directly on the audio waveform to jump to different parts of the song. Ensure the dark green line is on the spot you want.
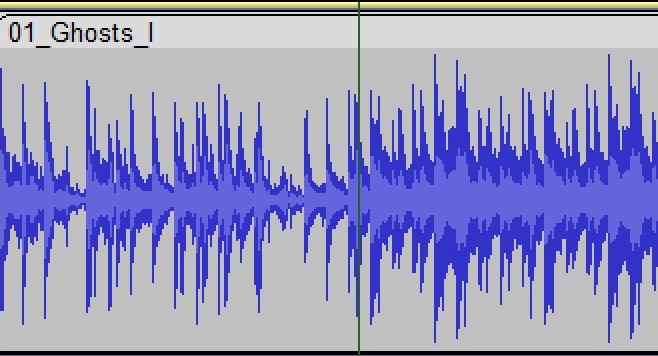
- Click the red circle button or press Shift + R to start recording a new track. Start talking! When you’re finished, click the square “Stop” button.

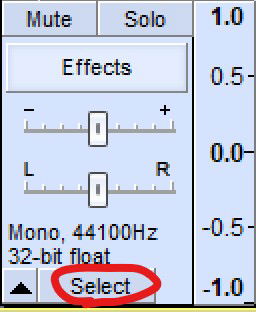
- Choose your voice recording by clicking the “Select” button on the leftmost part of the track you added from your recording.
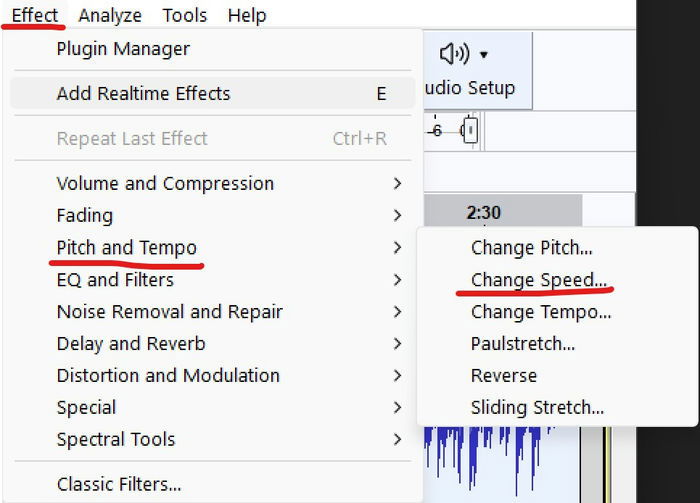
- Apply an audio effect that will distort your recording so that it no longer sounds like a human voice. Click “Effect -> Pitch and Tempo -> Change Speed.”
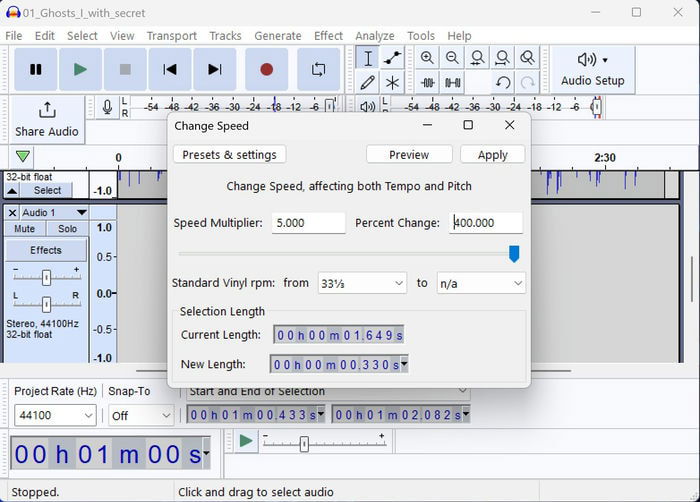
- In the “Percent Change” field, type “400,” then click “Apply” to speed up the recording significantly so that it’s incomprehensible.
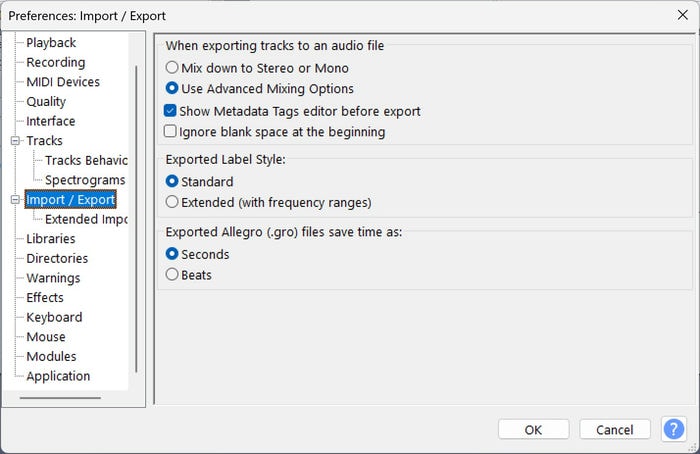
- We need to enable a setting that will let us save an audio file with multiple audio channels. Click “Edit -> Preferences -> Import / Export -> Use Advanced Mixing Options,” then click “OK.”
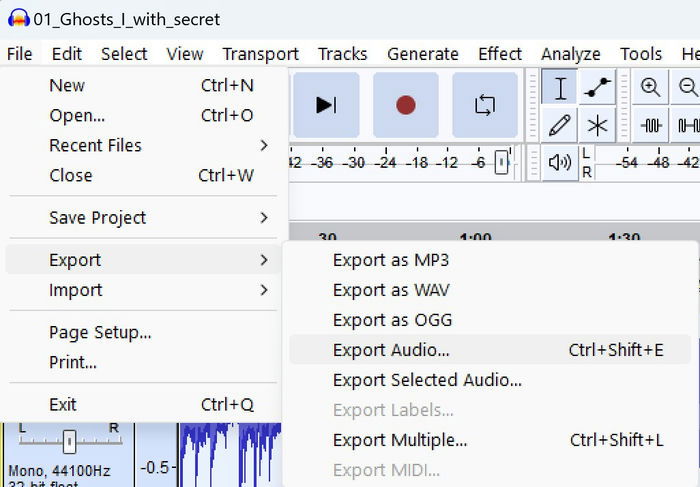
- Click “File -> Export -> Export Audio.”
- Choose an unsuspicious file name and click “Save.”
- If successful, you’ll see a graph showing each audio track mapped to an audio channel.

- Check out your exported file. It is just a song file that looks normal on the surface, but in reality, includes a voice message recorded by you personally. Since your recording was transformed into a high-pitched noise, a listener may think it’s just a normal part of the song. To listen to the message, open this song file in Audacity and repeat steps 7 through 9, but make sure the percentage is set to “-75.000.”
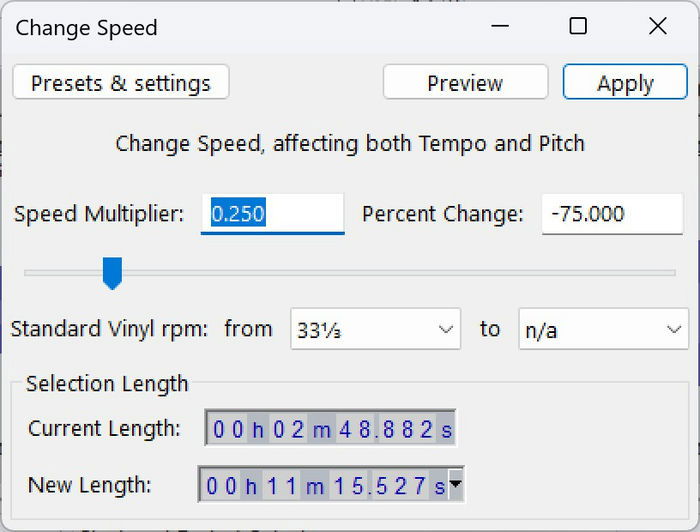
- After applying, your recording will be slowed down to the original speed. You may need to zoom out and scroll further out to the right to find your recorded part again. When you play it, you’ll hear your voice, although you may notice it sounds comically squeakier!
Tip: check out the best sound schemes for Windows that you can install on your PC.
3. Hide an Image Inside Another Image
This technique is one of the more technically challenging approaches but also one of the coolest. It allows you to hide an image inside a cover image that is two times bigger or more in terms of the number of pixels. The result: the small image is completely imperceptible but can be extracted without any data loss.
Note: what follows is a guide heavy on Command Prompt. You’ll also have to install Python and download an open source project.
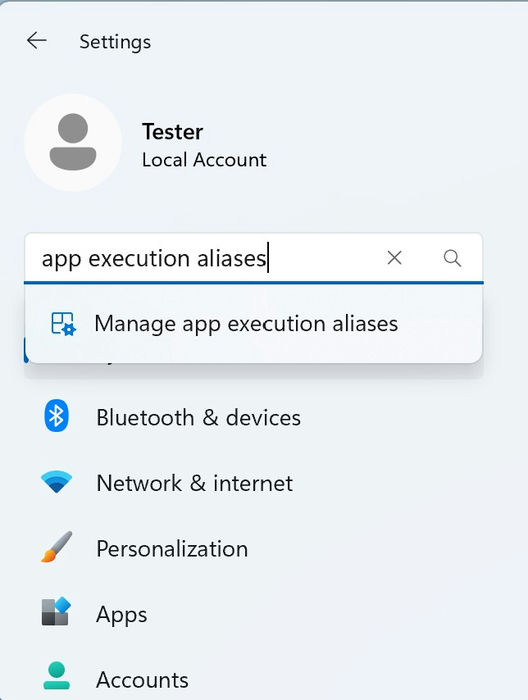
- Open the Windows Settings app and search for “App execution aliases” in the “Find a setting” search bar.
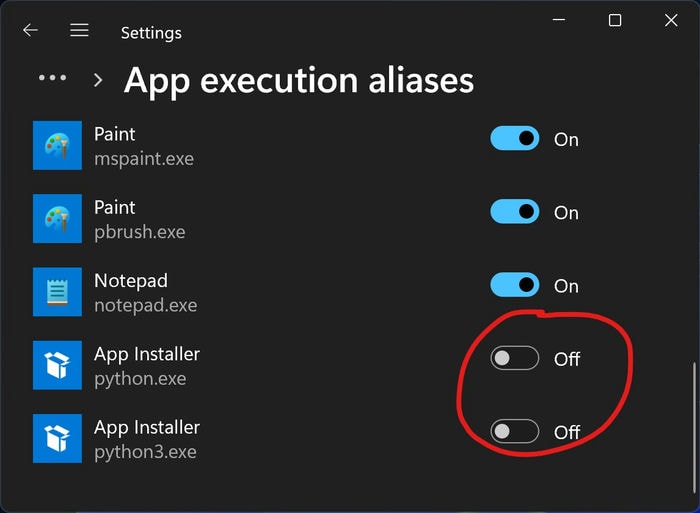
- Scroll down to find any items named “python3.exe” or “python.exe” and toggle them all off.
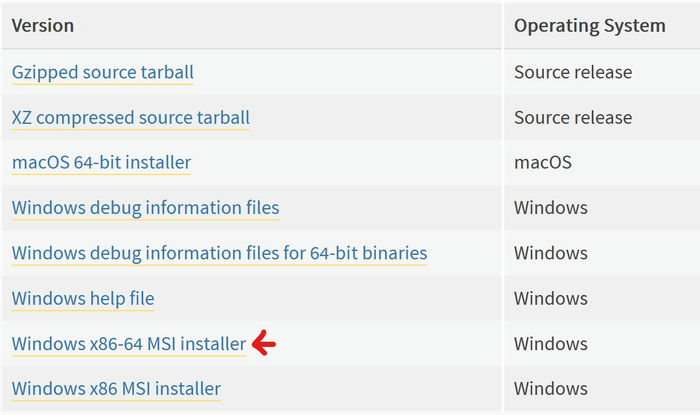
- Download Python 2.7 from the official website. You most likely want the “Windows x86-64 MSI installer” file.
- While installing, make sure that “Add python.exe to Path” is enabled in the customization steps.
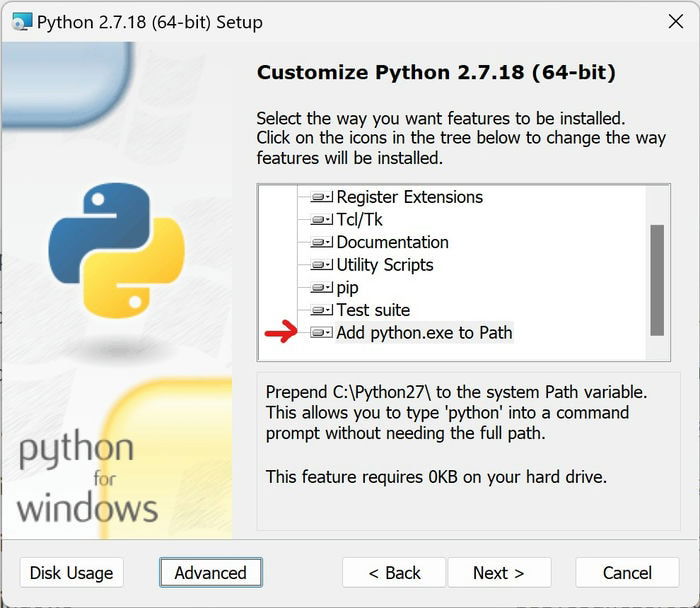
- Open this open source project on GitHub and click “Code -> Download ZIP.”

- Unzip the downloaded file, and go to the extracted folder. Inside, you should see files like “encode.py” and “decode.py.”
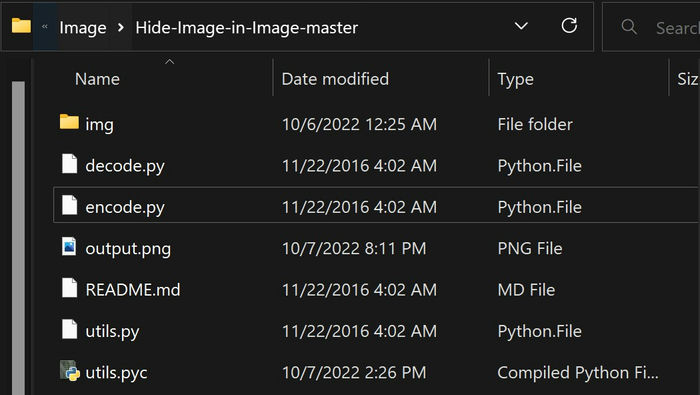
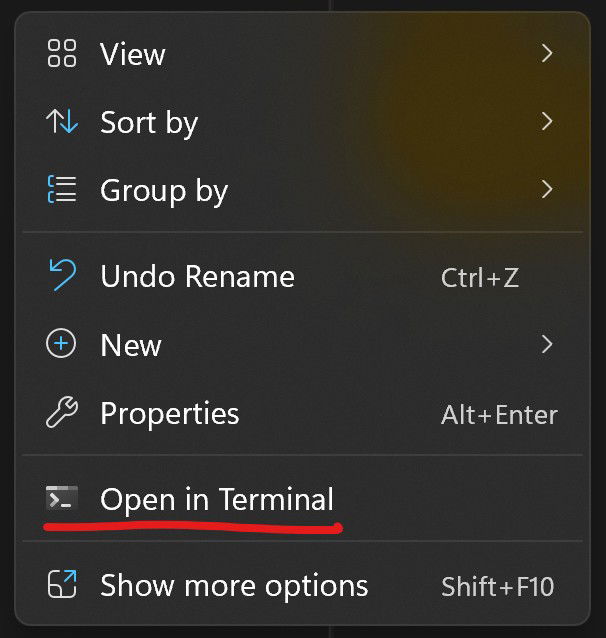
- Right-click the empty space in the File Explorer, then click “Open in Terminal.”
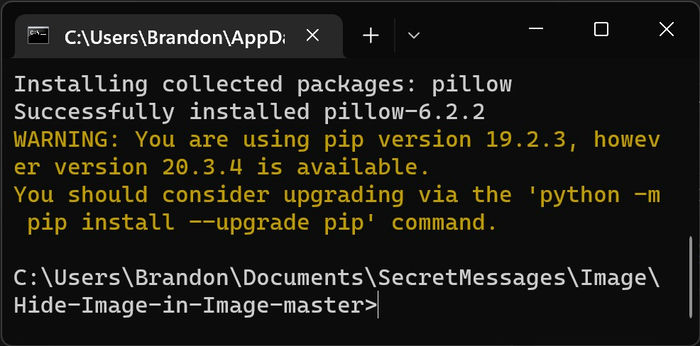
- To install a tool that the open source project needs to function, use the
pip install Pillowcommand. After hitting Enter, you should see output as in the following image.
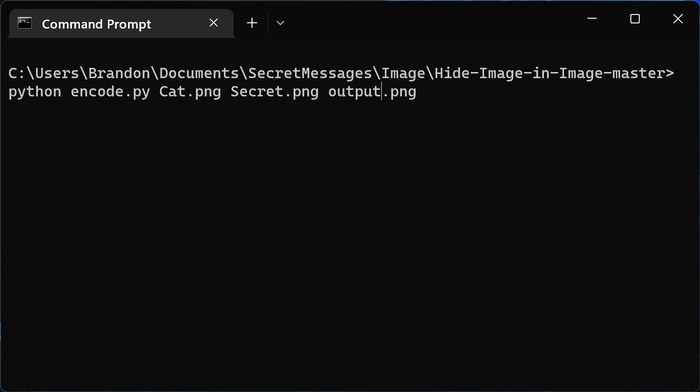
- You’re ready to hide your image! Run the following encode script:
python encode.py Cat.png Secret.png output.png
Replace “Cat.png” and “Secret.png” with the paths to your cover image and secret image, respectively, while “output.png” should be the name of the new combined file.
- To recover the hidden image, simply run the decode script:
python decode.py output.png decoded.png(changing the file names as needed). The “decoded.png” file would be the secret image that was hidden.
If you’re new to Git, we have a beginner’s guide that will help you understand its basics.
4. Hide Multiple Files (an Archive File) Inside an Image
If you have many documents to hide, you’ll be happy to learn that you can discreetly hide them all away in one go with this easy method.
- Install 7-Zip (we prefer 7-Zip over WinZip), then pick some file(s) and bring them all into a single folder, making sure you have one cover image file that you’ll use to hide the other files.
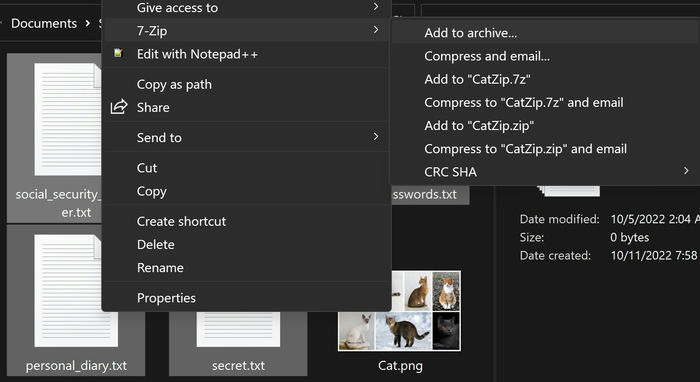
- Select your secret files, right-click the selection, and choose “Show more options -> 7-Zip -> Add to archive.”
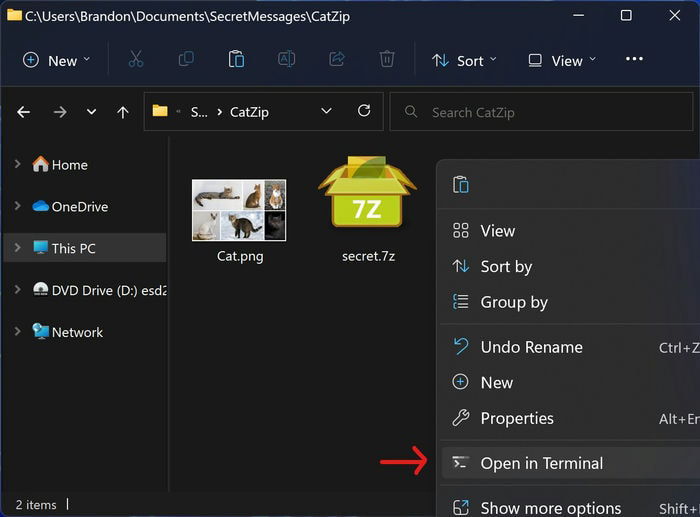
- Right-click the empty space in the File Explorer and click “Open in Terminal.”
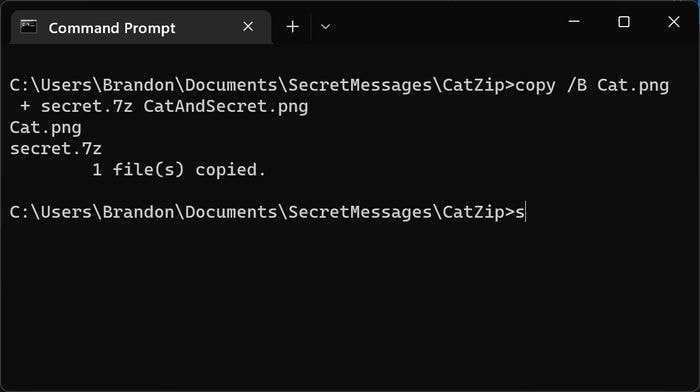
- Enter the following command:
copy /B Cat.png + secret.7z CatAndSecret.png. You’ll want to replace “Cat.png” with the image file you want as your cover, “secret.7z” with the archive you created in step #3, and “CatAndSecret.png” with an unsuspicious file name of your choice. (Just make sure it has the same file type as your cover image.)
- At this point, you’ll have an image that looks like a run-of-the-mill image file in every way. But unbeknownst to any snooper, it contains an entire archive of multiple files. To retrieve your files, right-click the image, then “Open with -> 7-Zip File Manager -> Extract.”
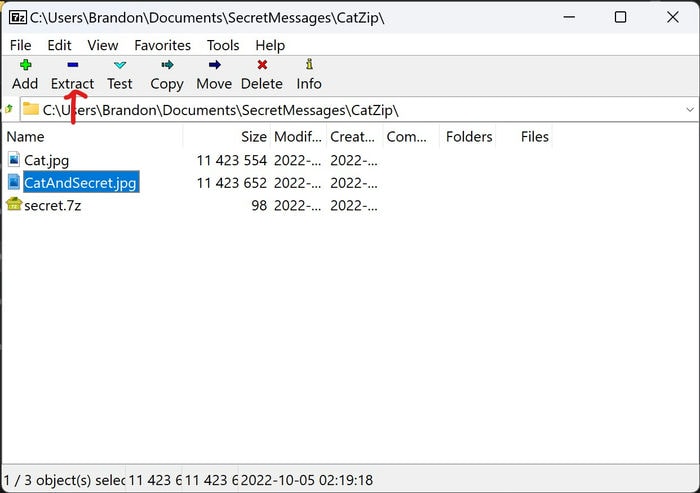
You don’t have to use 7-Zip for this technique, by the way. WinRAR or PeaZip would also work. Additionally, you can zip up your secrets on mobile. Check out our guide on zipping and unzipping files on Android.
5. Hide Any File in Another Plain File
This approach, using something called alternate data streams, can hide something when you’re in a pinch.
- Pick two files and put them in a folder: one a secret and another an innocent cover file.
- Right-click the empty space in the File Explorer and click “Open in Terminal.”
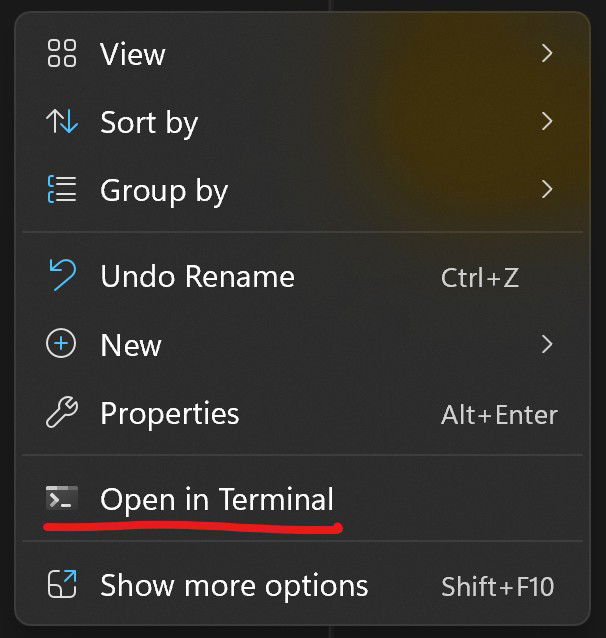
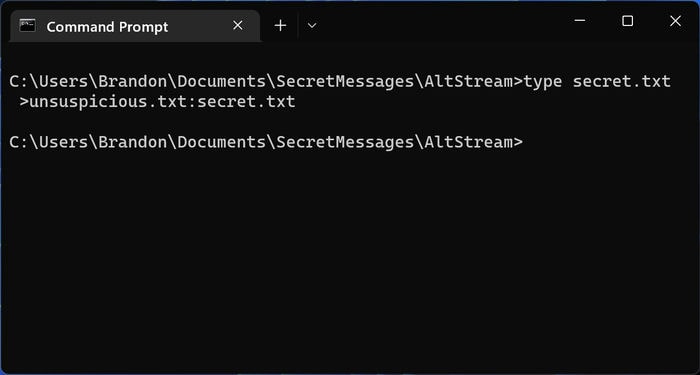
- Enter the following command, replacing “secret.txt” and “unsuspicious.txt” with your file names:
type secret.txt >unsuspicious.txt:secret.txt
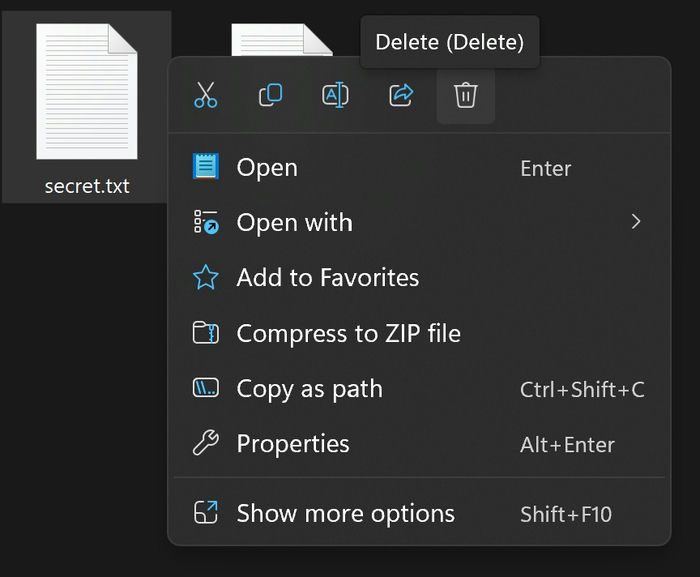
- Delete your secret file.
- Only your innocent cover file is left. If opened normally, it looks like nothing is different. But in reality, it’s like a sleeper agent; with the right activation phrase, it will become something entirely different.
- You will need to use the Command Prompt to open the plain file to uncover the secret file. If your secret was a .TEXT file, it can be uncovered with a Notepad command, such as
notepad unsuspicious.txt:secret.txt. - Someone who doesn’t know what’s going on could type
notepad unsuspicious.txtand open the cover file but not the secret.
Tip: learn how to add a text box in Google Docs for increased flexibility.
Frequently Asked Questions
Will these techniques work if I upload the files to social media websites?
No, they may not always work if you simply upload them directly to sites like Twitter, Facebook, or Instagram. Social media websites usually automatically compress uploaded image files. Compressing is destructive, meaning it irrevocably modifies the underlying data of a file, and you likely won’t be able to recover the embedded secret message.
To ensure you can share your files, upload them to a file-sharing service like Google Drive, Dropbox, or Microsoft OneDrive. Do note that the method with alternate data streams won’t work if the file is taken off the computer’s file system.
What is the difference between encryption and steganography?
You probably already know what encryption is. It’s the way to protect data by transforming data into seemingly random gibberish. Usually, only a decryption key will reveal the original data. Meanwhile, the art of steganography (what you learned to do in this article) means hiding a message inside another message or file. It doesn’t necessarily involve encryption, keys, or even computers. An example would be writing a physical letter where the first letter of each sentence spells out an additional secret message.
Encryption and steganography can be used in tandem. You could encrypt any of the secret files used in steganography for added protection. If you’re interested in upgrading your spy skills, we have a guide on how to encrypt your messages with PGP.
Have any of these techniques been used in the real world?
Yes! A real Russian spy network in the United States was alleged to have used steganography to transmit messages to their motherland starting around 2005. The spies used a custom-built program to encode data inside innocent-looking images, then uploaded them to various public websites. The data contained information about where to meet, where to find cash drops, etc. The spies were arrested by the Justice Department in 2010.
Image credit: Caleb Oquendo via Pexels All screenshots by Brandon Li.
Brandon Li is a technology enthusiast with experience in the software development industry. As a result, he has a lot of knowledge about computers and is passionate about sharing that knowledge with other people. While he has mainly used Windows since early childhood, he also has years of experience working with other major operating systems.
Subscribe to our newsletter!
Our latest tutorials delivered straight to your inbox
Sign up for all newsletters.
By signing up, you agree to our Privacy Policy and European users agree to the data transfer policy. We will not share your data and you can unsubscribe at any time. Subscribe
