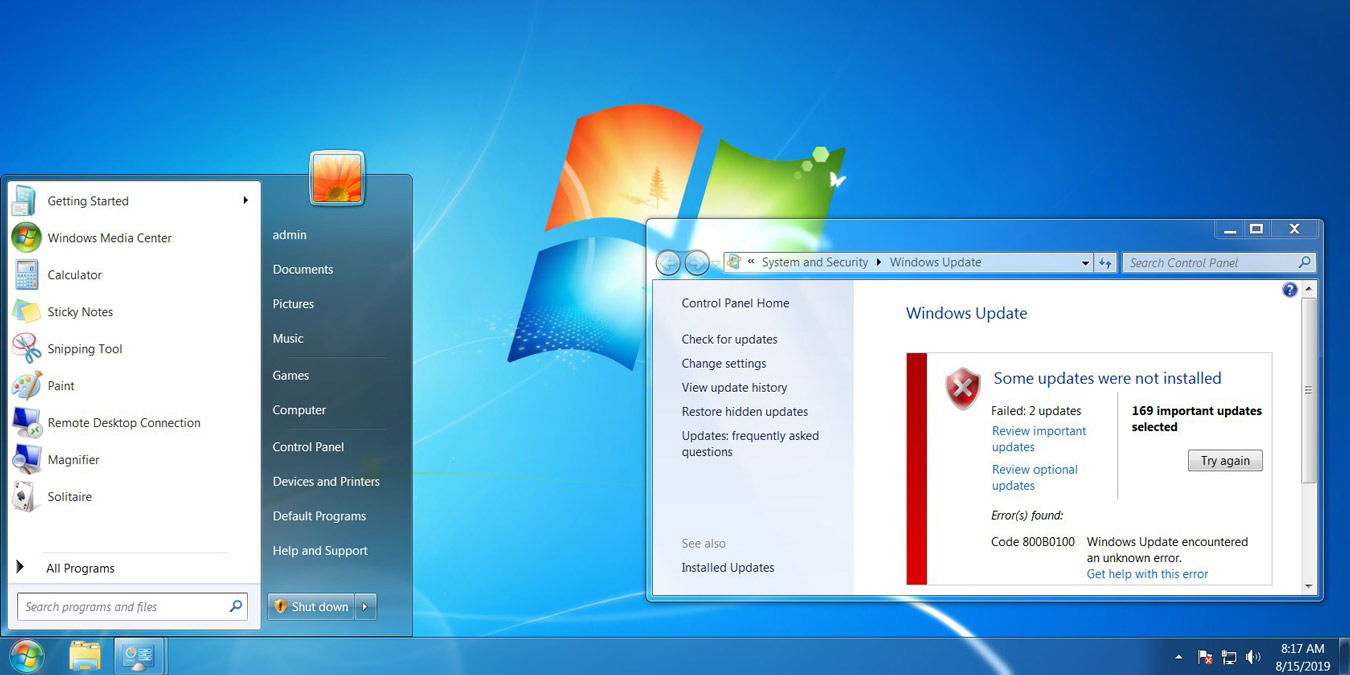
Windows 10 is not by all accounts a massive improvement from Windows 7, and particularly in terms of design some yearn to go back to the good old days (rather than upgrading to Windows 11). As a result, many users want to make at least their Windows 10 computers look like Windows 7. The question is, how?
The good news is that you can keep your Windows 10 features while enjoying that Windows 7 look you like so much. The following guide will show you how you can change specific things so that you can decide how much of your Windows 10 computer you want to look like Windows 7.
Also read: Make Windows 10 File Explorer Look Like Windows 7 File Explorer
Modify the Start Menu
Changing the Start menu will really give your Windows 10 computer a Windows 7 look. The tool for the job used to be Classic Shell, but development on that has been dead for a couple of years and it’s been taken over by the open-source Open Shell project.
During installation, we recommend deselecting the “Classic IE” option, as that applies to Internet Explorer, which is now defunct.
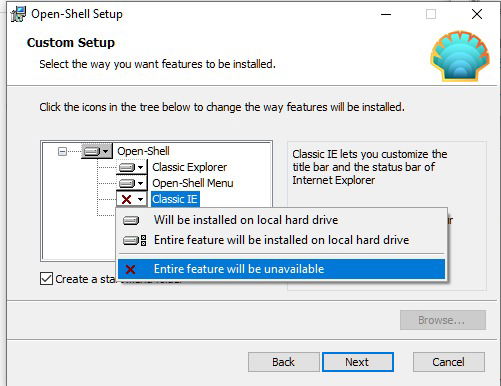
The Customize Start Menu tab will let you decide what links can appear on your Start Menu. How much and what you want to change is up to you, but this tool will get you on your way to getting that Windows 7 look.
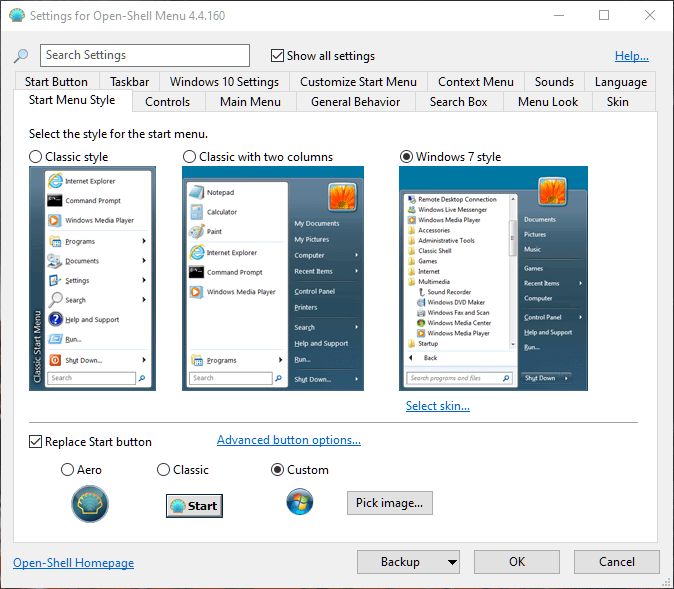
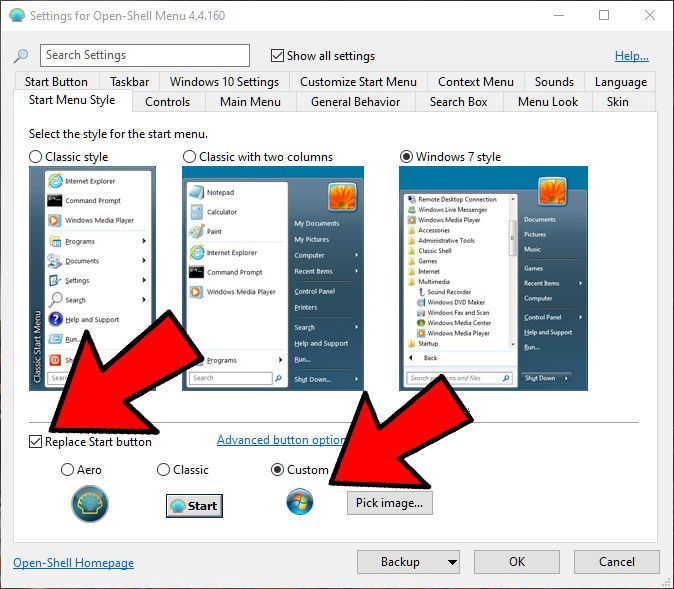
A good place to start is clicking “Skin” in Open Shell settings, then going for “Classic Skin” if you want the most “Windows 7” look.
Keep in mind that after you install it, nothing will happen. You have to press the Windows button for the Open Shell settings to appear.
Eliminate the Lock Screen
Getting rid of the lock screen requires that you make some minor changes in the Registry Editor. If you’re not very familiar with it, then you might want to skip this step. If you’re confident that you can at least make some minor changes, then open the Registry Editor by pressing the Win key and the R key.
Type regedit and when the Registry Editor appears, go to HKEY_LOCAL_MACHINESOFTWAREPoliciesMicrosoftWindows .
When you’ve reached the last step, right-click an empty space in the right-side pane and click “New” then “Key.”
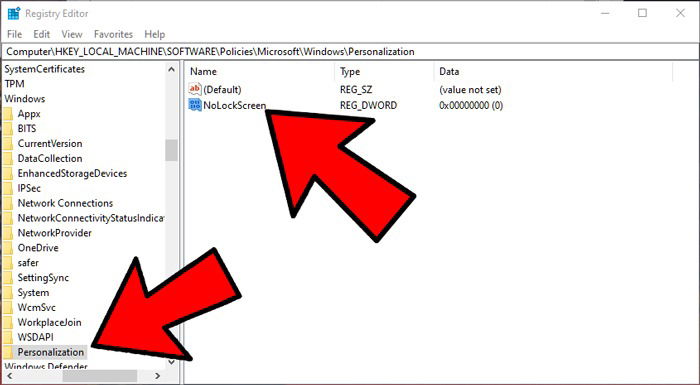
Name the new folder in the left-hand pane “Personalization.” Right-click over on the right side once you’ve created it, then click New->DWORD (32bit) Value. This time name it “NoLockScreen.”
To finish off, double click on the new value and modify the Value data to “1.” If you ever want to go back to the way things were, just change the value to “0” again.
Get Rid of the Action Center
The Action Center that was added in Windows 10 is a convenient feature. But, if you really want the Windows 7 experience, you’ll need to get rid of it.
To remove the Action Center from the taskbar, you again need to use the registry editor (the simple Settings method is now gone).
So go to the registry editor, then navigate to:
HKEY_CURRENT_USERSOFTWAREPoliciesMicrosoftWindowsExplorer
If the “Explorer” key doesn’t exist, create it under the “Windows” folder in the registry editor by right-clicking Windows -> New -> Key, then call it “Explorer.”
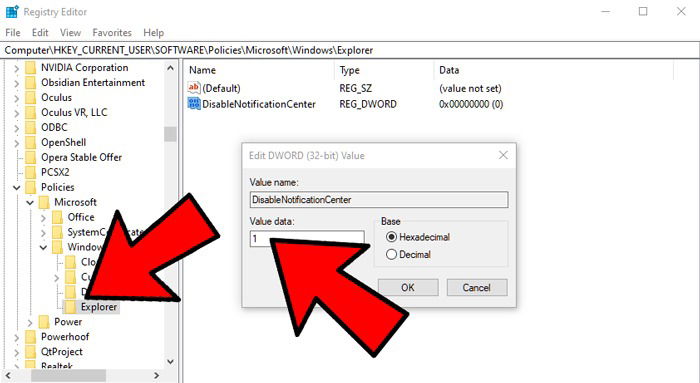
Under the Explorer key, over in the right-side pane, right-click an empty space -> New->DWORD (32bit) Value. Call the new value “DisableNotificationCenter” then double-click it and give it the value ‘1’.
Use Windows 7 Wallpapers and Icons
Remember the wallpaper your Windows 7 computer came with? You’ll definitely give your Windows 10 computer that Windows 7 look by adding those wallpapers. You can use the old wallpapers keep a little of that modern look with wallpaper such as the one below.
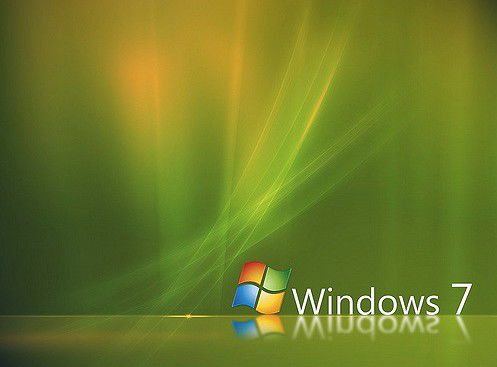
If you want the original Windows 7 Start button (and why wouldn’t you!), you can find a great selection at the Classic Shell forum. Just right-click the style you want from the list and download it.
To replace all your Windows 10 icons with Windows 7 icons, check out this Windows 7 icons pack.
After that, go to Open Shell settings, click the Start Menu Style tab, check the Replace Start button box then select “Custom ->Pick image” and select the icon you just downloaded.
Get the Windows 7 Calendar Back
Getting the calendar for Windows 10 to look like the Windows 7 calendar is going to require that you make some changes to the registry.
If you miss the Windows 7 volume control and want to get it back, go to HKEY_LOCAL_MACHINESOFTWAREMicrosoftWindows NTCurrentVersion.
Right-click on a blank space on the right pane and choose “Edit -> New -> Key.” When it asks you to save it, make sure that you name it “MTCUVC.”
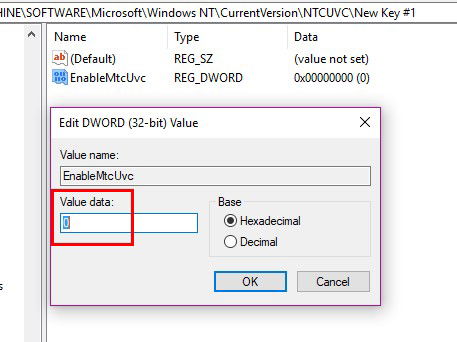
Right-click on a blank space on the right pane again, go to “Edit -> DWORD (32-bit) Value,” save it as “EnableMtcUvc” and press Enter. When you’ve created your DWORD, double-click on it, and make sure that the Value Data is set to “0.” Click OK to save your changes.
If you want to add the Windows 7 analog clock, go to HKEY_LOCAL_MACHINESOFTWAREMicrosoftWindowsCurrentVersionImmersiveShell. Right-click once again on a black space like you did before, and go to “Edit -> New -> DWORD (32-bit).”
When it’s time to name it, call it “UseWin32TrayClockExperience” and press Enter. Double-click on it and make sure that the Value Data is on 1 and click OK.
Sometimes the old-school look is the best look. If you want to keep customizing your desktop in Windows 10, then you should also check out our Rainmeter guide for something a bit more modern. Or have a look at these Rainmeter skins to whet your appetite.
Tech writer at Make Tech Easier. Enjoys Android, Windows, and tinkering with retro console emulation to breaking point.
Subscribe to our newsletter!
Our latest tutorials delivered straight to your inbox
Sign up for all newsletters.
By signing up, you agree to our Privacy Policy and European users agree to the data transfer policy. We will not share your data and you can unsubscribe at any time. Subscribe
