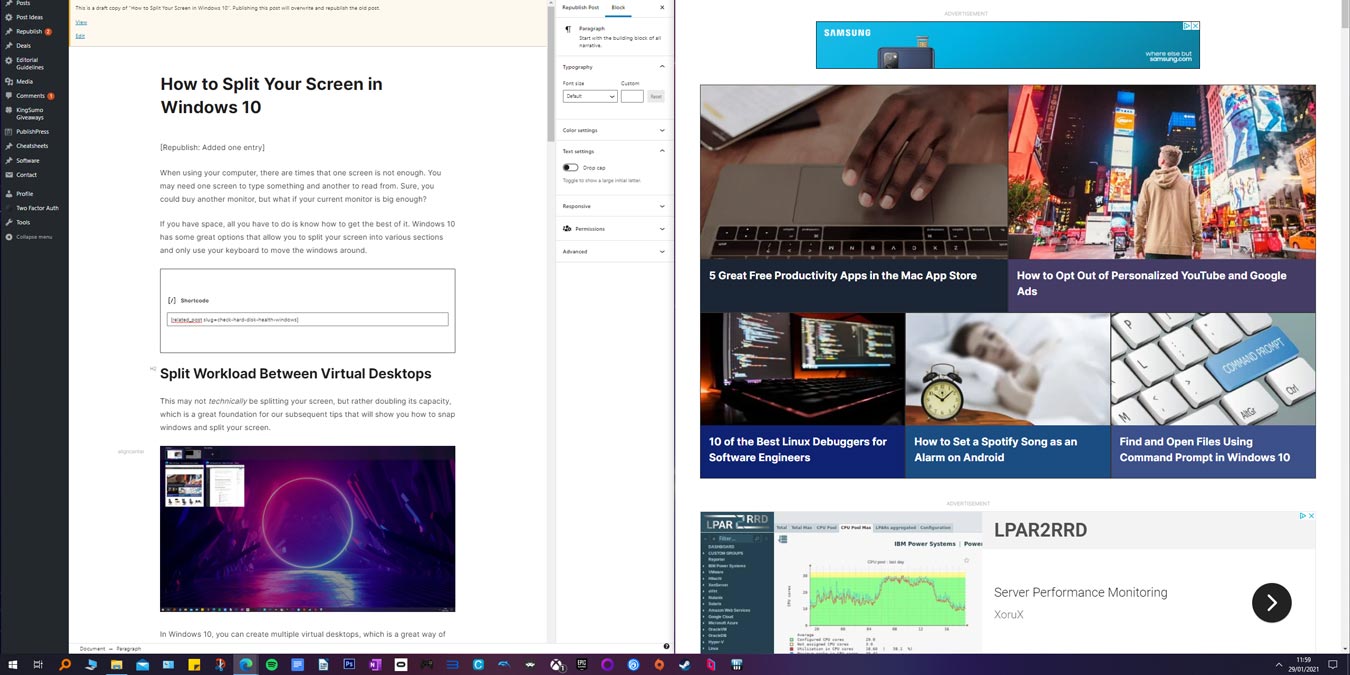
When using your computer, there are times that one screen is not enough. You may need one screen to type something and another to read from. If you have space, all you have to do is know how to get the most of it. Windows 10 has some great options that allow you to split your screen into various sections and only use your keyboard to move the windows around.
Also read: 6 Ways to Check Hard Disk Health in Windows
Split Workload Between Virtual Desktops
This may not technically be splitting your screen, but rather separating and expanding it across multiple screens. It’s a great foundation for our subsequent tips that will show you how to snap windows and split your screen.
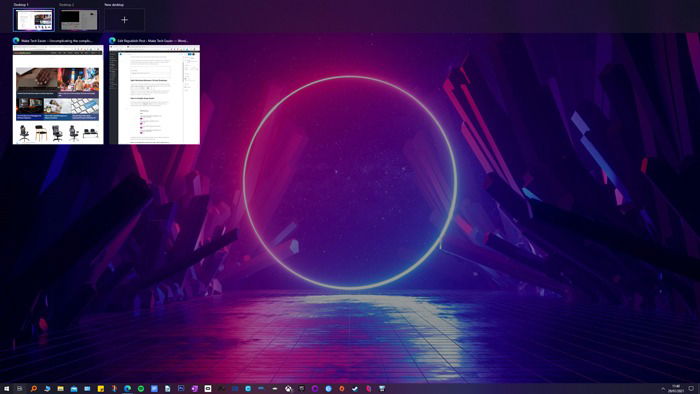
In Windows 10, you can create multiple virtual desktops, which is a great way of dividing your windows and apps, within which you can further split things up. Press Win + Tab to go to Task View, then the “+” icon at the top of the screen.
You can now drag your open windows to the new desktop, splitting your workload as if you had two monitors. You can quickly switch between the two desktops using Ctrl + Win + right or left arrow, and within that you can further split your windows, as we show below.
How to Enable Snap Assist
The feature that makes splitting possible is Snap Assist. If you’re not sure whether you have it enabled, press the Win and I keys to open Settings. When the Settings window appears, go to System, then Multitasking.
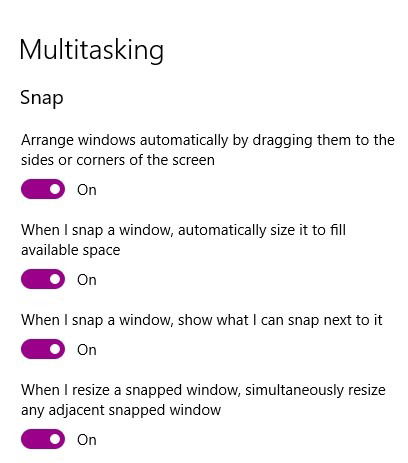
The option should be on by default, but it doesn’t hurt to make sure. Maybe you turned it off for some reason (or someone else did).
How to Split Your Screen into Two Windows
The side-by-side method will require the use of your mouse. Choose the windows you want and use the Win and left/right keys to decide which window goes on each side.
When one window is set on one side, and you see various available windows on the other side, use the arrow keys to move from one window to another. Press Enter to choose a window. You can also use the Win + Down arrow to dismiss a window and choose a different one.

How to Split Your Screen into Four Windows
For the times three windows aren’t enough, it’s possible to have four windows open. One way to do this is by having the four windows open, and with the mouse, manually adjusting to the size you want them to be. Drag each window to its respective corner.
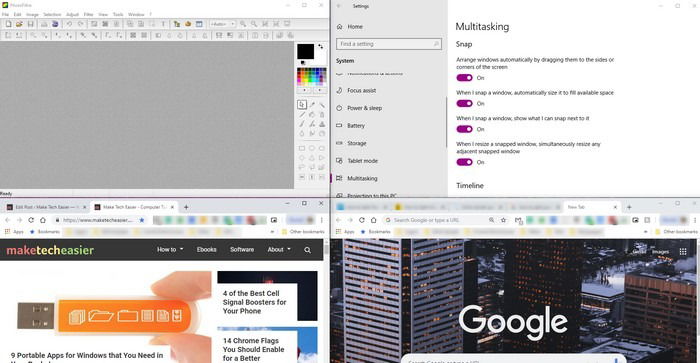
The previous method required that you use the right/left arrows, but with this method, you will be using the up/down arrows. Adjust the size for the windows without moving them anywhere, and use the Win and Up/Down keys to place them where you want. You may want to play around with them until you get the hang of it.
If you have two windows open side by side, click on one and press the Win and Down arrow keys. The window will stay in the bottom-left corner, and the remaining open window will appear. The one you choose will take the size of the empty space. Repeat the process with the other remaining window.
It’s also possible to make one window bigger than the other. Just place the cursor on the corner of the window and adjust it. Adjust the other windows to suit your needs.
Split-Screen Gaming in Windows 10
If you’re specifically looking to do some split-screen gaming in Windows 10, then none of the above is quite what you’re looking for. Luckily, Windows may just be the best split-screen gaming platform around, thanks to a tool called Nucleus Co-op.
With this tool, you can turn any one of hundreds of popular multiplayer games that lack split-screen functionality into a fully-functioning split-screen game. You only need to own one copy of the game, as this tool gets Windows to run two instances of the game, automatically splitting them to each fill half (or quarter, depending on the number of players) of your screen.
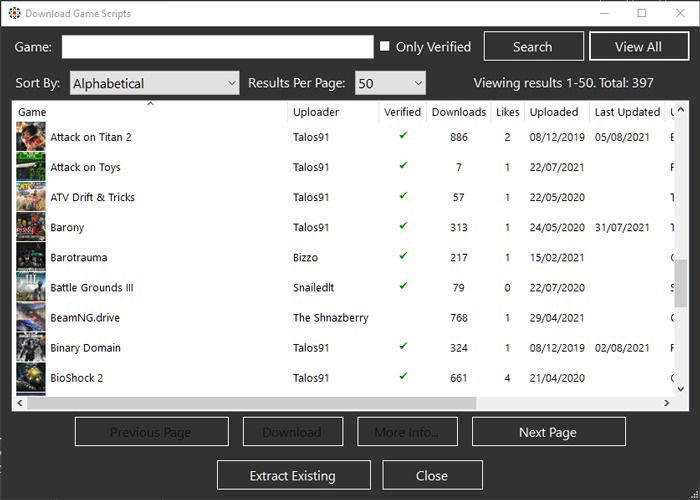
Once you’ve downloaded Nucleus Co-op, open it and click “Download Game Scripts” to find which games are supported. Once you’ve downloaded the script, look for the game’s “exe” on your PC to link it to Nucleus.
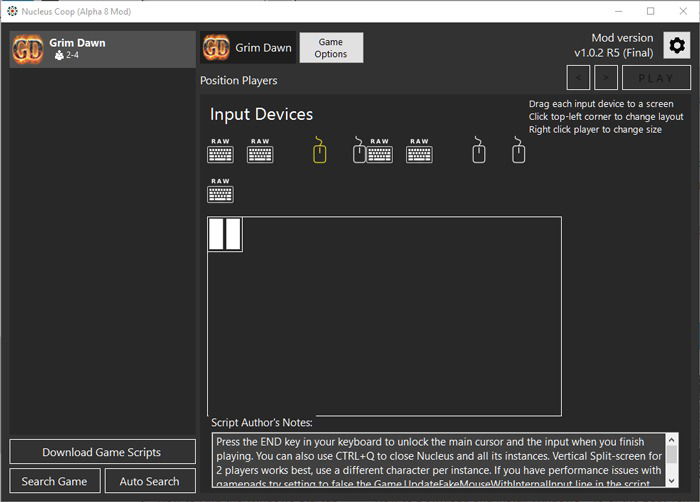
With the game selected in Nucleus, you can then choose how you want to split your screen – vertically, horizontally, or a custom option.
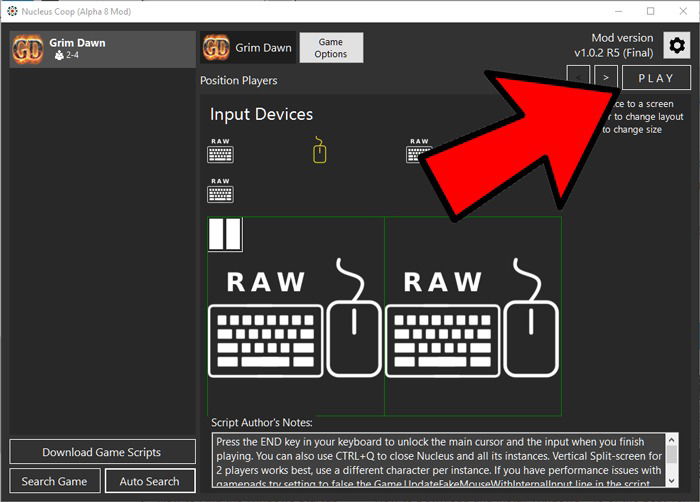
Once you’ve set everything up, click the arrow at the top right of Nucleus to see if there are more options for that game. When you’re ready, click “Play.”
Frequently Asked Questions
1. Can I do a split screen across multiple monitors?
Yes, you can. You can seamlessly drag windows across to your next monitor and still snap them wherever you want. You have to do it a bit quicker, however, to get the window on the correct monitor.
2. Will any multiplayer game work with Nucleus Coop?
No. The hardworking developers behind Nucleus Coop need to make custom scripts to get games working. You can find the full list of supported games here.
3. Can I customize the default size of each snapped window?
The default options in Windows 10 let you customize snapped windows to an extent, but to really set your split screen up the way you want, Windows 11 has a snap layout feature that lets you organize all your app windows on the screen based on different layouts. Alternatively, you should can PowerToys, which lets you create FancyZones. See our guide on PowerToys here to help you get started.
It’s much more comfortable to split the screen than to have various monitors around you. It eliminates craning you neck to see everything. For more ways to smooth out your Windows 10 experience, see our list of the best ebook readers for Windows 10 and our guide on how to remove old drivers in Windows 10.
Tech writer at Make Tech Easier. Enjoys Android, Windows, and tinkering with retro console emulation to breaking point.
Subscribe to our newsletter!
Our latest tutorials delivered straight to your inbox
Sign up for all newsletters.
By signing up, you agree to our Privacy Policy and European users agree to the data transfer policy. We will not share your data and you can unsubscribe at any time. Subscribe
