We all know the importance of backing up our data simply because we never know when our computers are going to crash or hit by virus. Regardless of the Operating System, it is always useful to have a handy backup software in hand so you can easily backup and restore your data. Handy Backup is a simple, yet useful backup application for Windows (and yes, we have a giveaway for it.)
My impression of using Handy Backup is that it is easy to use. After the installation and on the first run, I am able to get it to backup my files in just three clicks. That is, of course, for the basic configuration. And if you need more advanced configuration like backing up to remote server, external USB devices, it is available as well.
Other than the normal files and folders backup, Handy Backup is able to backup Outlook, Skype, Photoshop and many other applications. In fact, it is using a plugin system to manage the third-party application backup. That means, if you understand XML, you can code up your own plugin to backup the applications of your choice too.
Usage
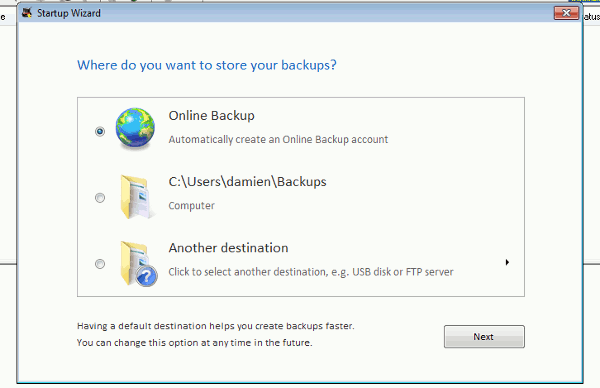
Once installed and on the first run, Handy Backup will prompt you to select the destination to backup your files. The “Online Backup” is referring to the online storage provided by Novosoft (with a fee). You can also select another folder as the backup destination, backup to a FTP server, or remote server such as Amazon S3 or a WebDav connection.
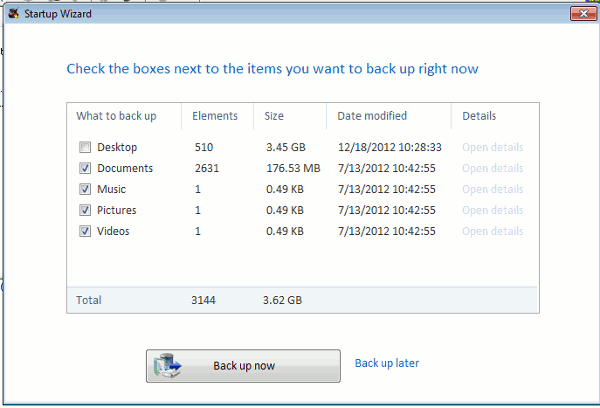
The next step is to select the files and folders to backup. Once that is done, simply click the “Backup Now” button and it will do its job.
Configuration
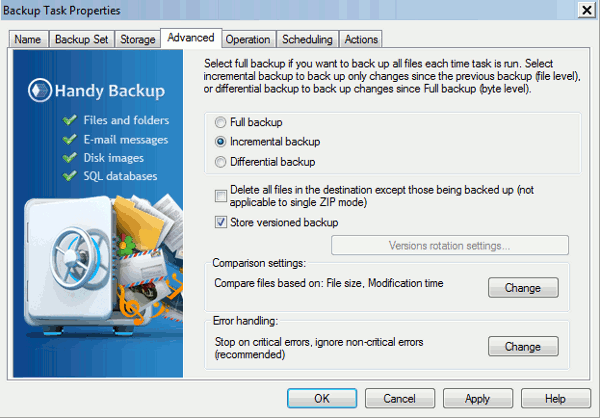
It wouldn’t be handy if it doesn’t provide you with ways to configure the software. Under the “File -> Properties” section, there are plenty of configuration options to play with. In the Advanced tab, you can configure it to do a “Full backup”, “Incremental Backup” or “Differential Backup” everytime the backup action is executed.
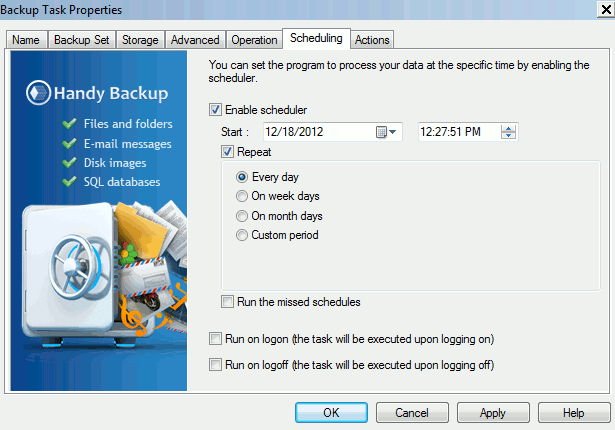
There is also the “Schedule” tab where you can schedule the backup to run automatically on a scheduled time.
Synchronizing Folders
Other than the standard backup and restore, Handy Backup also comes with a Synchronization feature that allows you to synchronize files between two folders.
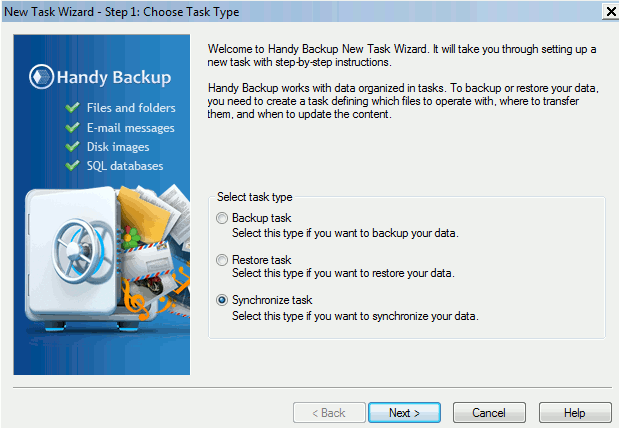
Go to “File -> New Task” and select “Synchronize task”.
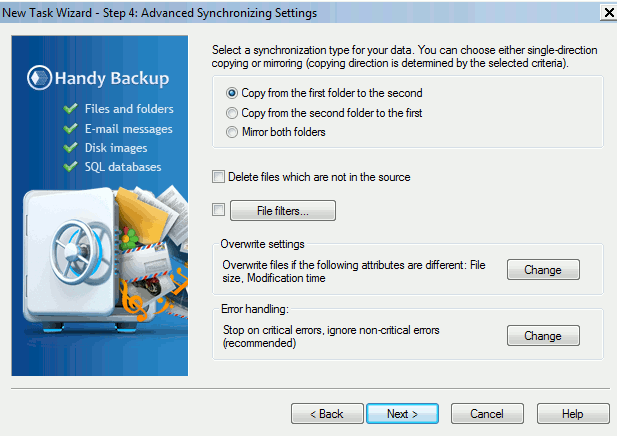
Select the first and second folders. Next, decide the action to be taken, whether to synchronize the first folder with the second, or vice versa.
Set the scheduler and the name for the task and execute it. That’s it, both the folders are now synchronized.
Damien Oh started writing tech articles since 2007 and has over 10 years of experience in the tech industry. He is proficient in Windows, Linux, Mac, Android and iOS, and worked as a part time WordPress Developer. He is currently the owner and Editor-in-Chief of Make Tech Easier.
Subscribe to our newsletter!
Our latest tutorials delivered straight to your inbox
Sign up for all newsletters.
By signing up, you agree to our Privacy Policy and European users agree to the data transfer policy. We will not share your data and you can unsubscribe at any time. Subscribe
